
Table View
Click the icon in the workspace sidebar to open Table View.
Table View lets you view survey data and manage site settings such as odour characters, POI types and pollutants.
It also includes tools for updating values in bulk and reviewing furthest-point data.
1. Surveys by Collection
Use this page to view your survey data in a text-based list.
For more information, see Surveys by Collection.
2. Odour Characters
Odour characters describe what an odour smells like, such as sewage, rotten eggs or compost. Assessors select these characters when recording odour data in the mobile app.
Odour characters belong to the site, so each site can have its own list.
Characters are shown alphabetically, with Edit and Delete actions on each row.
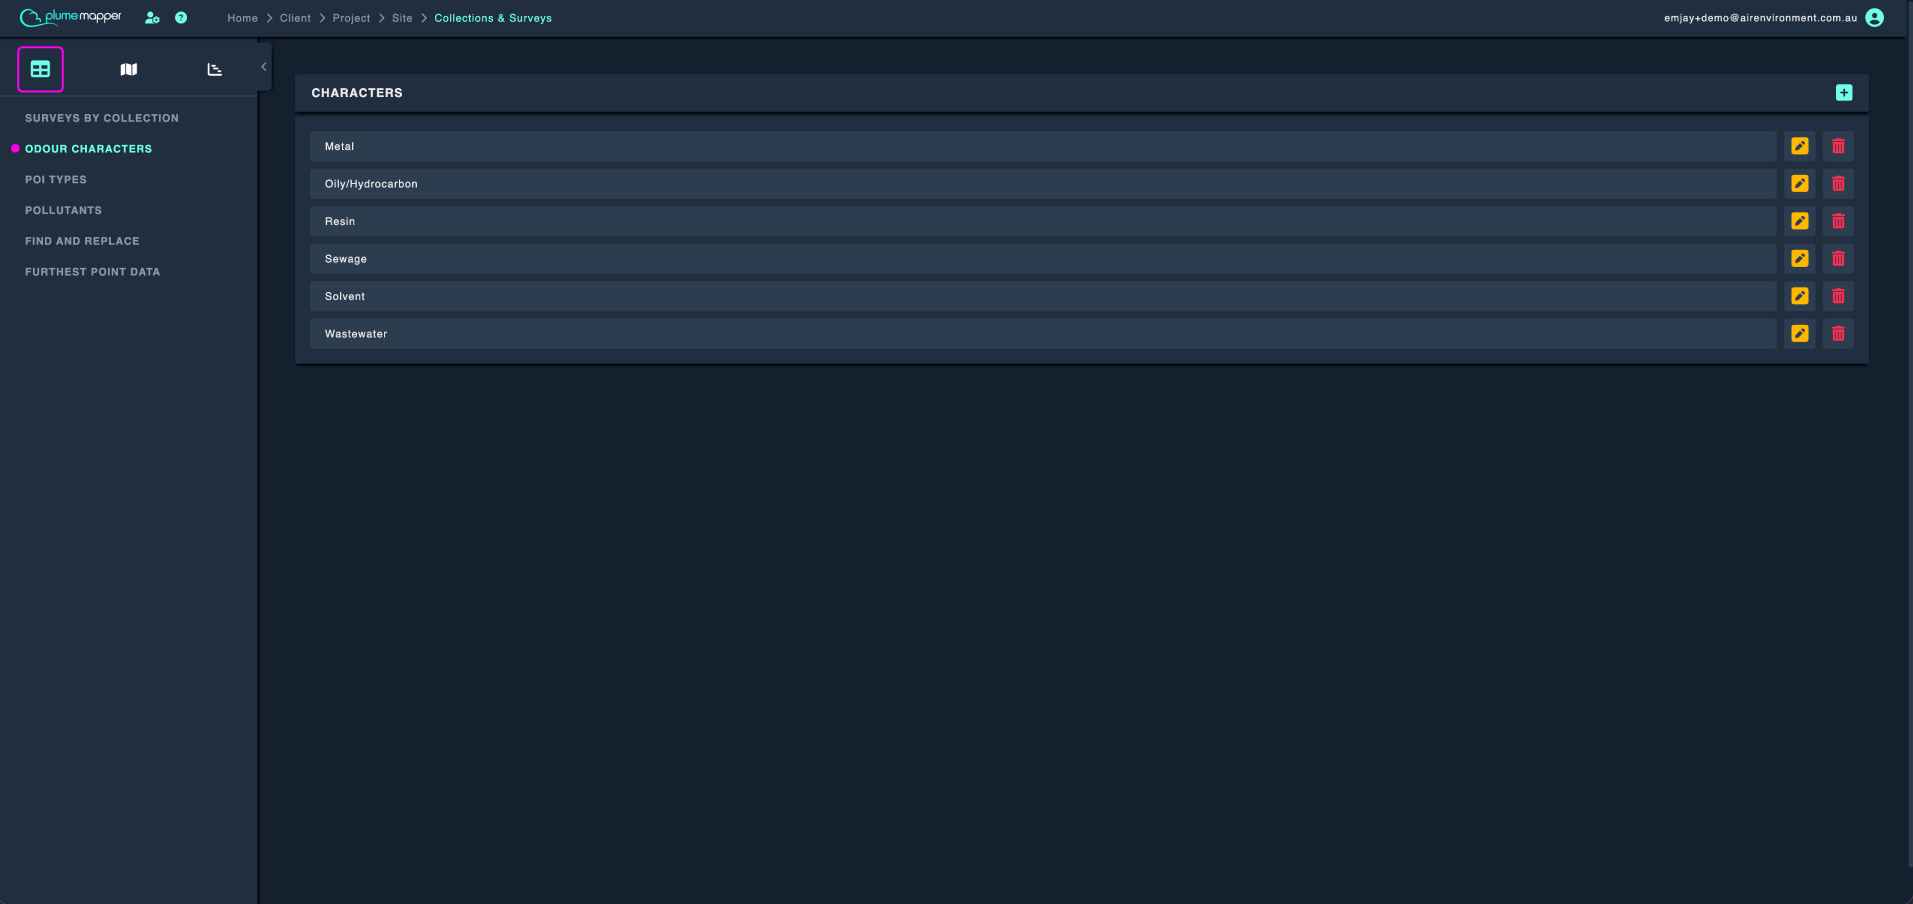
Add a Character
1. Click the icon beside the Characters heading.
2. Enter the character name.
3. Click Add.
A character name is required and must be unique. Capital letters and spaces are ignored when checking for duplicates, so Rotten Eggs and rotteneggs are treated as the same character.
Edit a Character
1. Click the icon on the character’s row.
2. Update the name and click Update.
If no measurements use the character, it is renamed immediately. If it is already used in measurements, you can choose one of the following:
- Update Measurements - renames the character in the list and updates every measurement at this site that uses it.
- Continue without updating - renames the character in the list only. Existing measurements keep the original name.
- Alternatively, close the modal to cancel the edit.
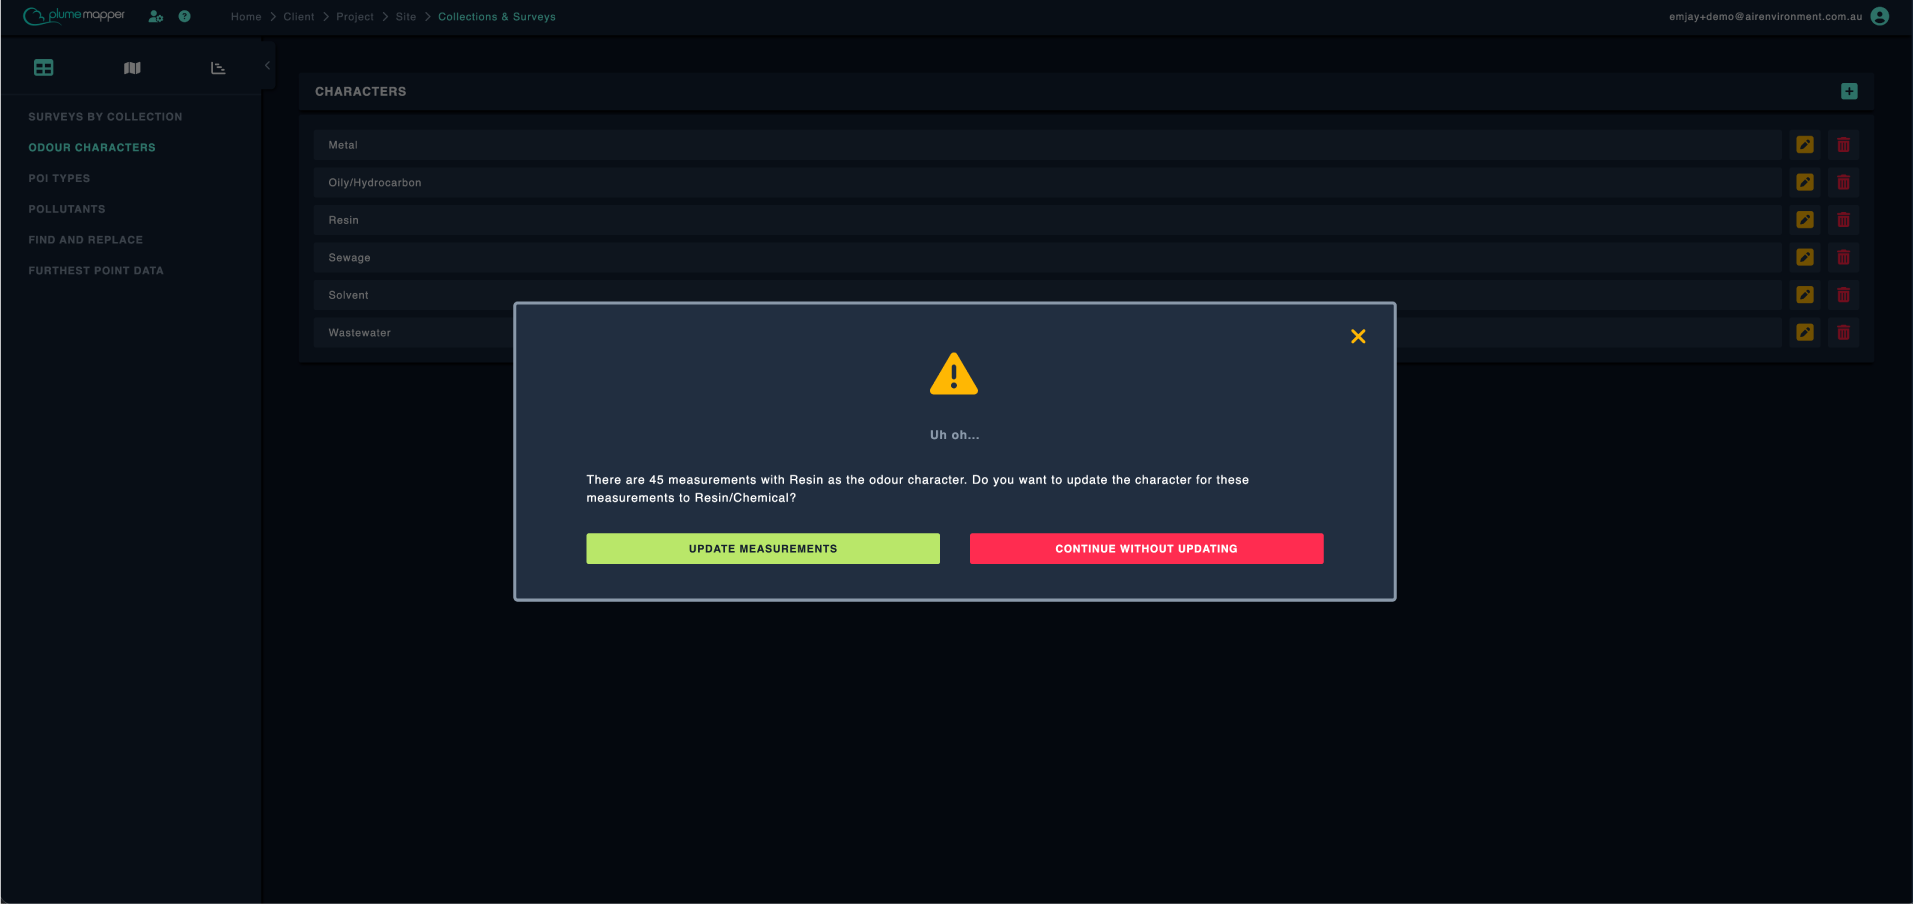
Delete a Character
Click the icon on the character’s row.
- If the character is not used in any measurements, click Delete to confirm.
- If it is used in measurements, enter the character name when prompted, then click Delete.
Note: Deleting a character removes it from the site’s list, so it cannot be selected for future measurements. Existing measurements keep their recorded character. Use Find and Replace first if you need to update those measurements.
3. POI Types
POI types categorise the points of interest on your map, such as residence, school or weather station. Select a POI type when creating or editing a point of interest.
Important: POI types are company-wide settings, not site-specific. Any change you make applies to every site in your company.
Types are listed alphabetically, with Edit and Delete actions on each row.
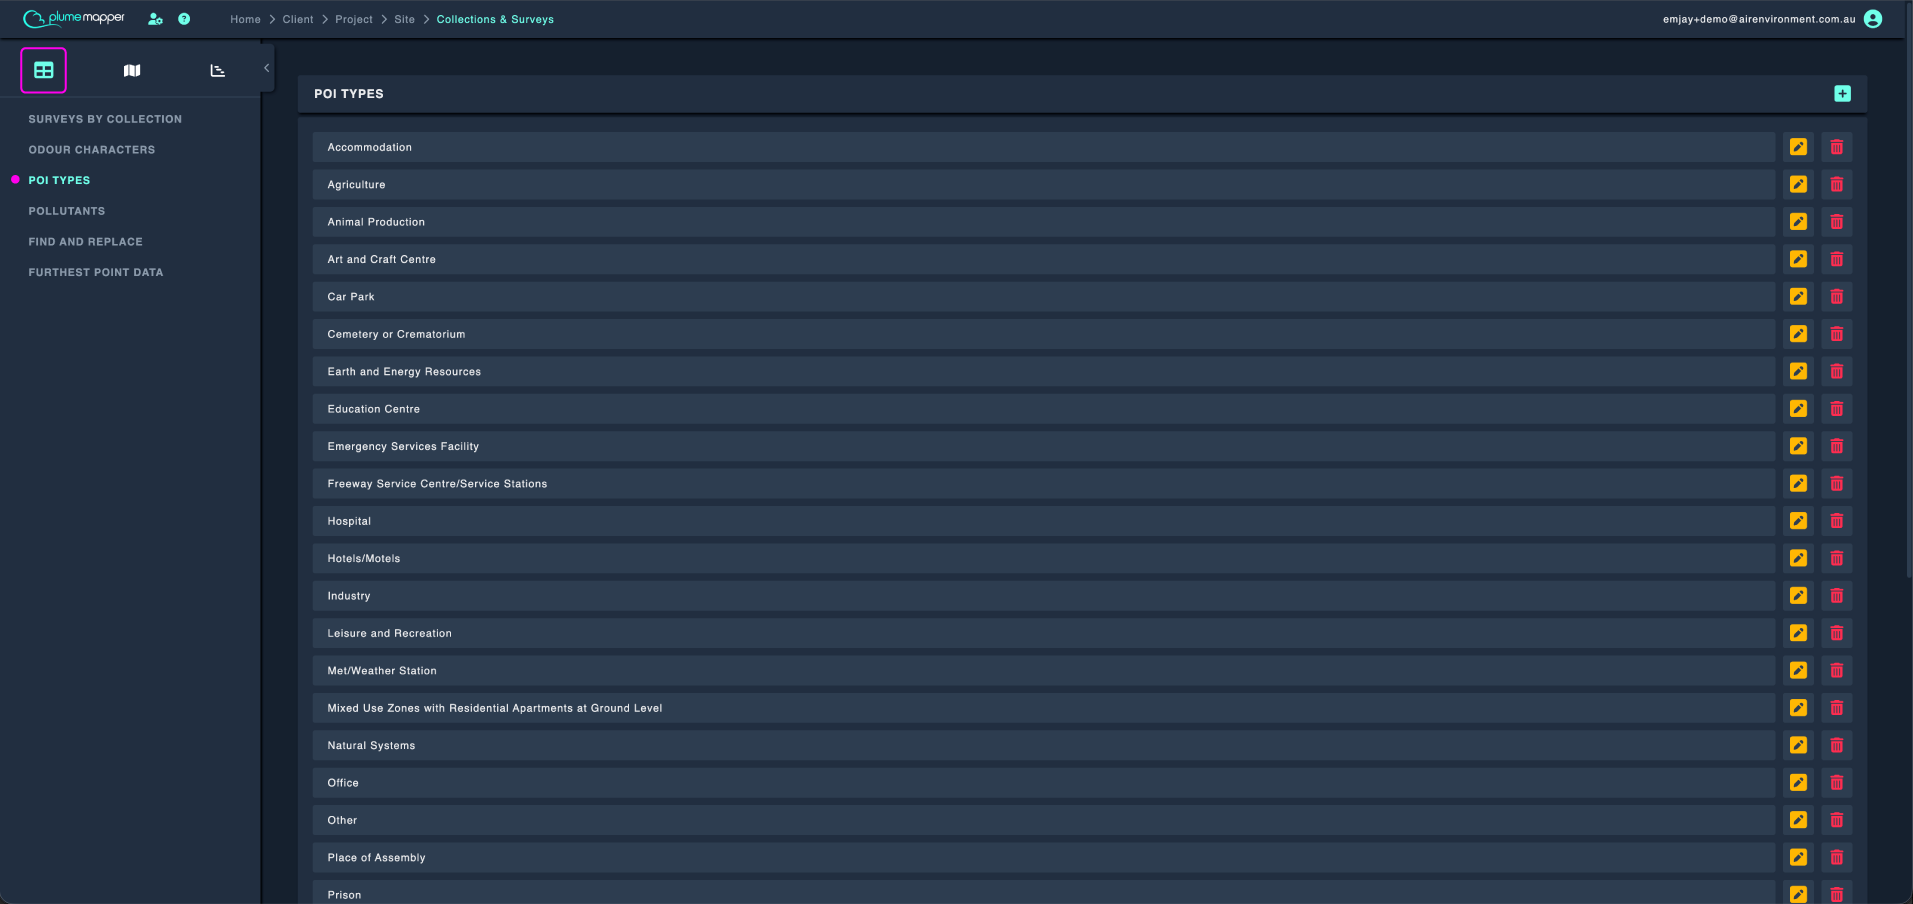
Add a POI Type
1. Click the icon beside the Poi Types heading.
2. Enter a label.
3. Click Add.
A label is required and must be unique. Capital letters are ignored when checking for duplicates, so School and school are treated as the same type.
Edit a POI Type
1. Click the icon on the type’s row.
2. Change the label and click Update.
Delete a POI Type
Click the icon on the type’s row, then click Delete to confirm.
4. Pollutants
Pollutants are gases and particulates that assessors can record alongside odour data using a monitoring device. Each pollutant has a name and unit of measurement, displayed as Name (unit), for example Hydrogen sulfide (ppb).
Pollutants belong to the current site. Each row includes Edit and Delete actions.
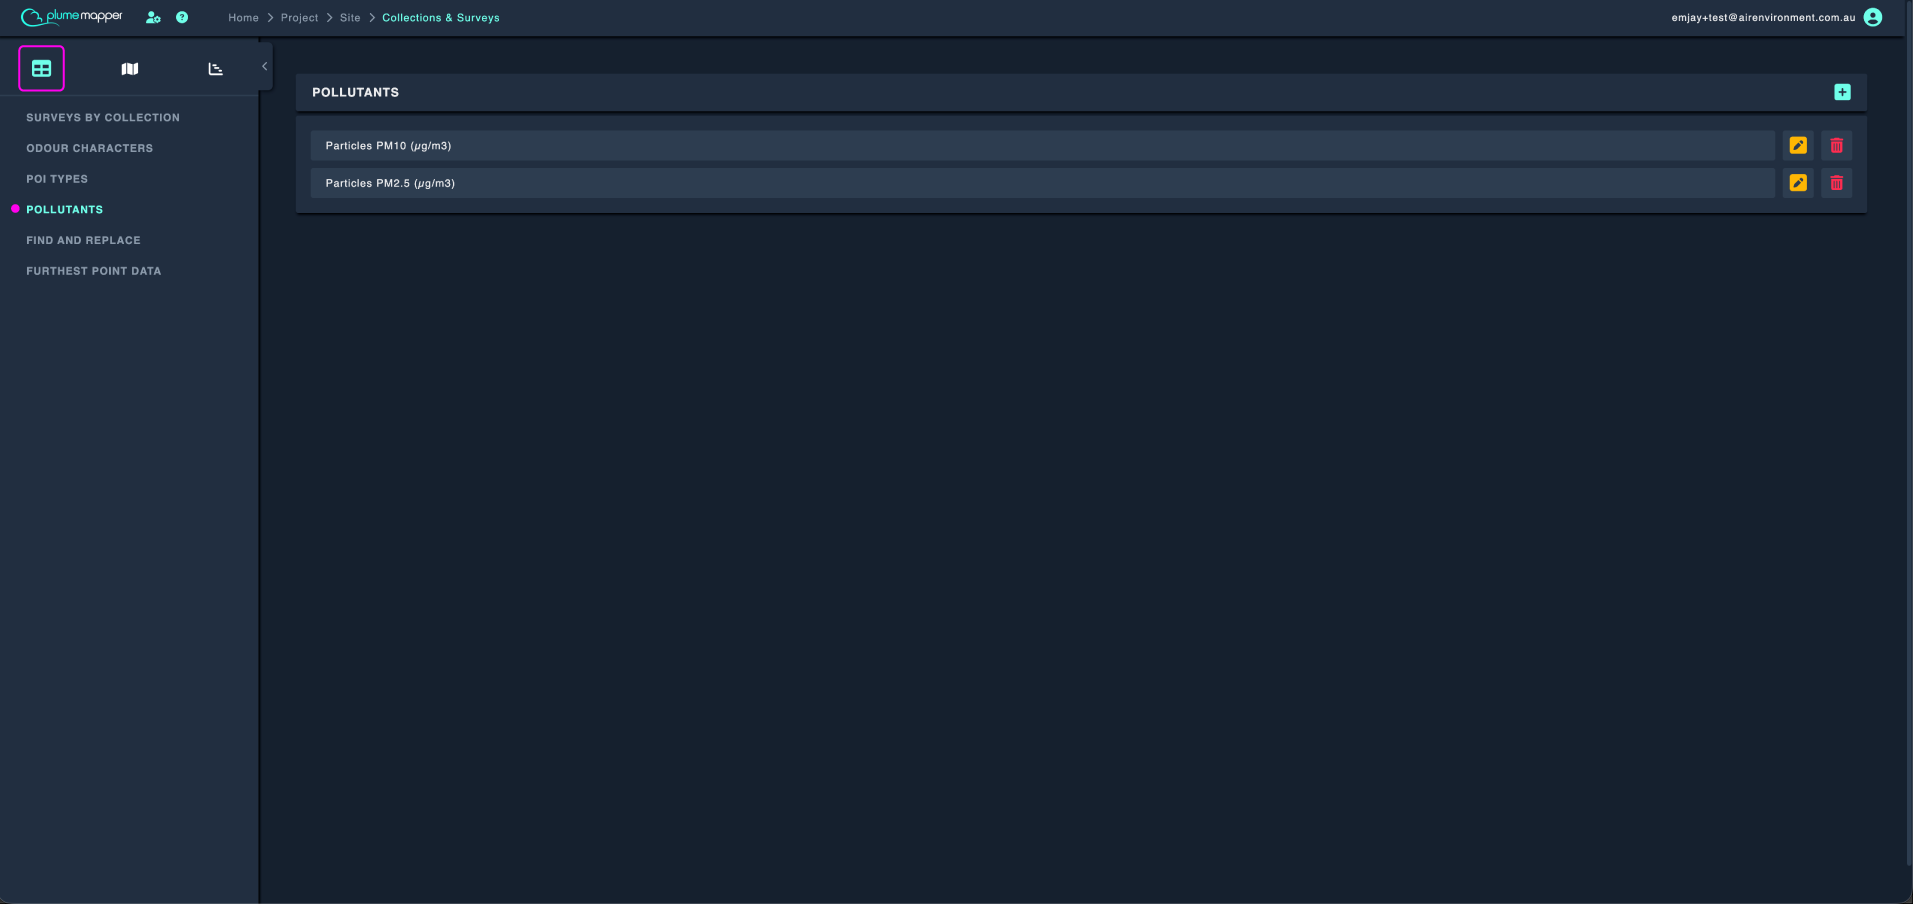
Add a Pollutant
1. Click the icon beside the Pollutants heading.
2. Enter a Pollutant Name, or select one from Common Pollutants. Available options include Ammonia, Carbon dioxide, Carbon disulfide, Carbon monoxide, Dimethyl disulfide, Dimethyl sulfide, Hydrogen sulfide, Nitrogen dioxide, Oxygen, Ozone, Particles PM10, Particles PM2.5, Particles Total, Sulfur dioxide and Total volatile organic compounds.
3. Enter a Unit of Measurement, or choose one from Common Units of Measurement: ppb, pphm, ppm, µg/m3, mg/m3 or %.
4. Click Add Pollutant.
Both the name and unit are required. Pollutant names must be unique; capital letters and spaces are ignored when checking for duplicates.
Edit a Pollutant
1. Click the icon on the pollutant’s row.
2. Update the name, unit, or both, then click Update Pollutant.
Note: Editing a pollutant changes only the site’s available list. Readings already recorded with the previous name or unit are not changed.
Delete a Pollutant
Click the icon on the pollutant’s row, then click Delete to confirm.
Note: The pollutant can no longer be selected for new readings, but existing readings are kept.
5. Find and Replace
Find and Replace lets you update one odour source, odour character or assessor across all measurements at the site in a single action. For example, you can merge a misspelled source into the correct source or move measurements to the correct assessor.
Warning: Changes made with Find and Replace cannot be undone. Check your selections carefully before continuing.
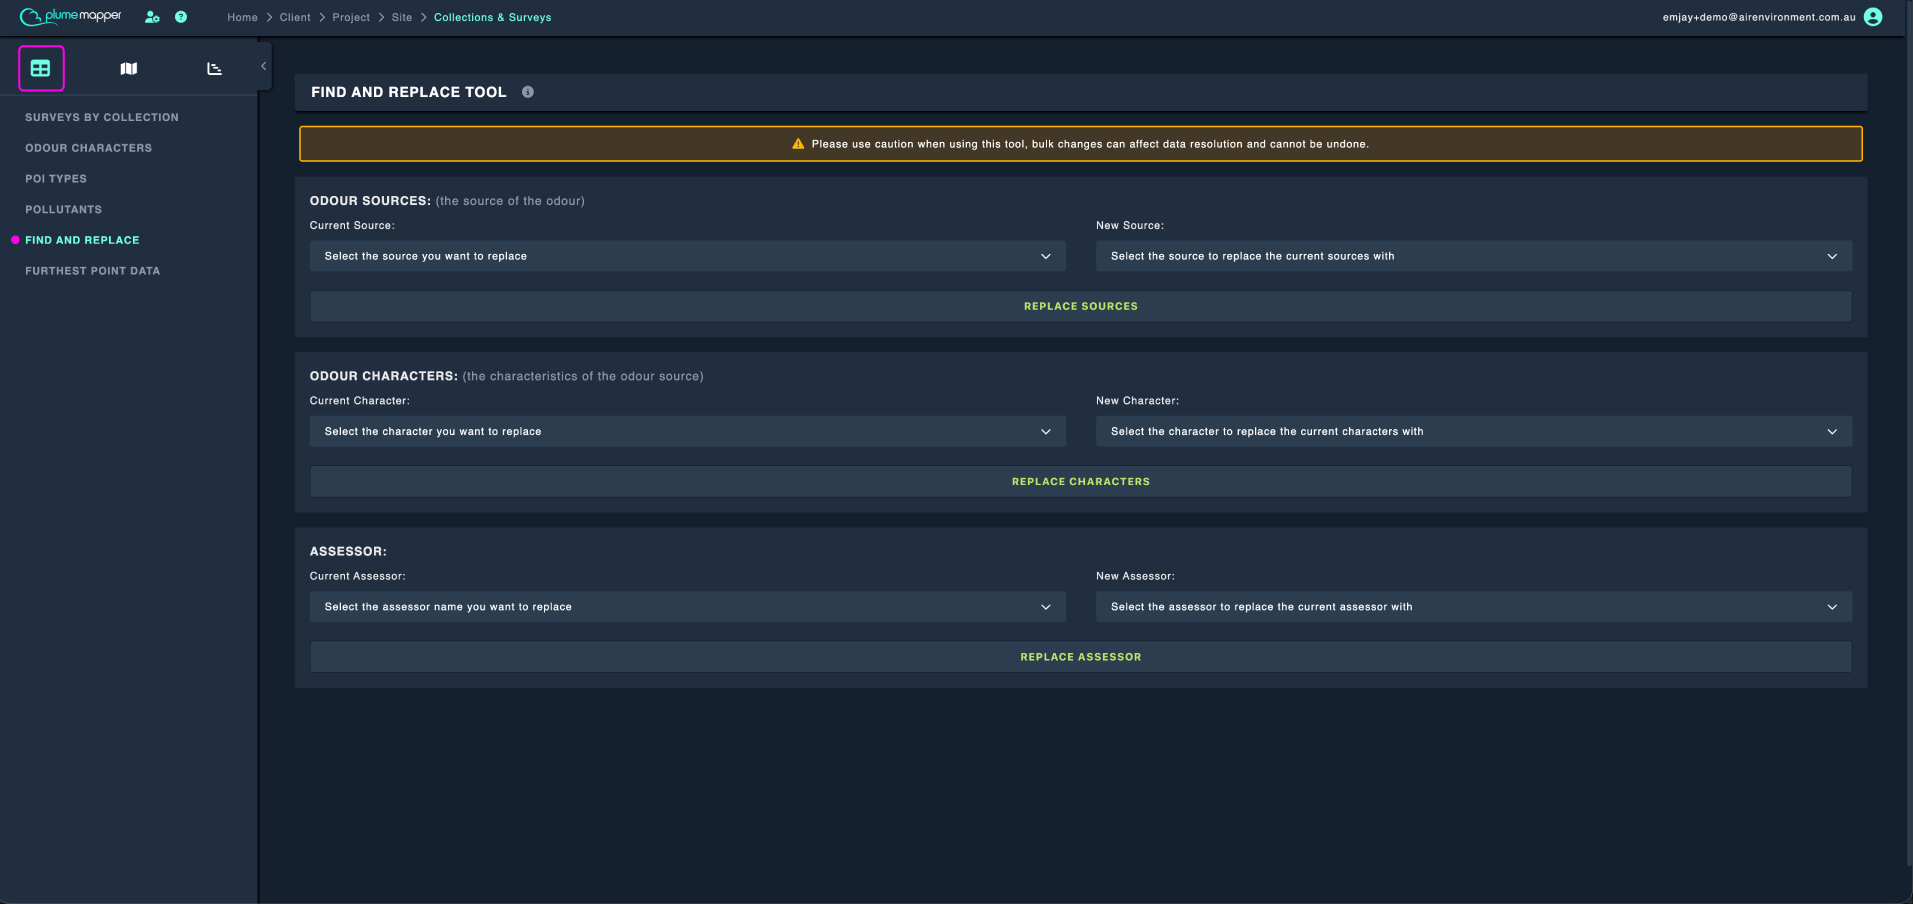
The page has three sections:
- Odour Sources - sources from the site’s odour sources list and any source-type zones.
- Odour Characters - characters from the site’s odour characters list.
- Assessor - assessors who recorded measurements in your open collections.
To replace a value:
1. Select the existing value from the Current dropdown.
2. Select the replacement from the New dropdown.
3. Click Replace Sources, Replace Characters or Replace Assessor. The button displays Replacing… while the update runs, then a confirmation appears.
Both dropdowns contain existing values only. To replace a source or character with a new value, add it first from Odour Sources or Odour Characters.
Replacing a source or character does not remove the old value from the site’s list. Delete it separately if you no longer need it.
6. Furthest Point Data
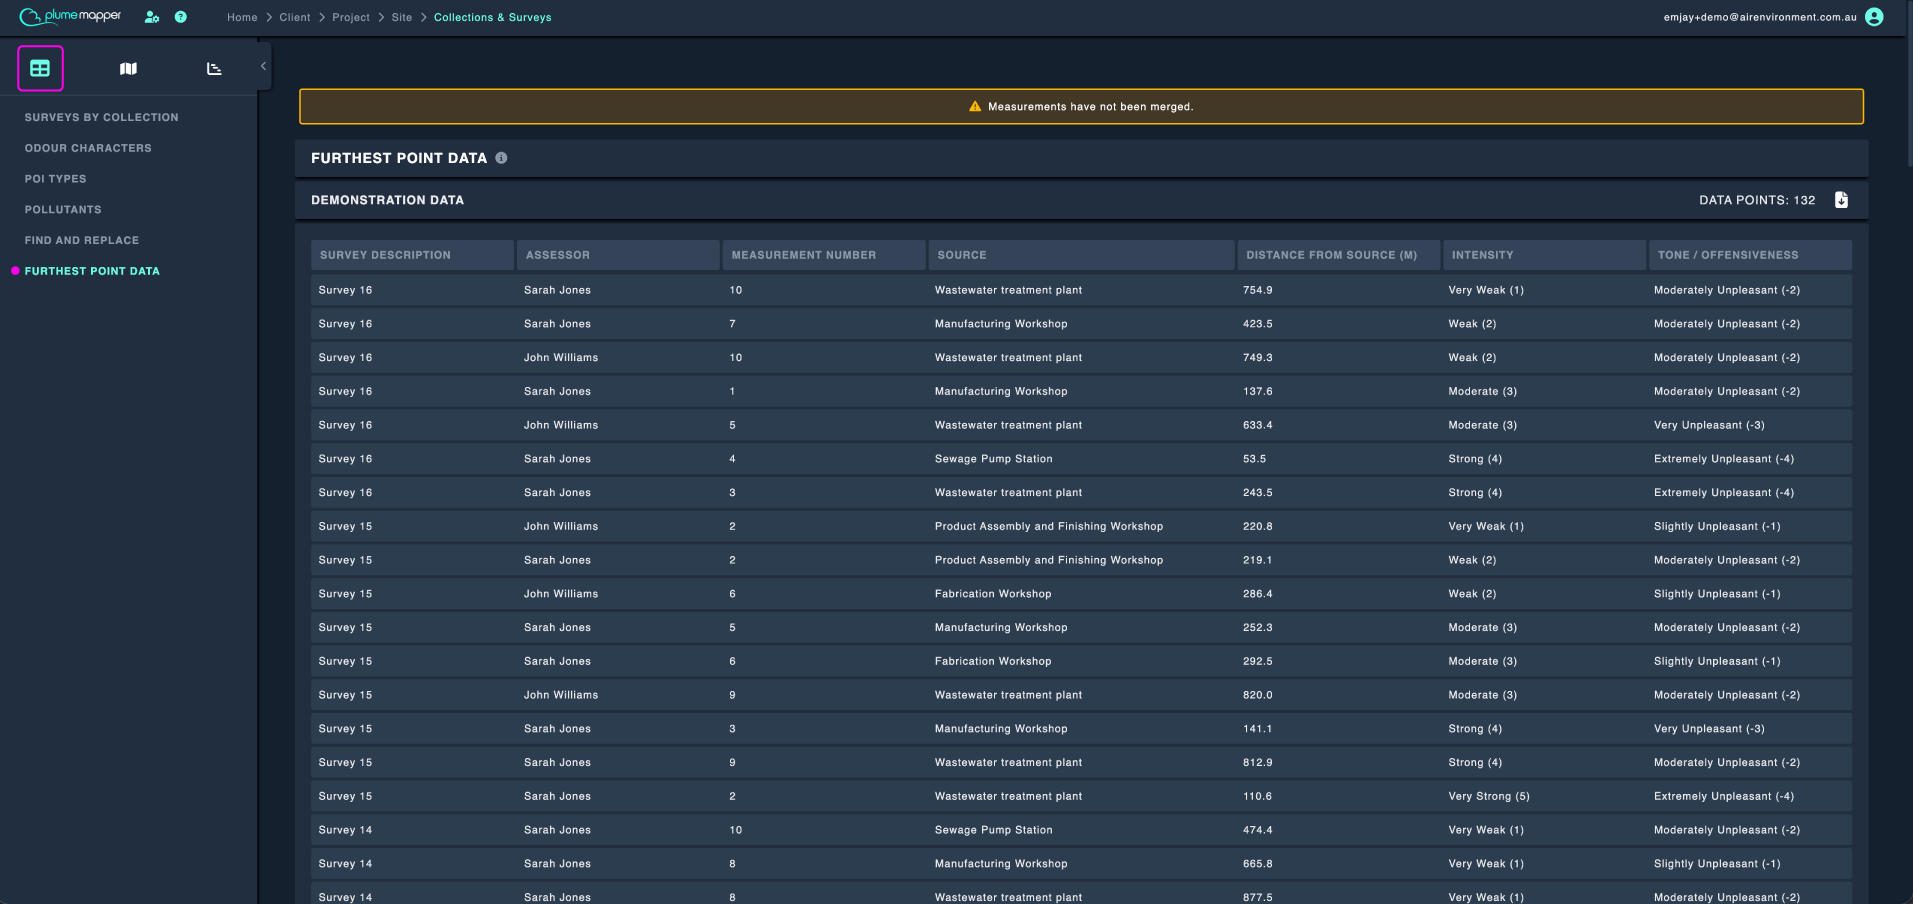
Furthest Point Data shows the greatest distance at which each odour source was detected for each intensity level, across your surveys. This is the same data used by Odour Footprint and Risk Assessment, presented in a table you can review and export.
How Distances Are Calculated
The table uses the surveys checked in the workspace sidebar.
1. The system collects each odour detection: every odour in an instantaneous measurement and every sniff in a timed measurement. Detections with an intensity of 0 or no source are excluded.
2. It calculates the detection’s distance from its source. When there is a matching source-type zone, distance is measured to the nearest edge of that zone. Otherwise, it is measured to the odour source’s map point. Detections without a matching zone or map location are excluded.
3. For each combination of survey, source and intensity, only the furthest detection is included.
Note: If your site uses paired measurements, merge them before using this data. A Measurements have not been merged warning remains visible until they are merged. Once merged, the table uses the merged measurements.
Read the Table
Results are grouped by collection and sorted alphabetically by collection name. Within each collection, the newest survey is shown first, and rows are then sorted by intensity from lowest to highest.
Each collection heading displays a Data Points count and an Export icon.
Each row includes:
- Survey Description - the survey name
- Assessor - the person who recorded the detection
- Measurement Number
- Source - the recorded odour source
- Distance from Source (m) - displayed to one decimal place
- Intensity - shown using the site’s intensity scale
- Tone / Offensiveness - shown using the site’s tone scale. For timed measurements, this is the sniff’s tone when tone was recorded per sniff; otherwise, it is the overall measurement tone.
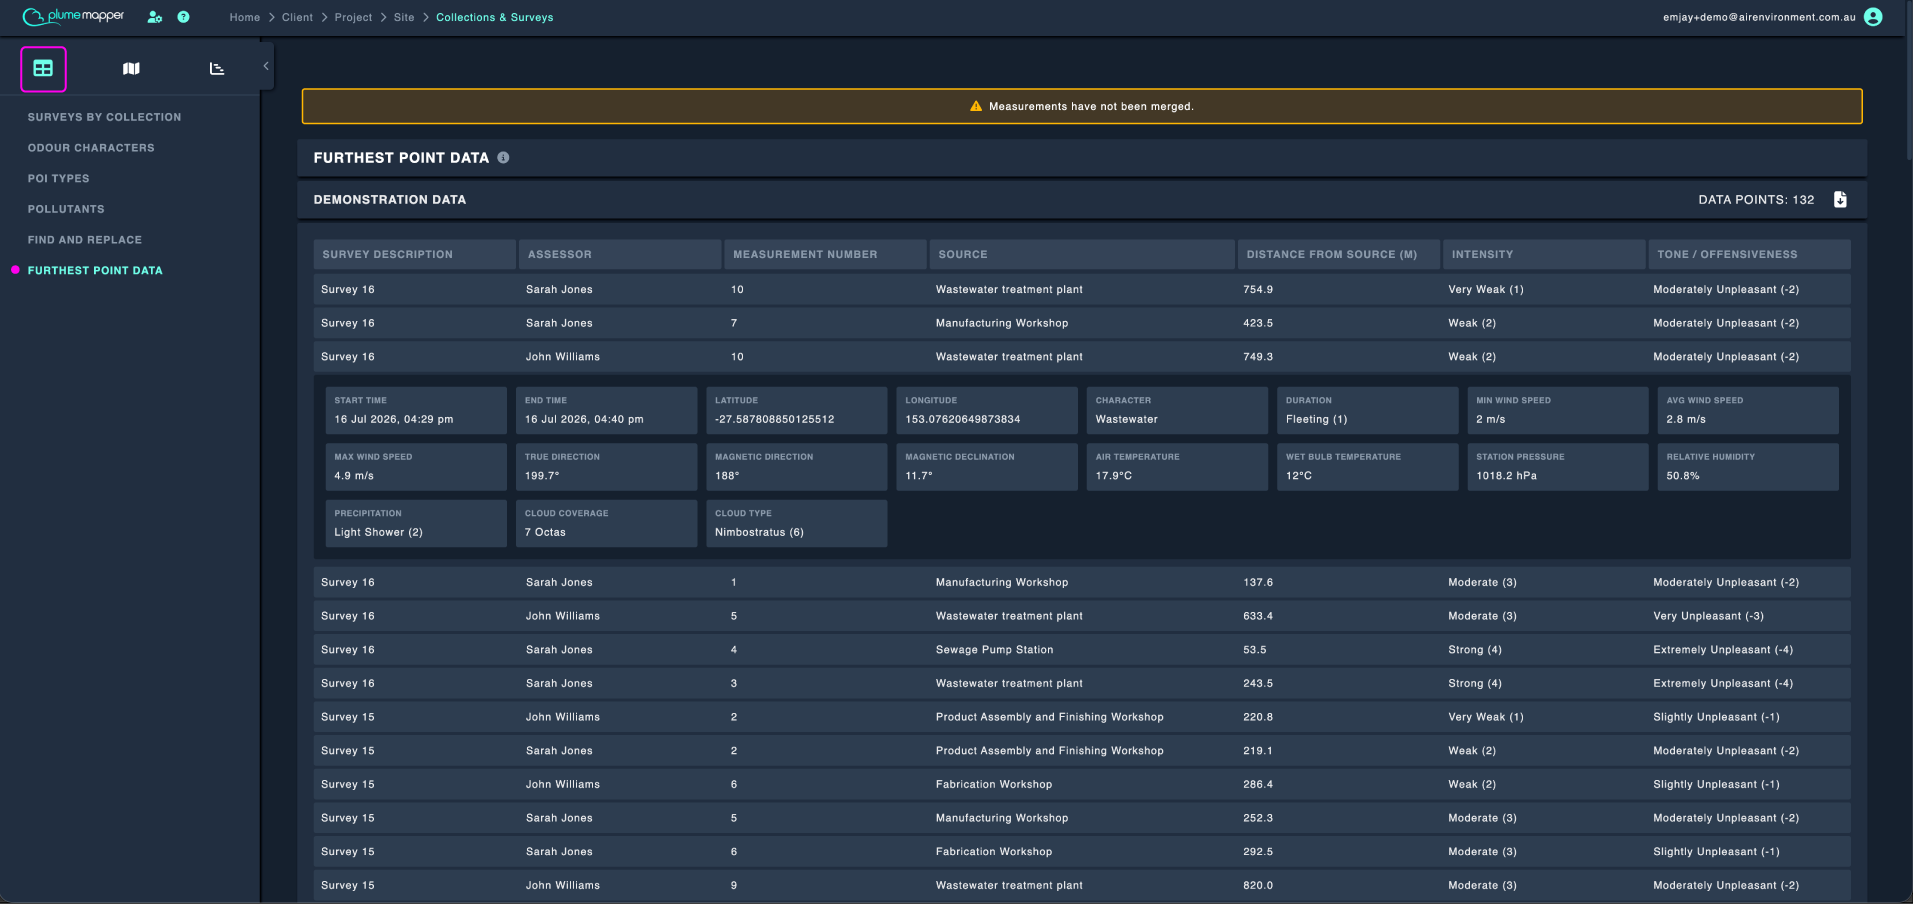
Click a row to expand it and view the remaining detection details. Only fields with values are displayed:
- Start Time, End Time, Latitude, Longitude, Character and Duration for instantaneous measurements
- Weather - minimum, average and maximum wind speed; true and magnetic direction; magnetic declination; air and wet bulb temperature; station pressure; relative humidity; precipitation; cloud coverage; and cloud type. Timed measurements show separate Start and End values.
Click the row again to collapse it. Only one row can be expanded at a time.
Export Data
Click the icon in a collection heading to download that collection’s rows as a CSV file.
The export includes all available columns, including weather data, and excludes columns with no values.