Odour Sources
Known odour sources can be assigned to your measurement data, this is crucial for generating the odour footprint.
When you add an odour source using the web app, it becomes available in dropdown menus on the mobile app as well as in the zone source type dropdown when adding a zone.

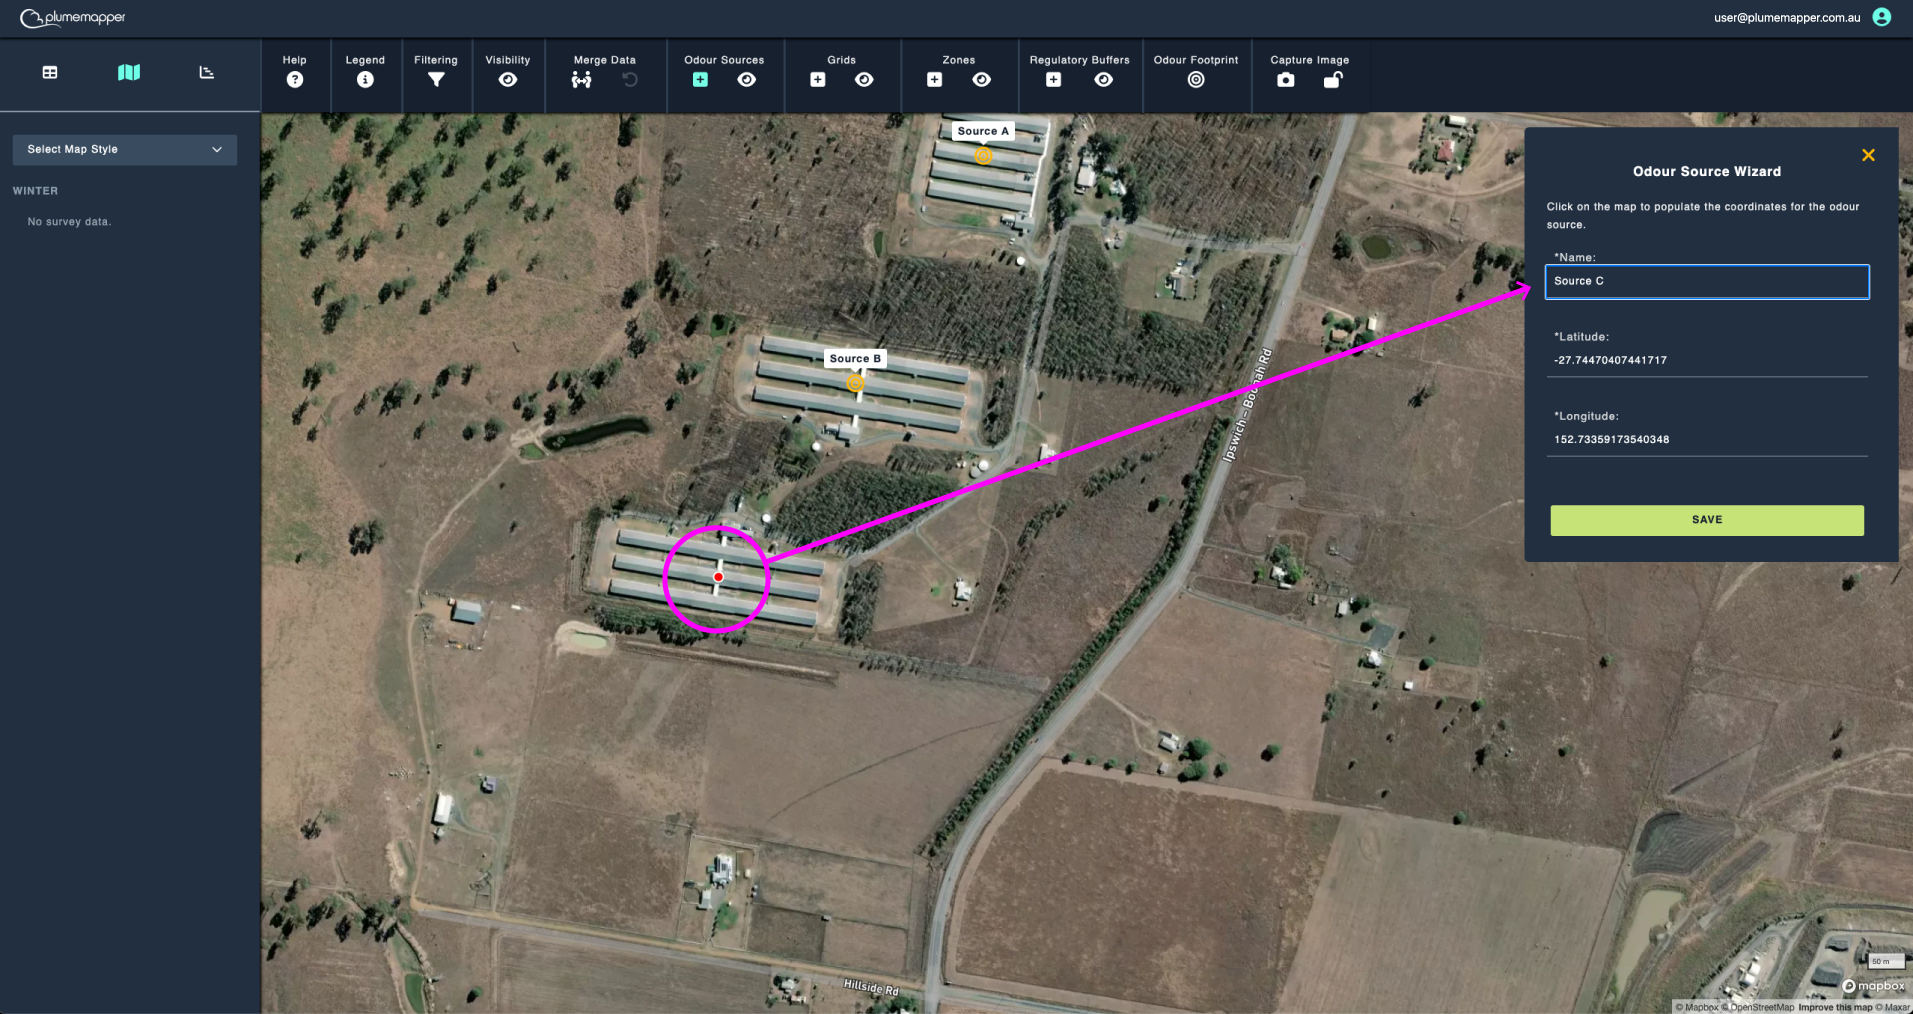
Adding a new odour source:
1. Click the icon on the map toolbar, to access the Odour Source Wizard.
2. Enter a unique name for the odour source in the input field.
3. Click on the map to set the source’s location or manually enter the coordinates if known.
4. Click the Save button to add the new source.
Editing an odour source:
1. Click on the odour source marker on the map.
2. Click the icon in the banner that appears at the top.
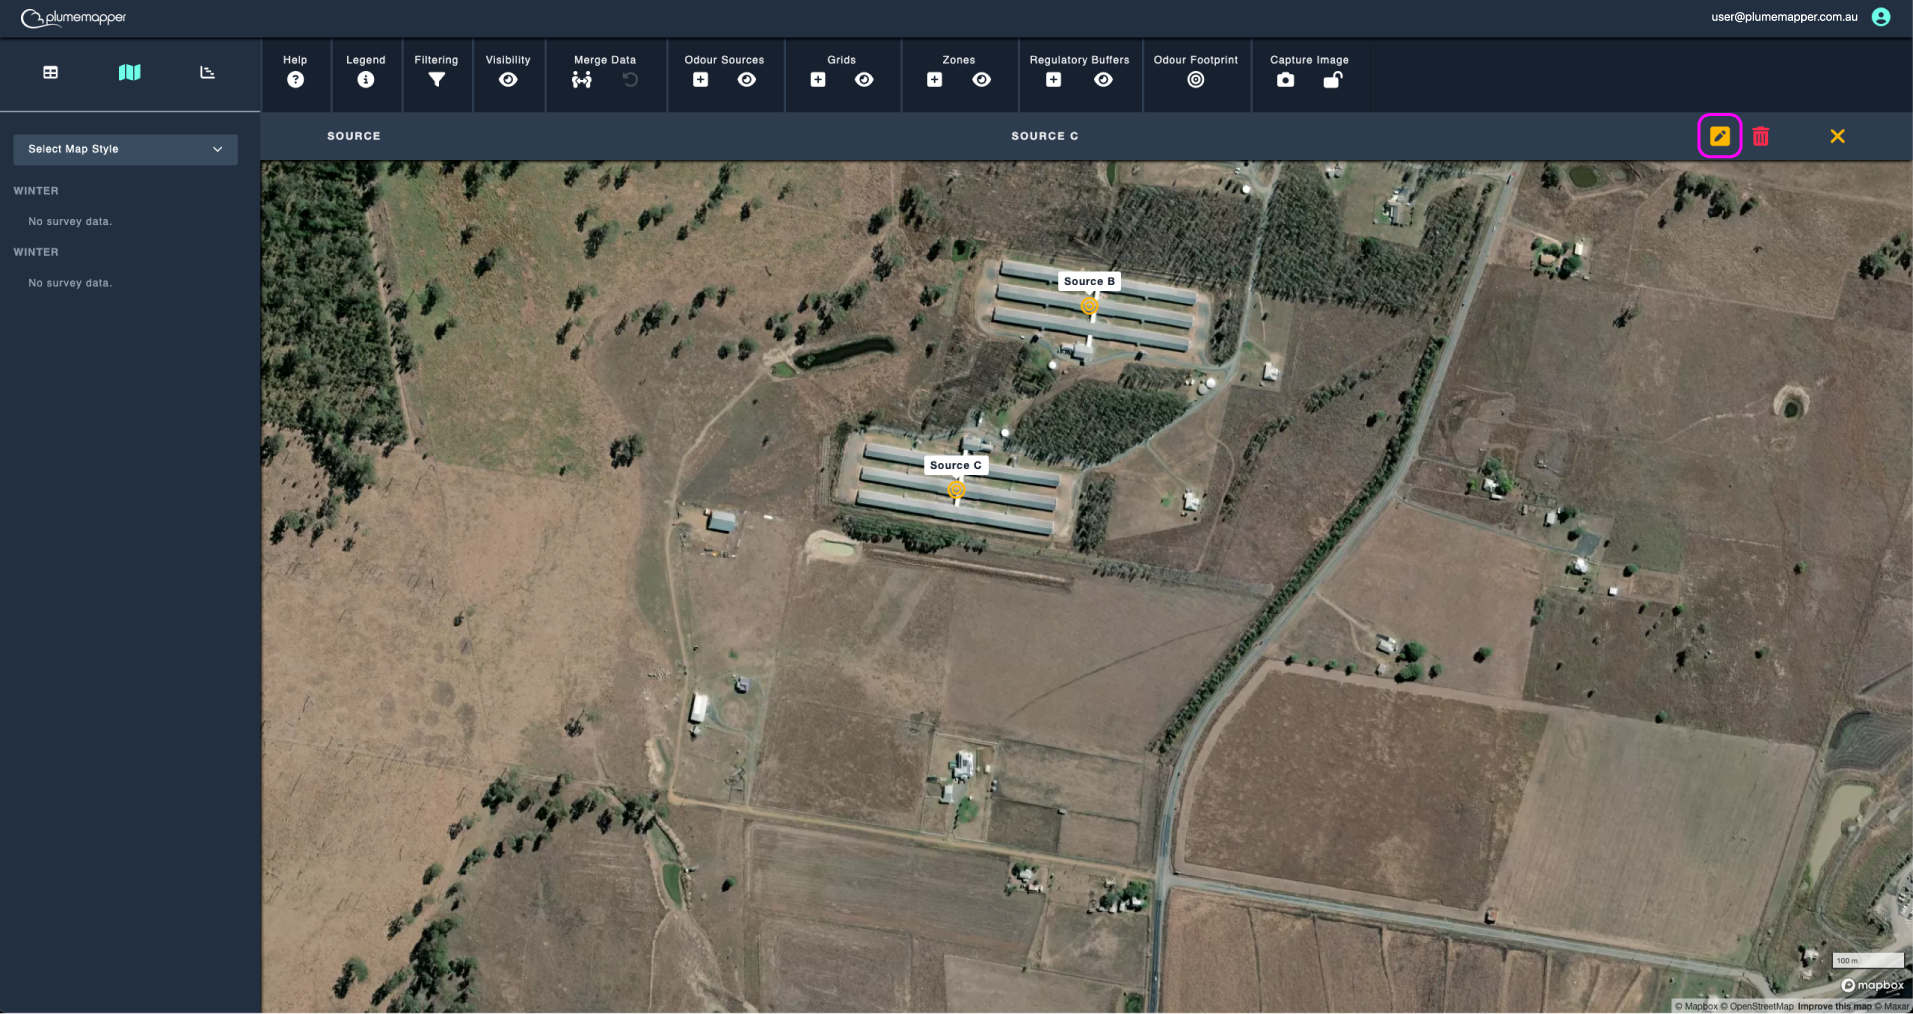
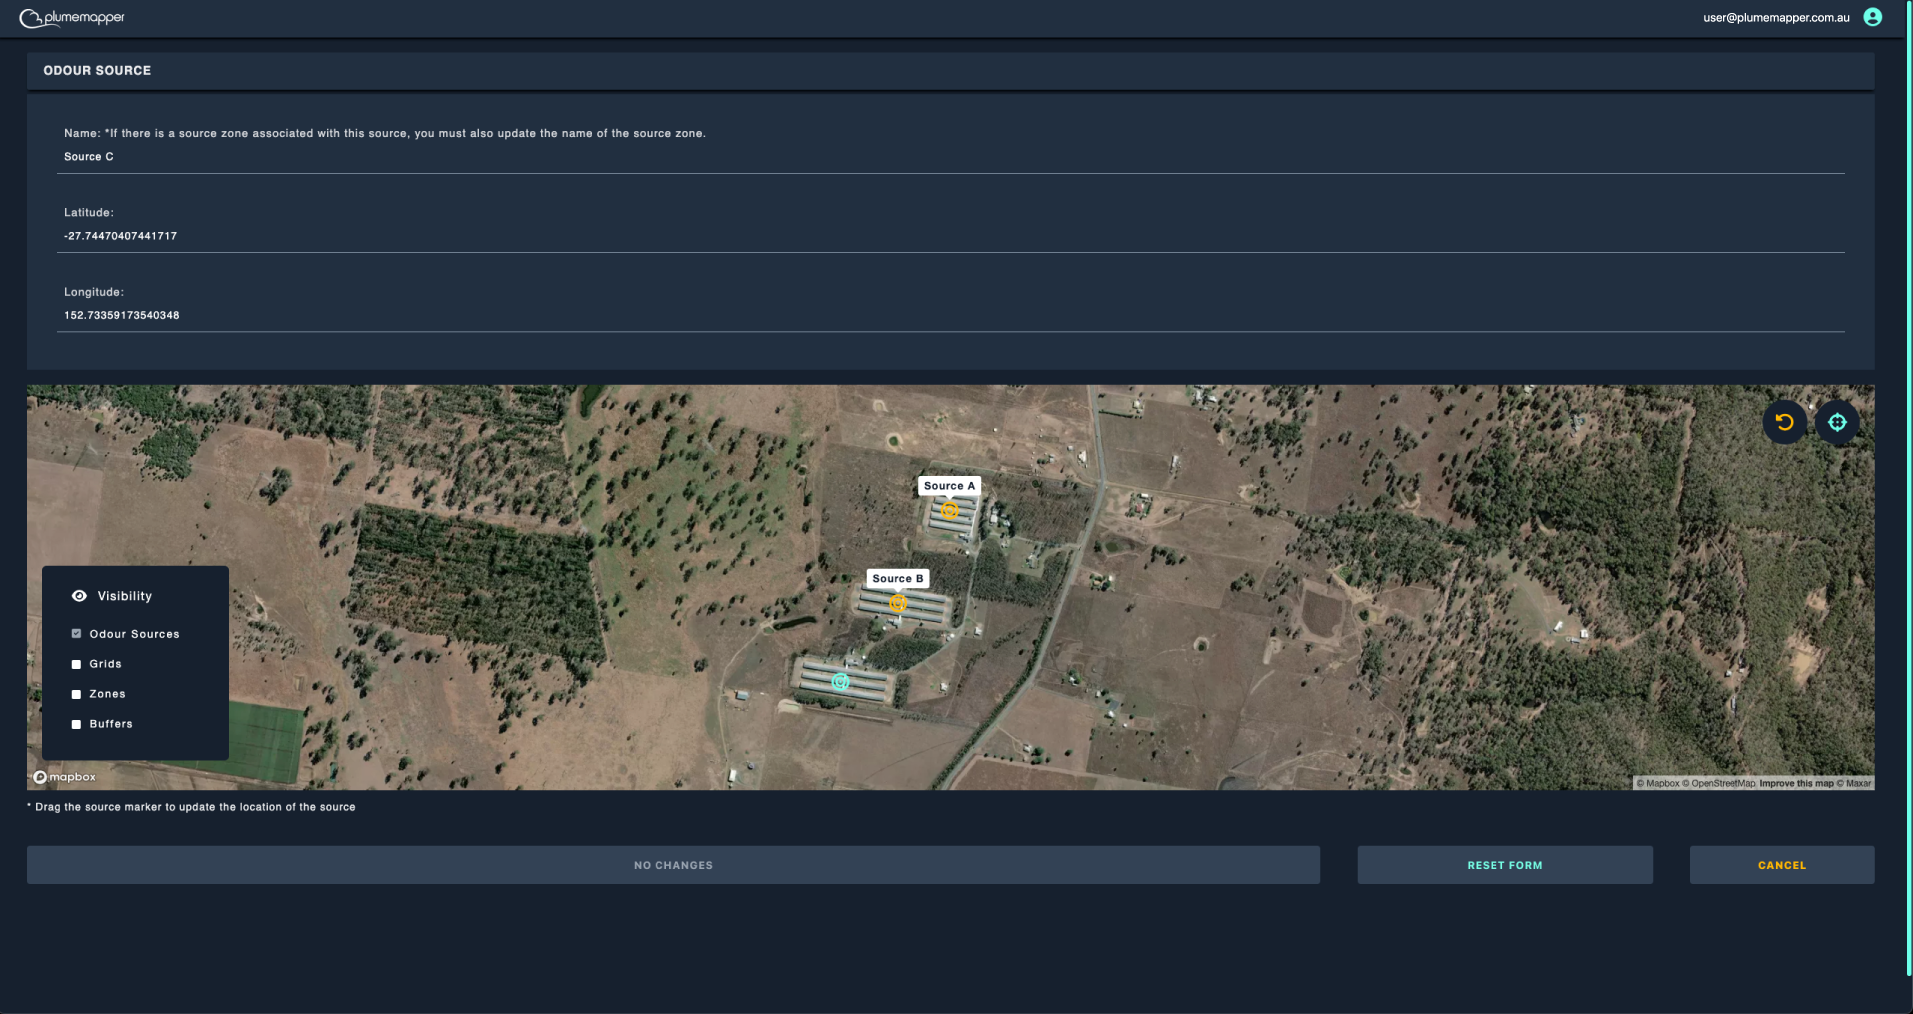
3. On the Edit page, modify the name or coordinates as needed.
3.a. Drag the blue source marker to update the location or enter a latitude and longitude in the input fields.
4. To reset the source back to it’s original location, click the button.
5. Click the Save Changes button to confirm and save your changes.
6. Click the Reset Form button to reset the source back to it’s original state.
7. Click the Cancel button to navigate back to the previous page, without saving any changes.
Note:
After editing a source name, if there is an associated source zone; that name must also be updated to exactly match the new source name.
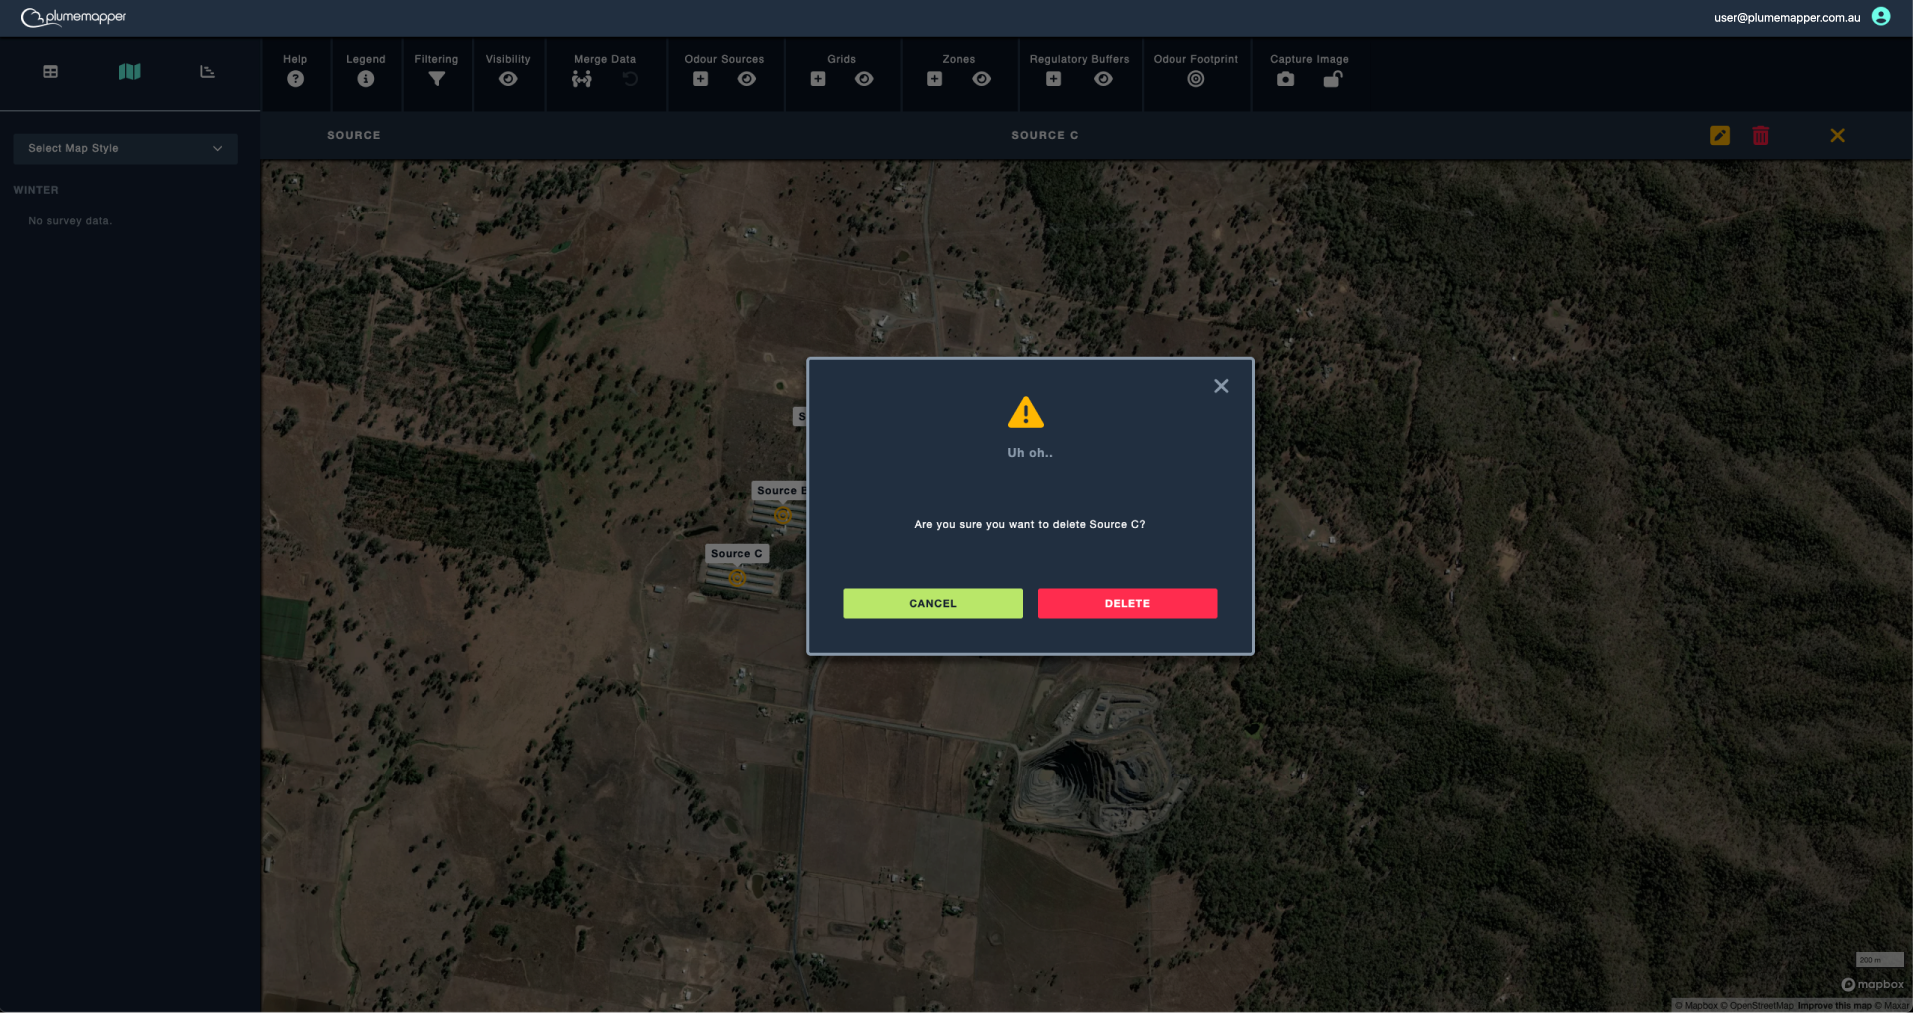
Deleting an odour source:
1. Click on the odour source marker on the map.
2. Click the icon in the banner that appears at the top.

3. Confirm deletion, by clicking the Delete button in the modal that pops up.
Note:
Deleting an odour source is permanent and cannot be undone.