Points of Interest
You can add any notable POI to your site, e.g. a school, a hospital, a met station or a neighbouring facility.
POI added here are also used by the risk assessment tool, to help determine how sensitive a receptor point is.
Adding a POI
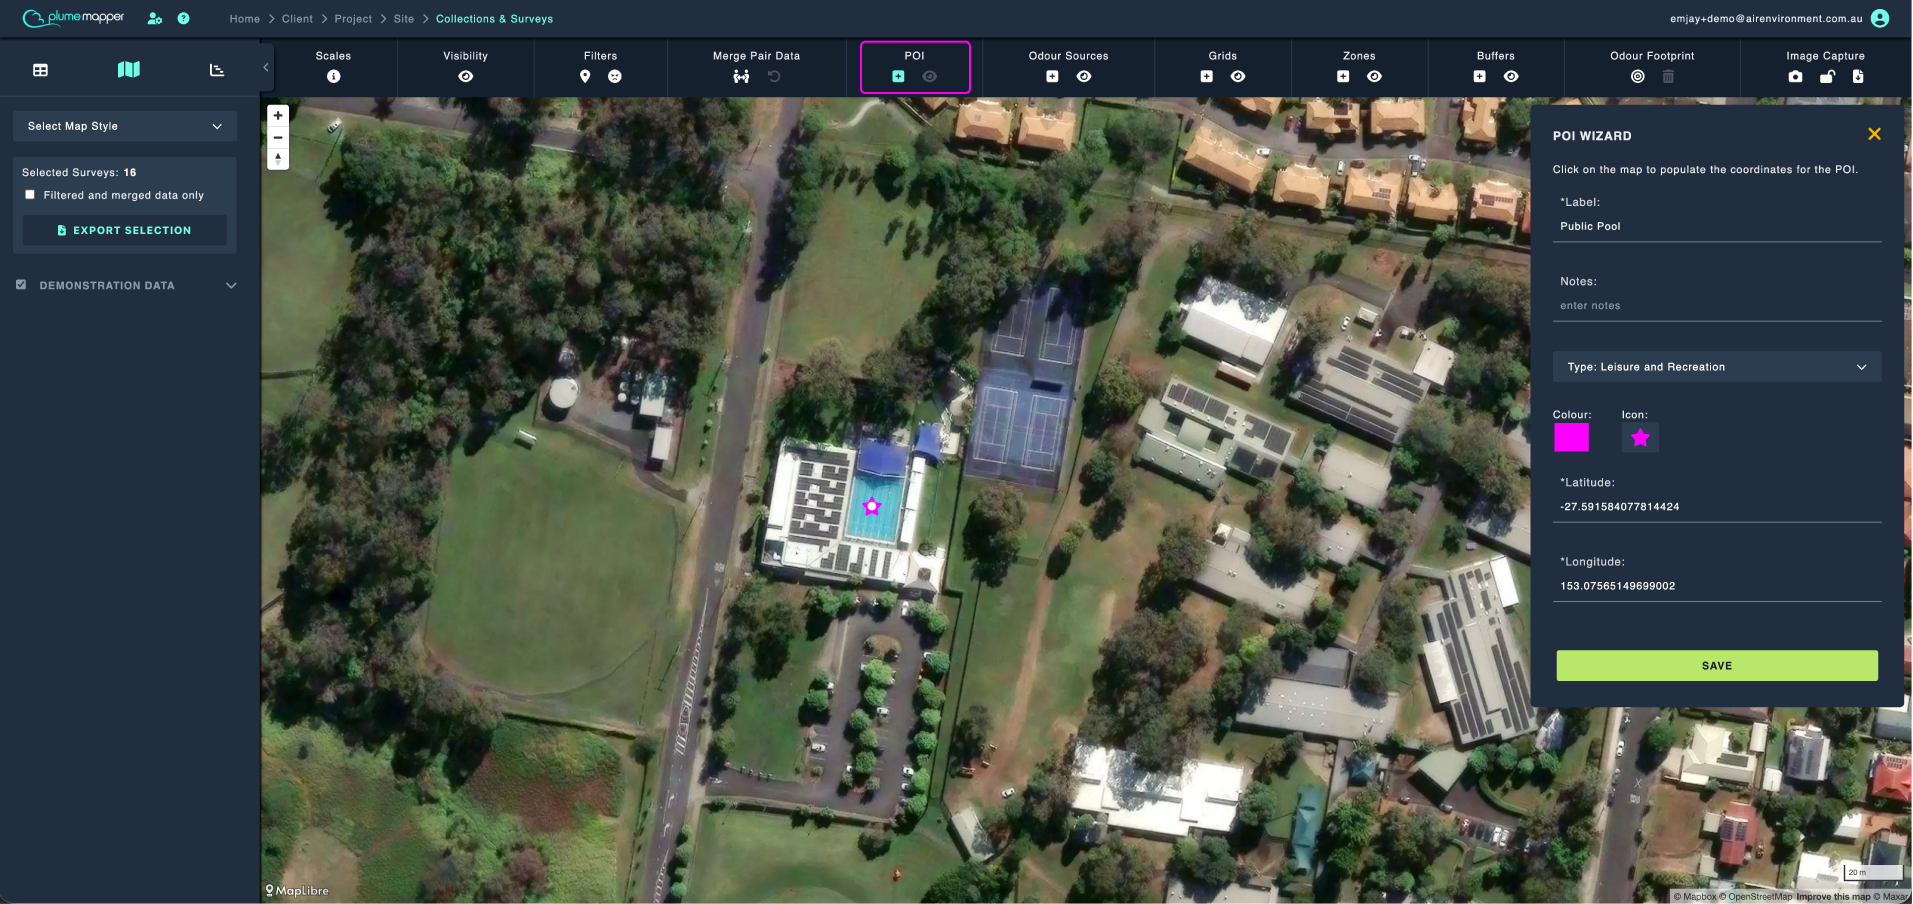
1. Click the icon under POI on the map toolbar, to access the POI Wizard.
2. Enter a label for the POI in the input field.
- Each POI label must be unique per site.
3. Enter any notes you want to keep against the POI.
4. Assign a type to your POI via the dropdown list.
- These types are stored in your company wide root settings, not per site.
5. Choose a colour, and click the icon button to open the icon picker.
6. Click the map to set the location, or manually enter the latitude and longitude.
7. Click the Save button to add the new POI.
Showing and Hiding POI
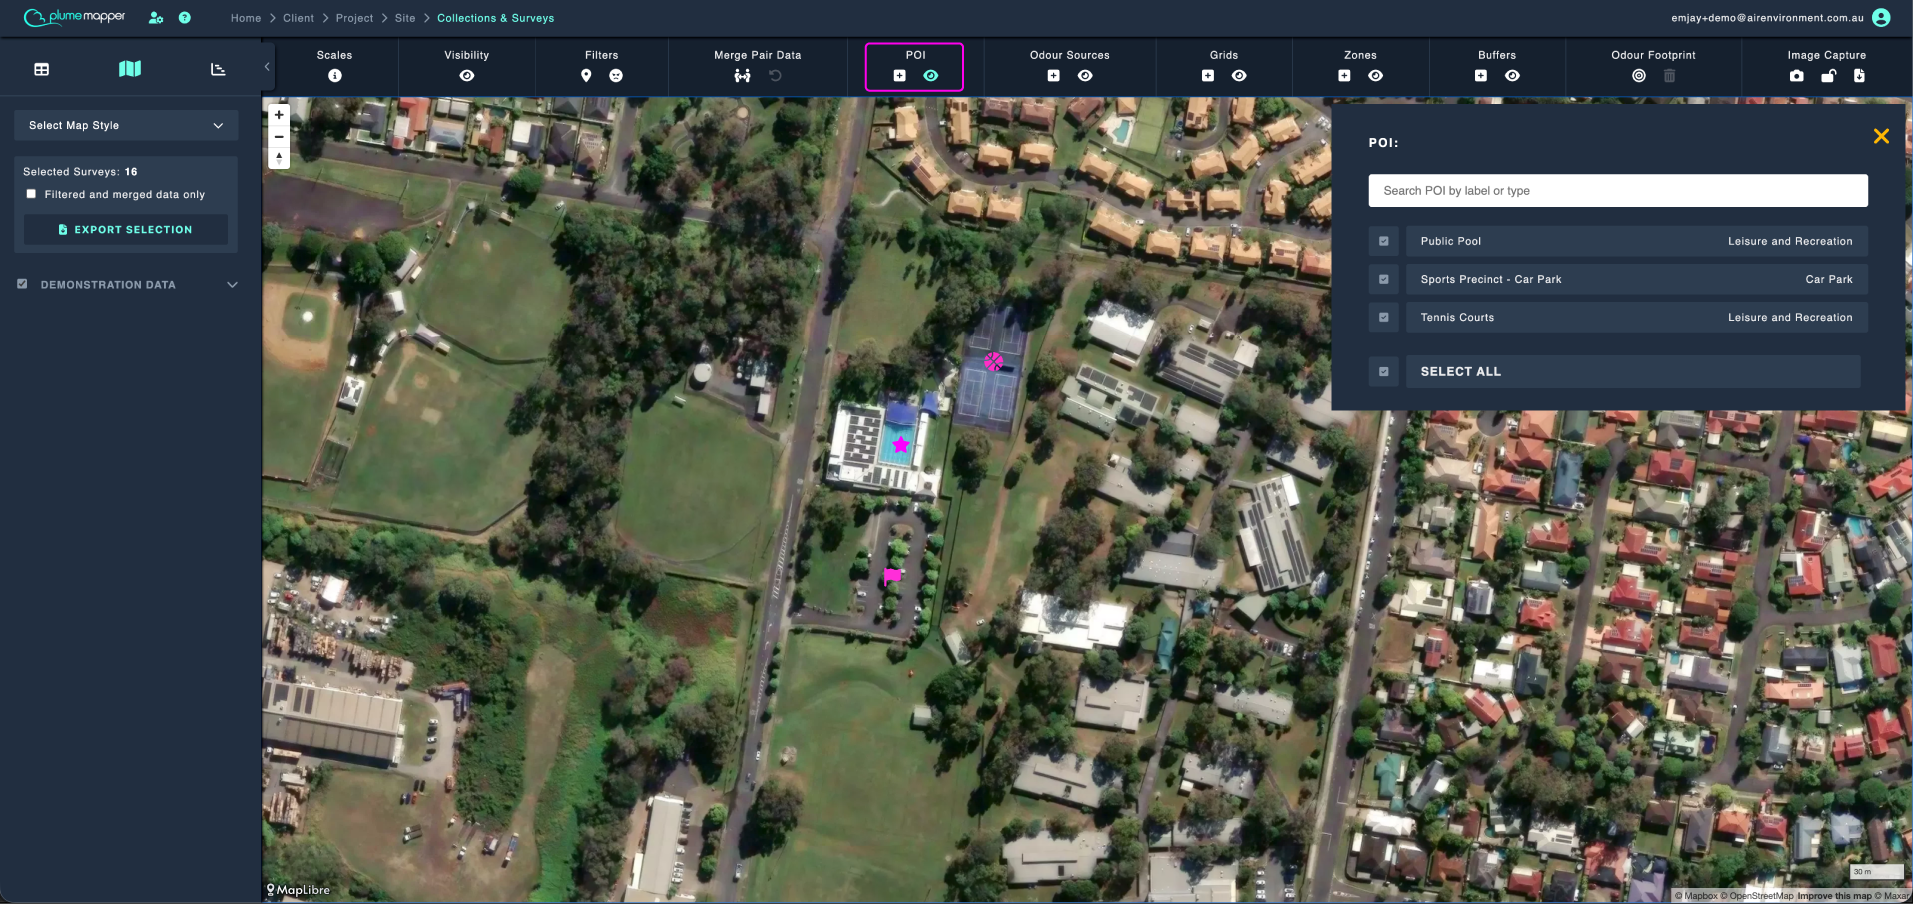
Click the icon under POI on the map toolbar, to open the POI list.
- Search for a POI by label or type, in the input field.
- Check or uncheck the items on the list you wish to be visible on the map.
- Use Select All at the bottom of the list to show or hide all of them at once.
Note: The icon is disabled (greyed out) when the site has no POI.
Editing a POI
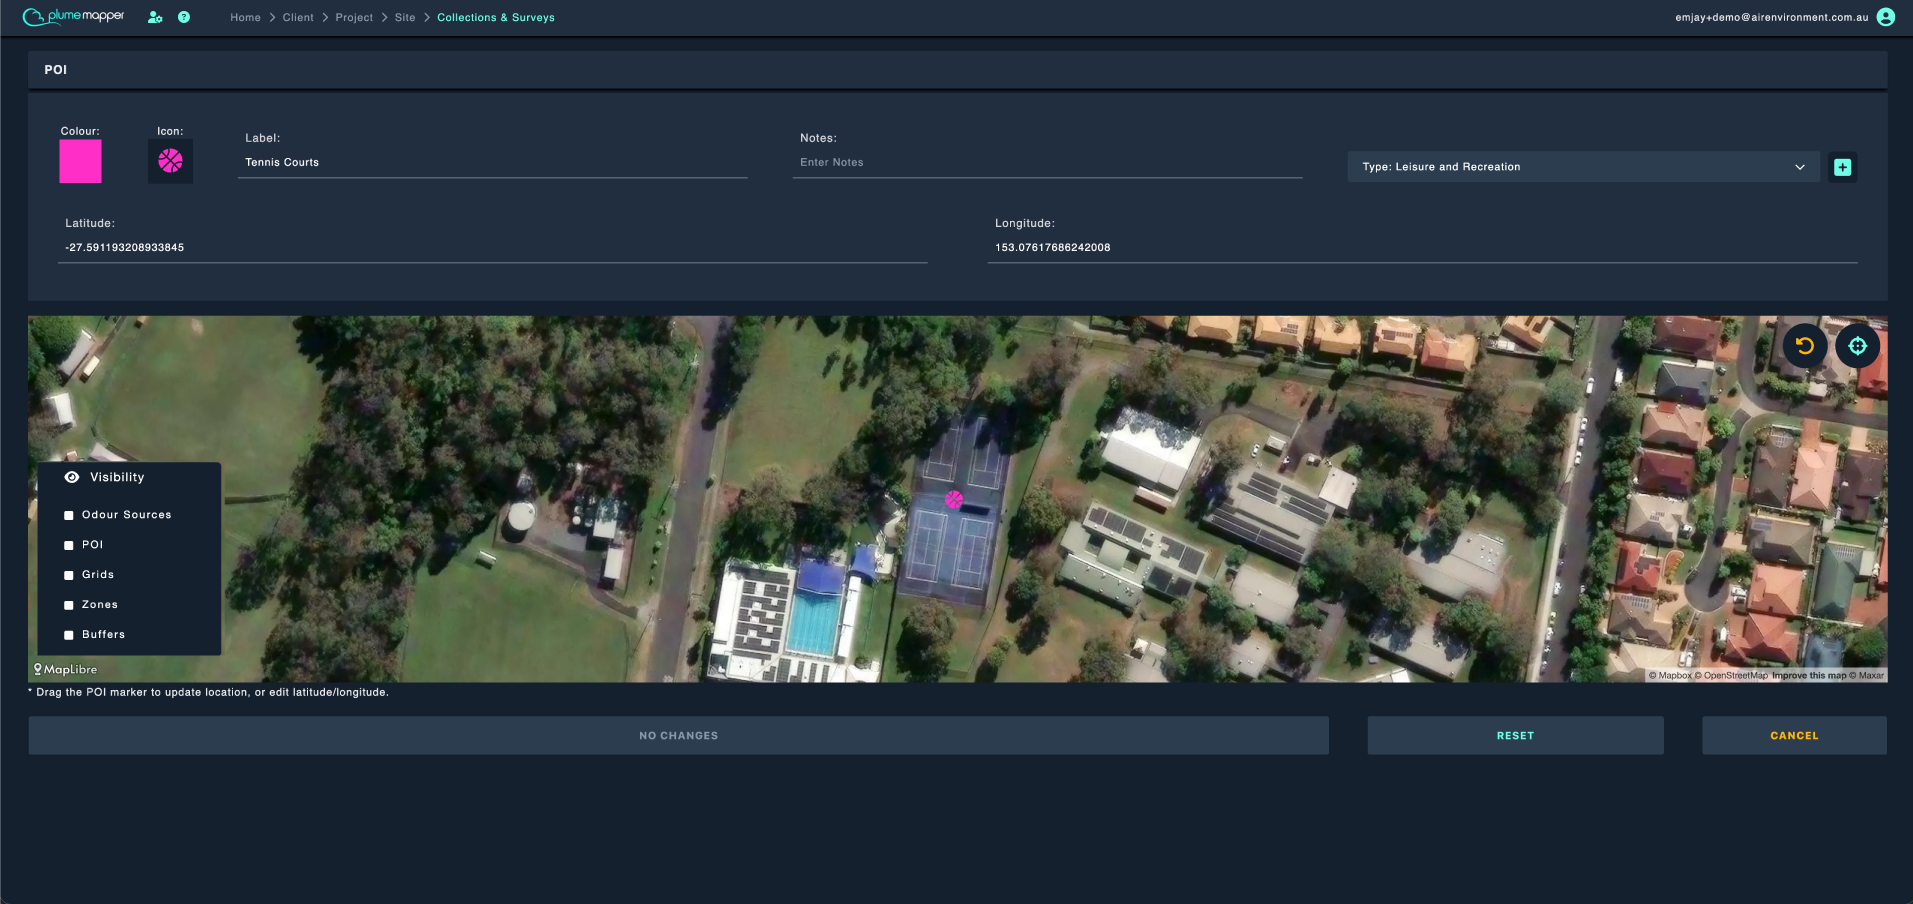
1. Click the POI marker on the map.
- The banner that appears at the top shows the POI type and any notes recorded against it.
2. Click the icon in the banner.
3. Modify the label, notes, type, colour, icon or location as needed.
- Drag the marker to update the location or manually enter the latitude and longitude.
4. Click the Save Changes button to confirm and save your changes.
Deleting a POI
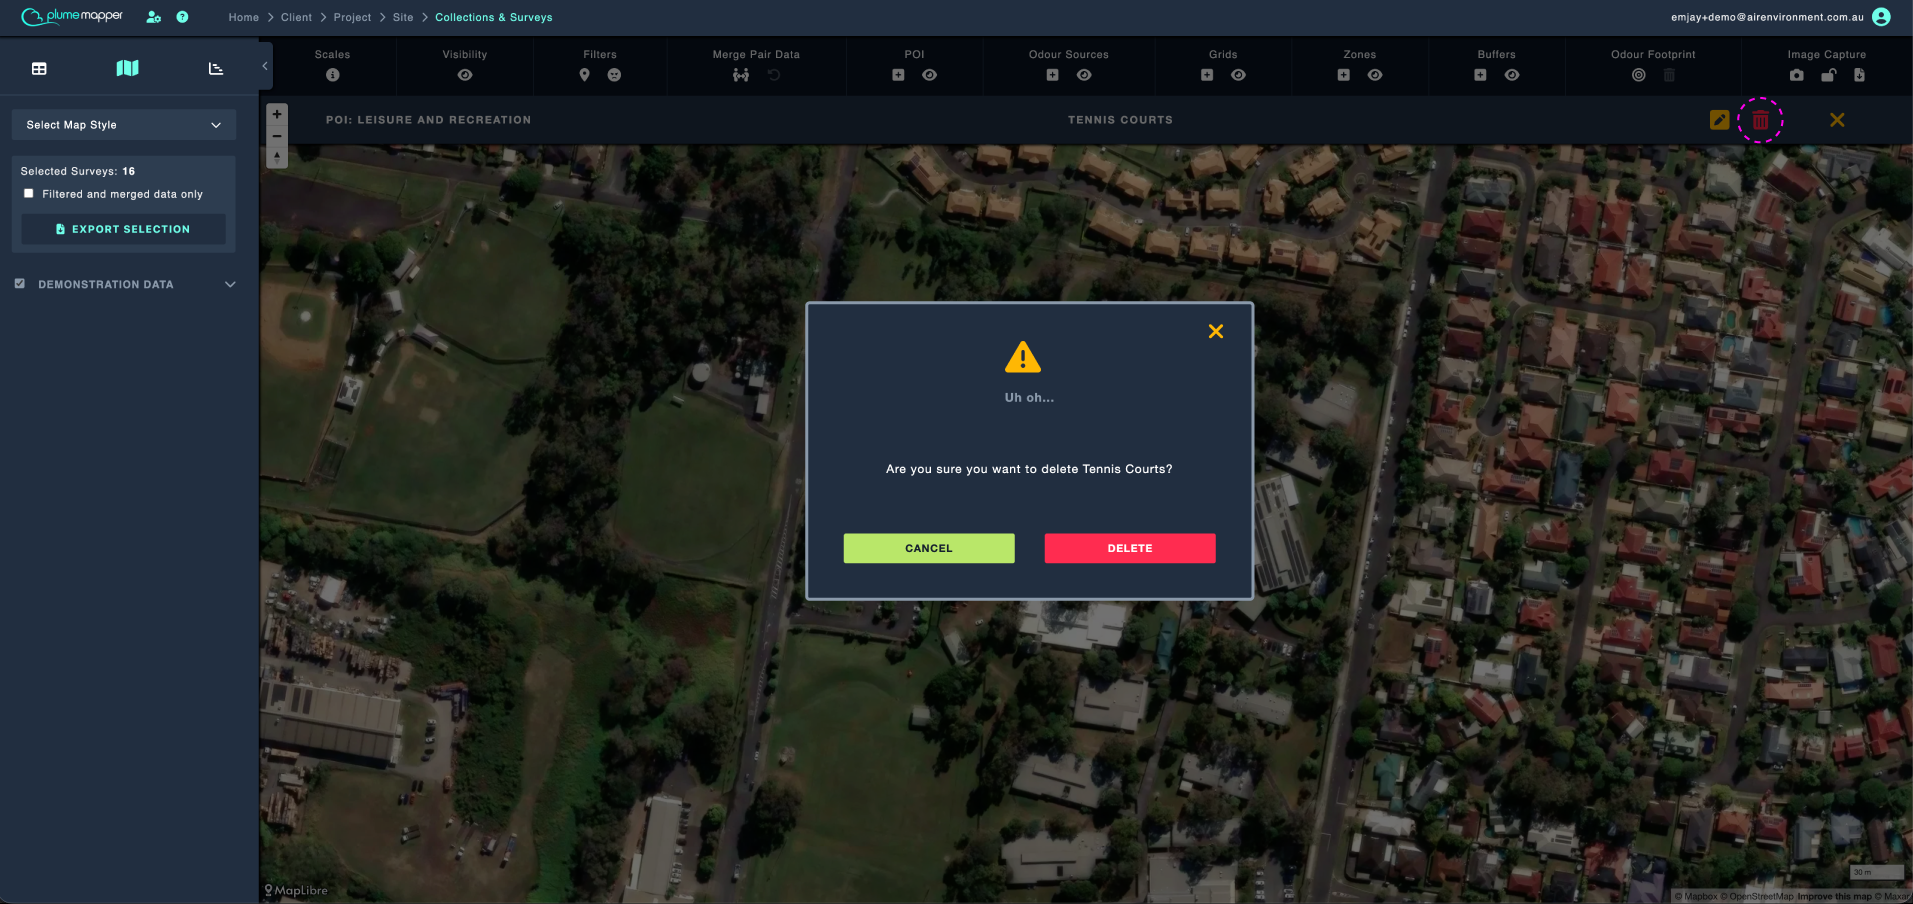
1. Click the POI marker on the map.
2. Click the icon in the banner that appears at the top.
3. Confirm deletion, by clicking Delete in the modal that pops up.
Important: Deleting a POI is permanent and cannot be undone.