Import Site Features
You can import zones, grids and POIs into a site instead of drawing them one at a time on the map.
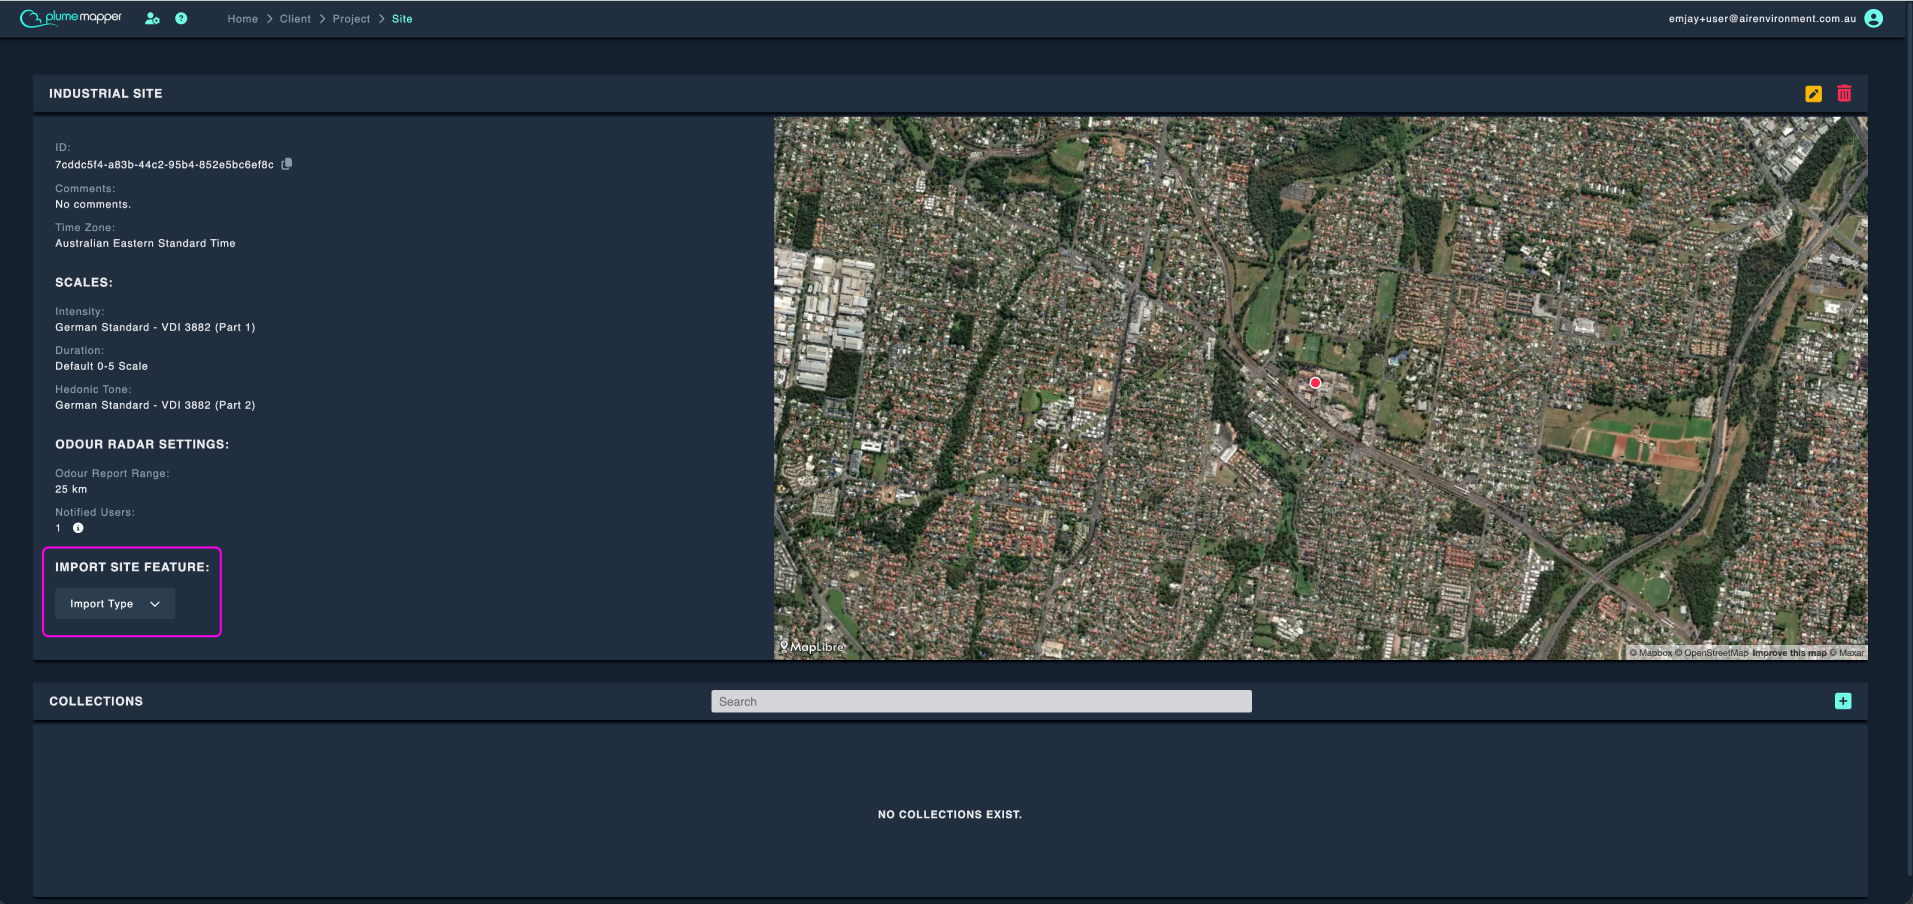
Importing is done from the site page, under the Import Site Feature heading.
1. Navigate to the site you want to import into.
2. Click the Import Type dropdown.
3. Select Zone, Grid or POI to open the importer.
Every importer works the same way:
- Upload your data.
- The map previews what was found and zooms to fit it.
- Click Next to move to the review screen.
- Adjust the features, then save them to the site.
Note: Nothing is added to the site until you save on the review screen.
Import Zones
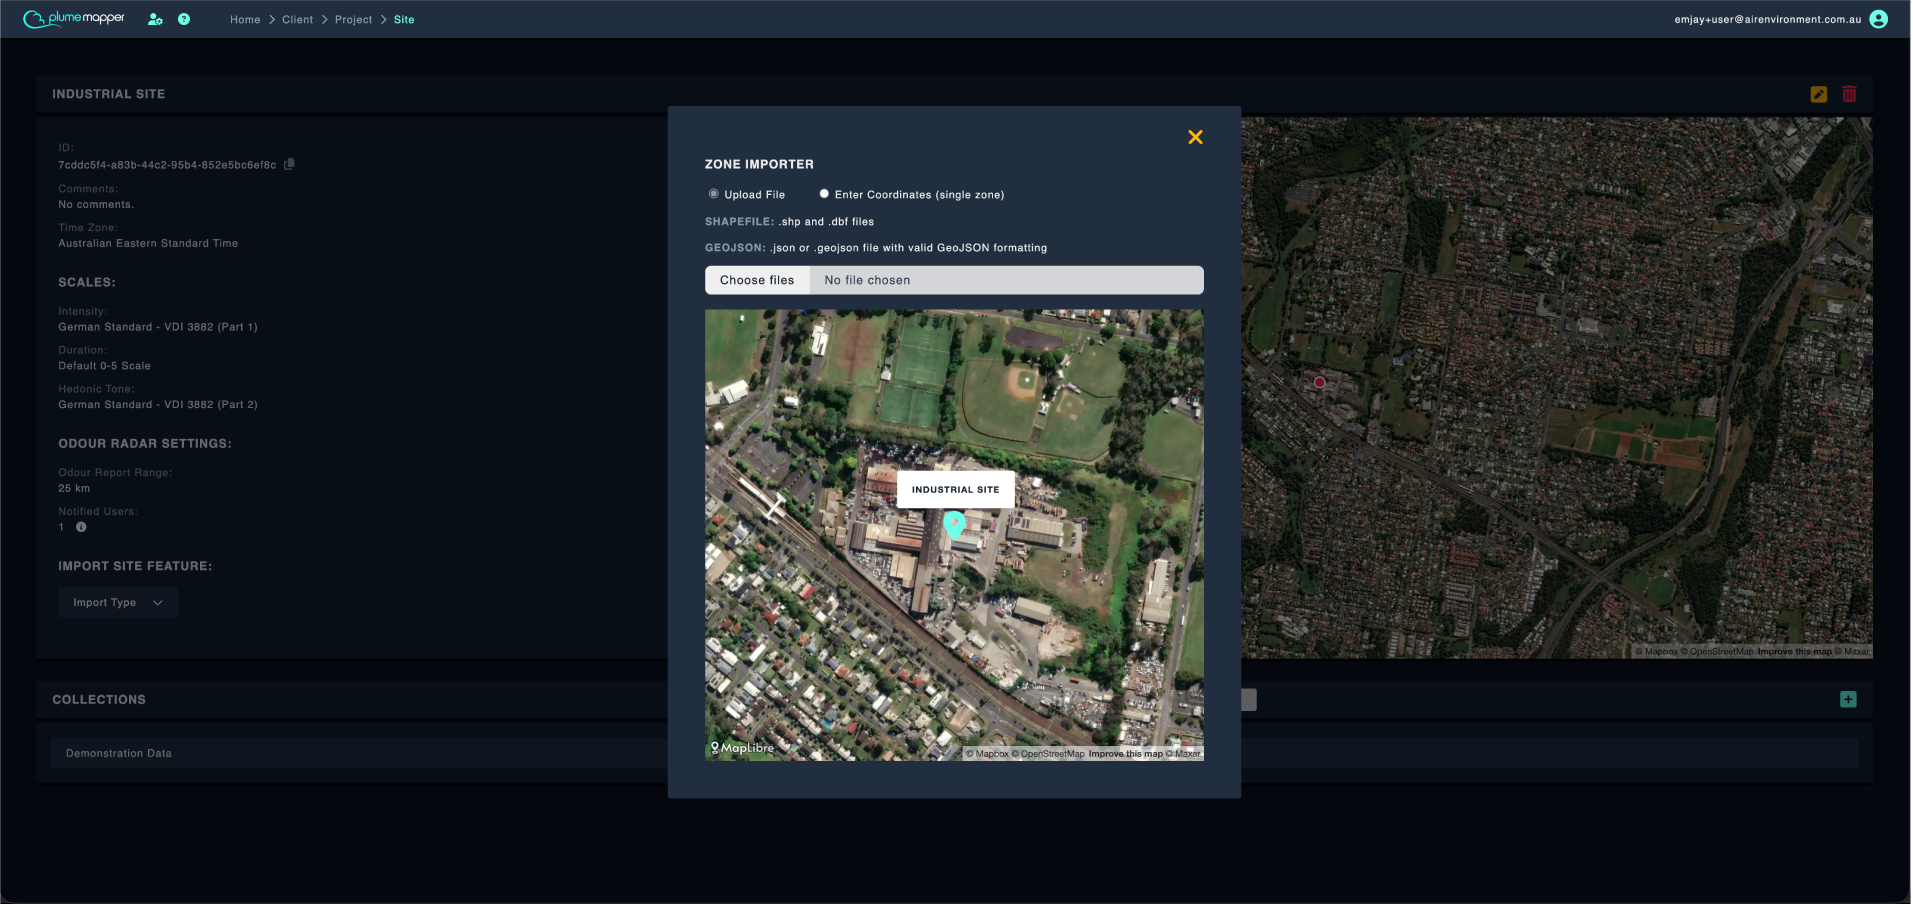
Zones can be imported from a file, or by entering the coordinates for a single zone.
Upload a File
1. Select Upload File.
2. Click the file input and choose your data.
- Shapefile: .shp and .dbf files - either as a .zip, or by selecting the individual files together. The .prj, .cpg and .shx files can be included.
- GeoJSON: a .json or .geojson file with valid GeoJSON formatting.
3. The zones will render on the map in pink once they have been read.
Note: If the file uses a projected coordinate system, the coordinates are converted automatically using the site’s UTM zone. If the file is too large you will be asked to try a smaller one.
Enter Coordinates (Single Zone)
1. Select Enter Coordinates (single zone).
2. Enter an array of coordinate pairs in the text field: [ [lng, lat], [lng, lat] ].
- Hemisphere suffixes are accepted, for example
153.02E. - The pairs can be entered as either [lng, lat] or [lat, lng].
3. The zone will render on the map once the coordinates are valid.
Review Zones
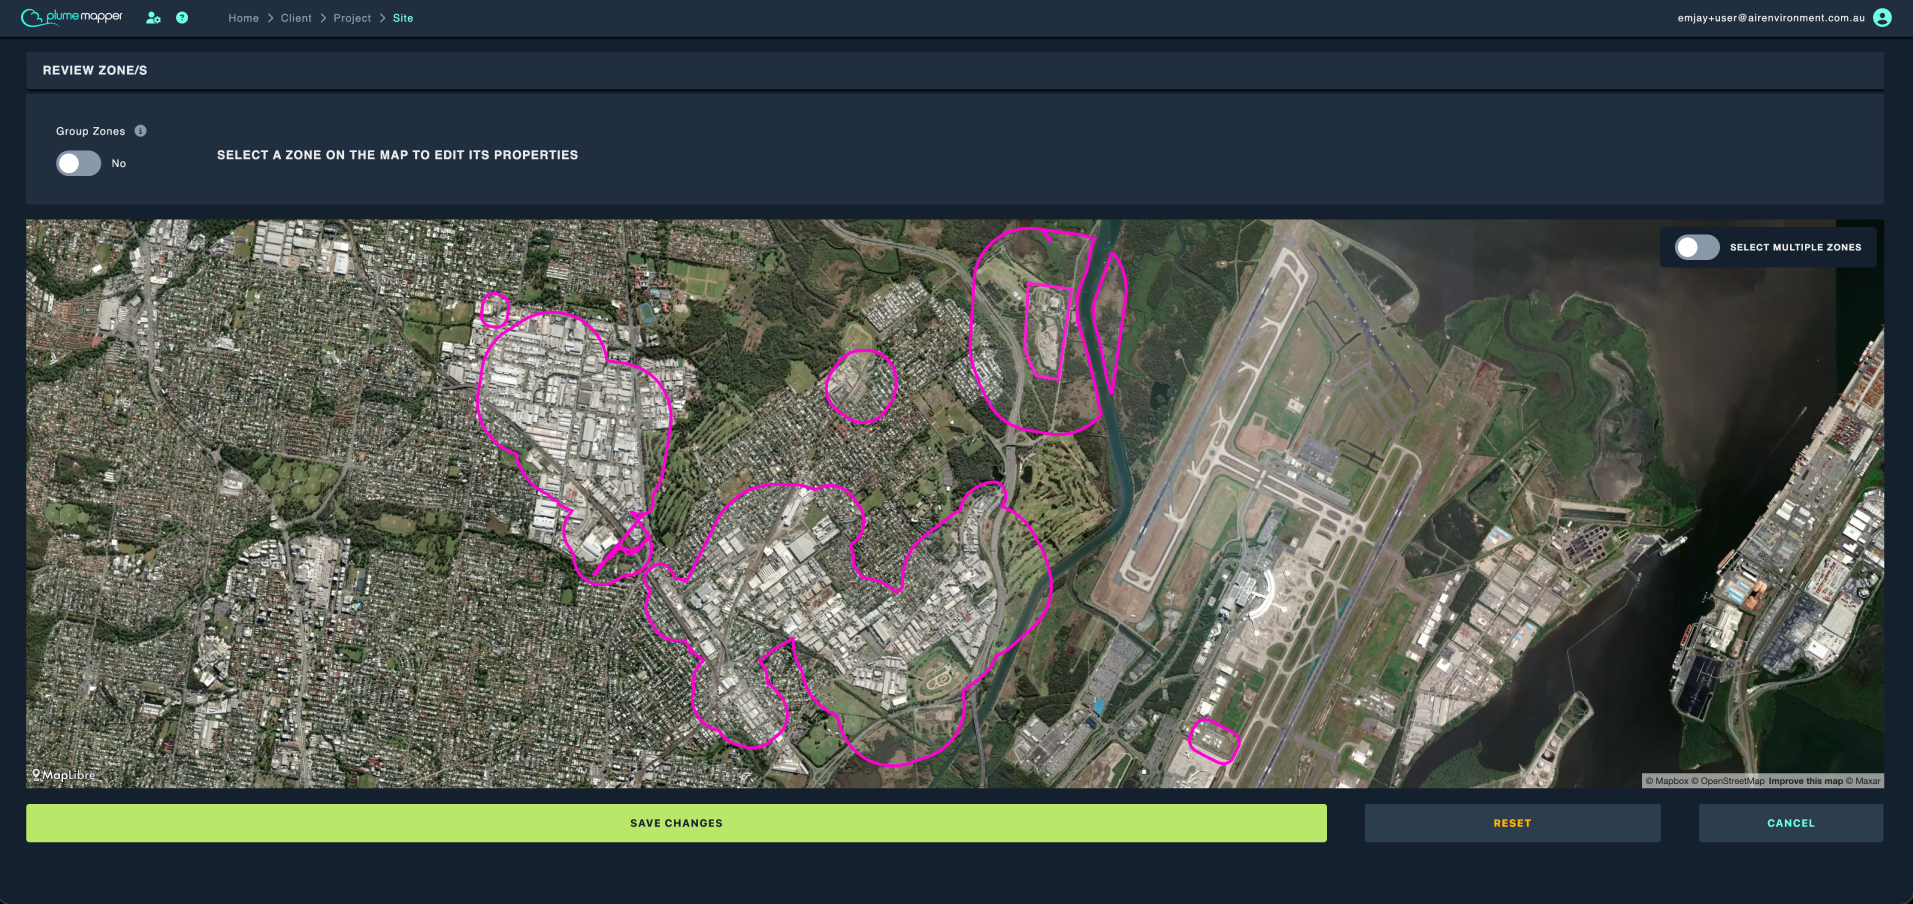
1. Click Next.
2. Click a zone on the map to edit its properties.
- Edit the Name and the Type (source, receptor or boundary).
- Change the colour and line type.
- Delete the zone with the icon.
3. Toggle Select Multiple Zones to edit more than one zone at a time.
- Choose a select mode: drag a box around the zones, or click them individually.
4. Toggle Group Zones to combine the imported zones into a single grouped zone.
- Choose the group type, then enter a Group Name.
5. Click Save Changes to add the zones to the site.
- Click Reset to discard your edits and start the review again.
- Click Cancel to leave without saving.
Note: Imported zones default to the boundary type, so set the type on any zone you intend to use as a source or receptor.
See zones for more information on how zones are used.
Import Grids
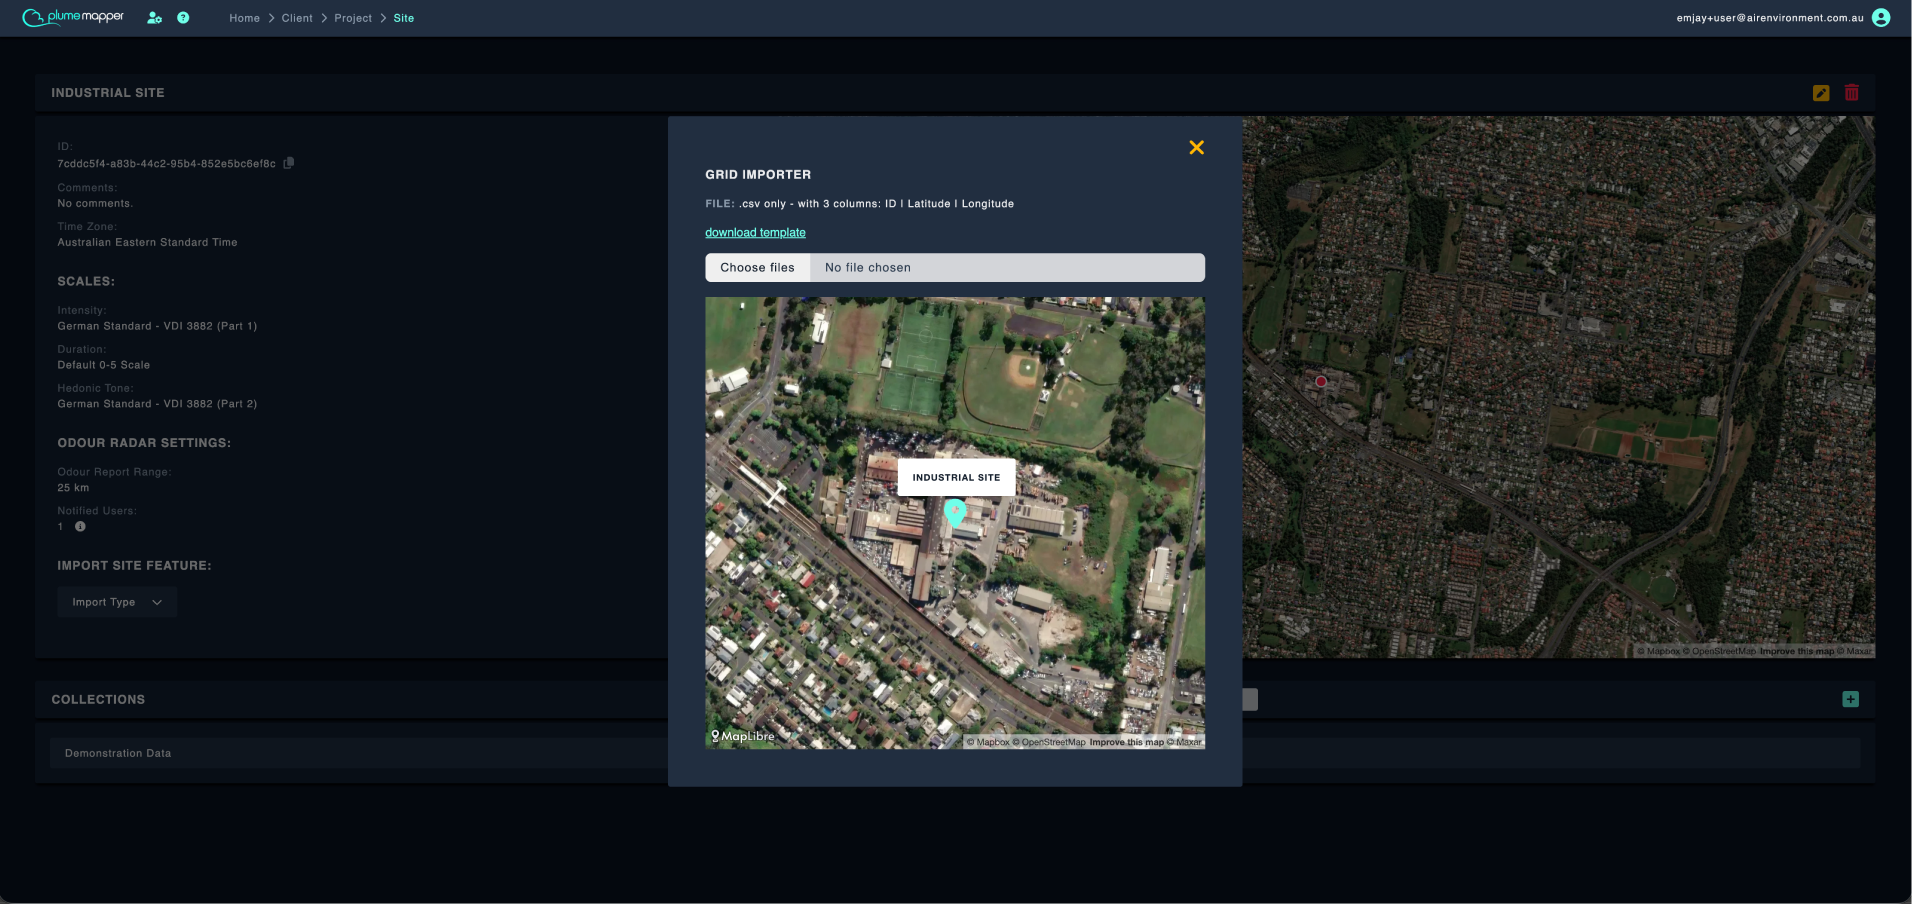
Grids are imported from a CSV file.
1. Select Grid from the Import Type dropdown.
2. The file must be a .csv with 3 columns: ID | Latitude | Longitude.
- Click download template for a correctly formatted file to fill in.
3. Click the file input and choose your CSV.
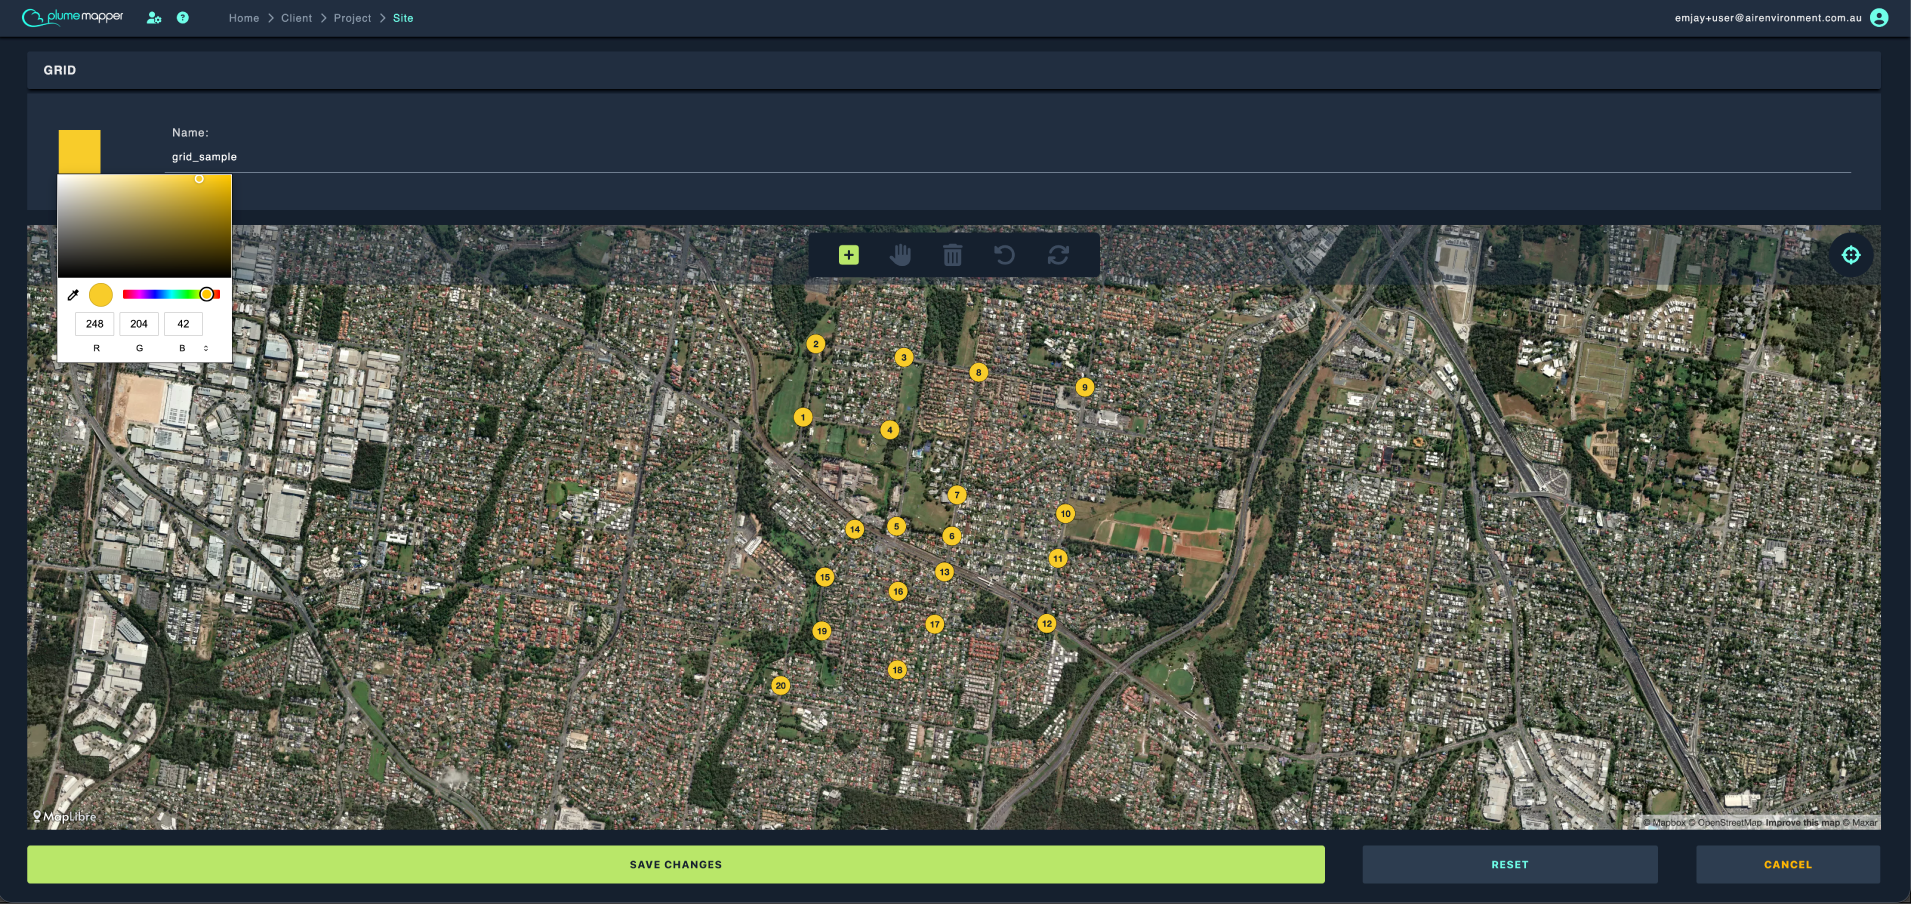
4. The grid points will render on the map once they have been read.
5. Click Next.
Review the Grid
1. Enter a Name for the grid and choose a colour.
2. Click a grid point on the map to select it.
- Update the Latitude and Longitude in the panel, then click Update Coordinates.
- Or drag the point to its new location.
3. Use the map toolbar to:
- add points - click on the map to place each one, then exit add mode.
- deselect the selected point.
- delete the selected point.
- undo the last action.
- reset the grid points back to the imported state.
4. Click Save Changes to add the grid to the site.
- Click Reset to discard your edits and start the review again.
- Click Cancel to leave without saving.
Note: Grid names must be unique per site.
See grids for more information on how grids are used.
Import POIs
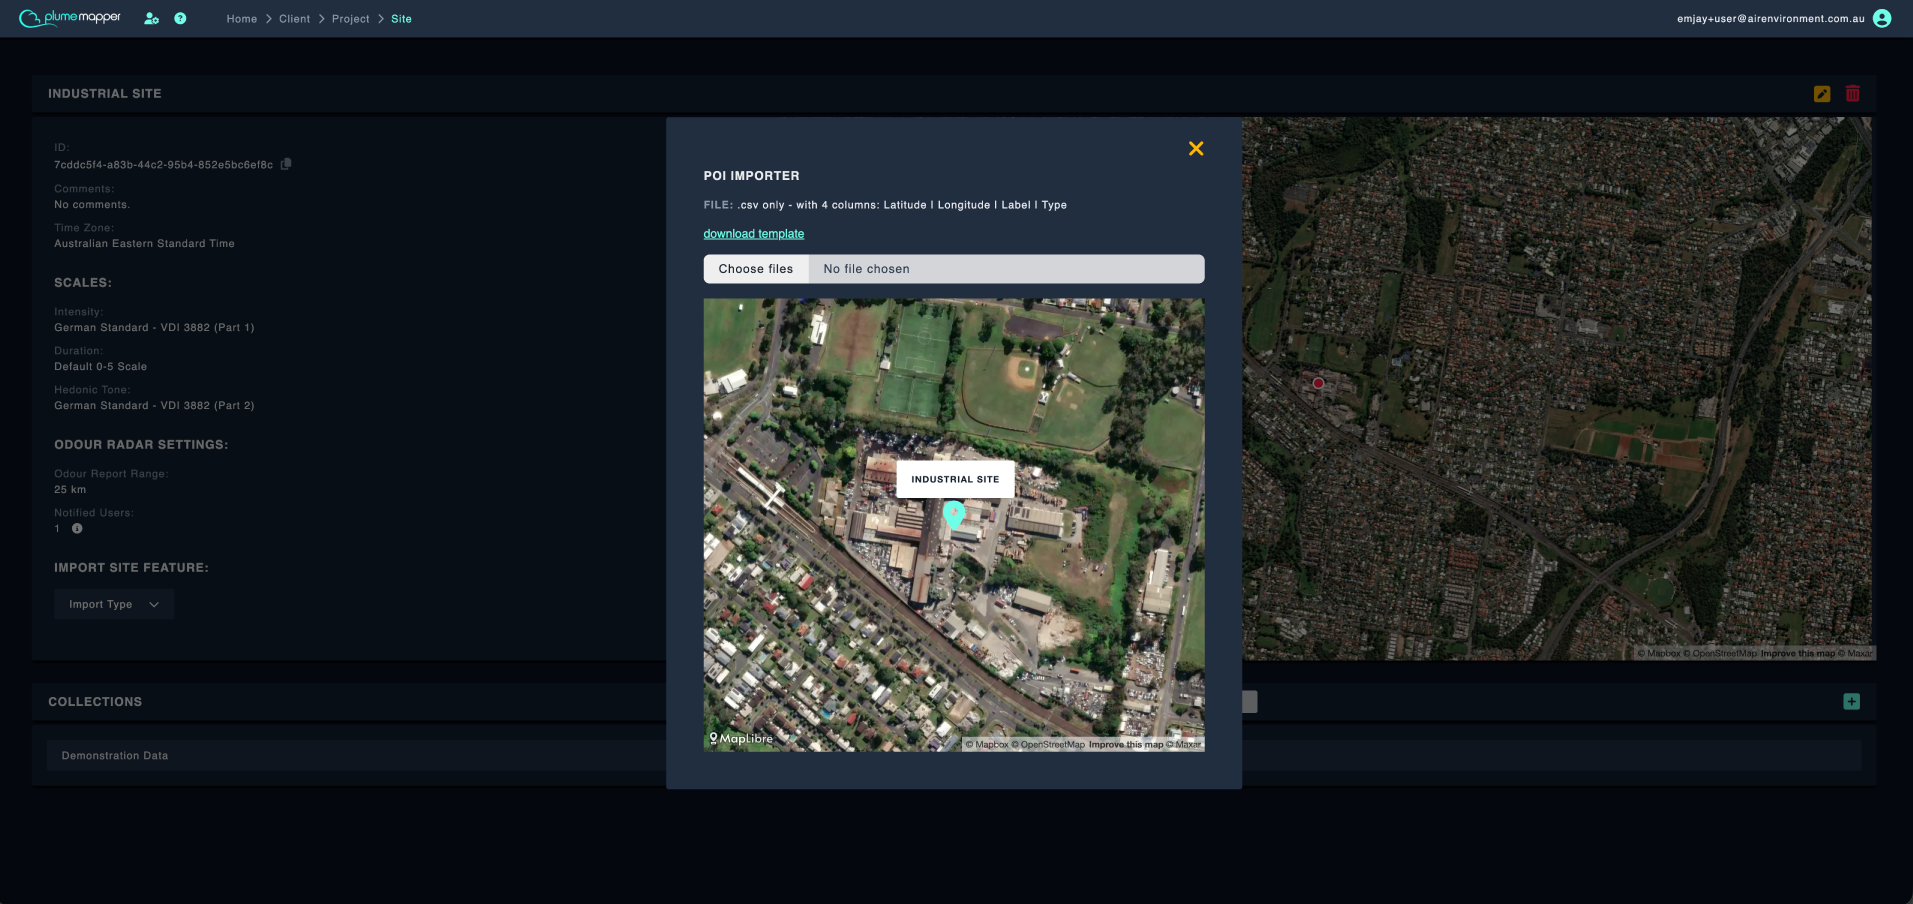
POIs are imported from a CSV file.
1. Select POI from the Import Type dropdown.
2. The file must be a .csv with 4 columns: Latitude | Longitude | Label | Type.
- Click download template for a correctly formatted file to fill in.
3. Click the file input and choose your CSV.
4. The POIs will render on the map once they have been read.
5. Click Next.
Review the POIs
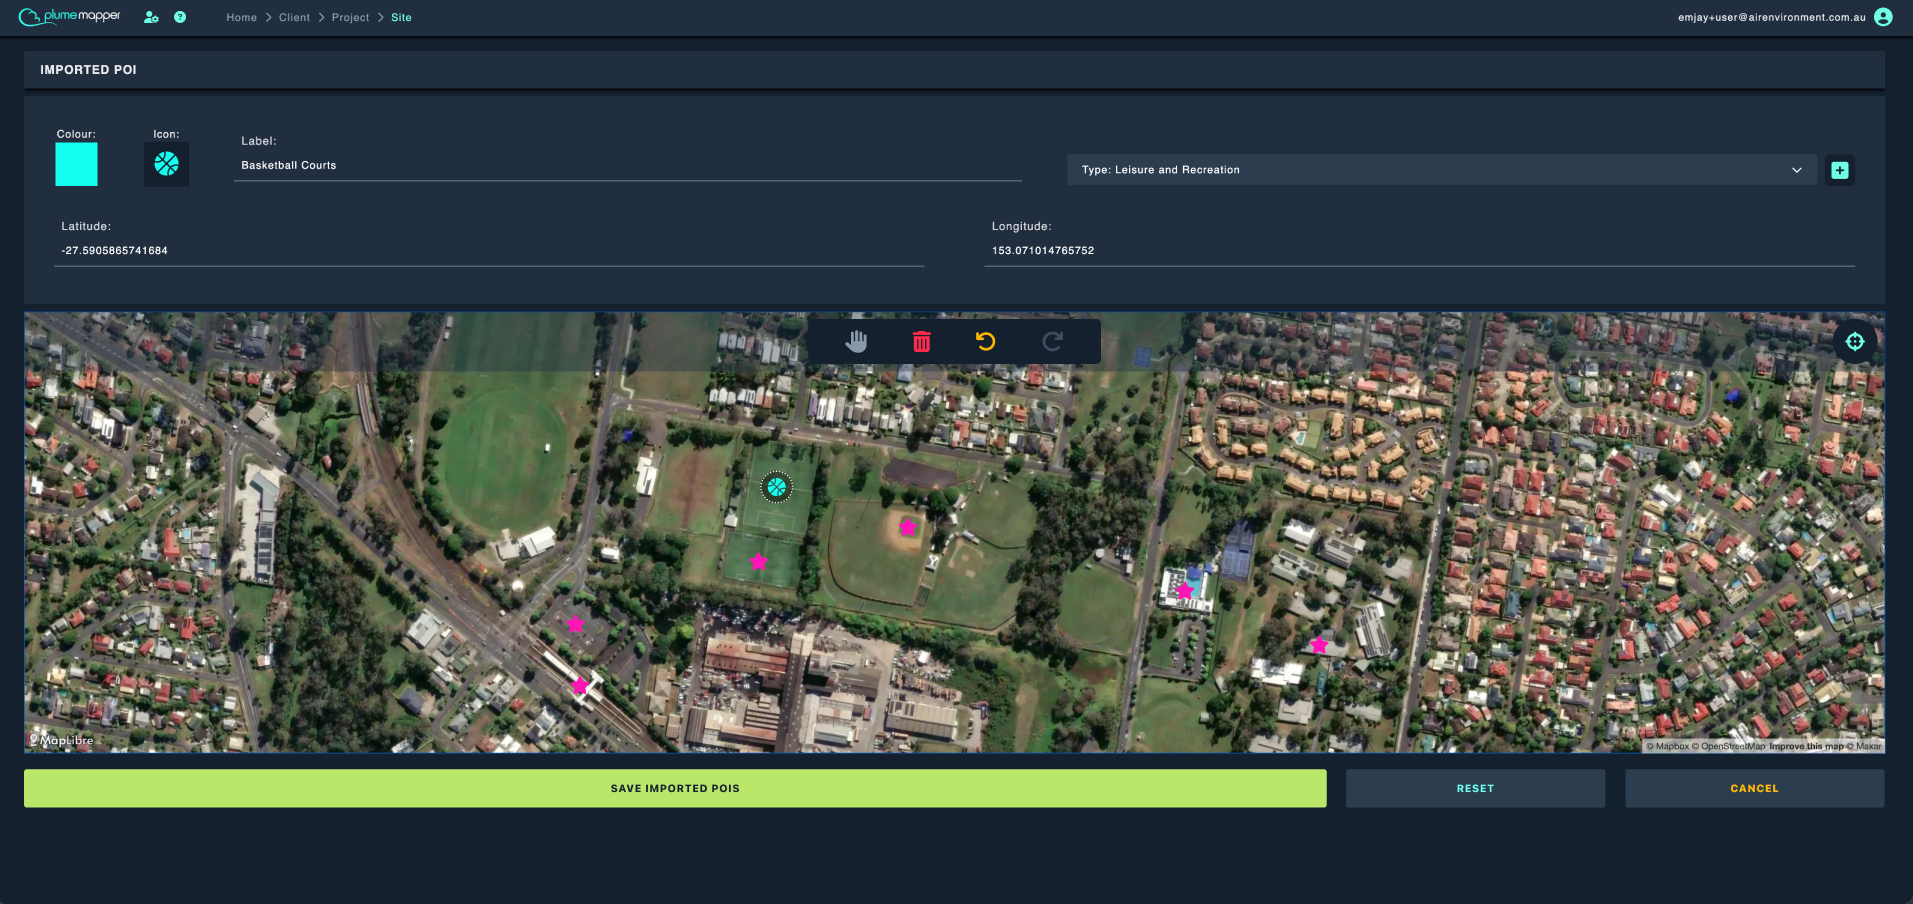
1. Set a Global POI Colour to apply one colour to every imported POI.
2. Click a POI on the map to edit it individually:
- Label
- Type - select an existing type, or add a new one.
- Colour and Icon
- Latitude and Longitude
3. Click Save Imported POIs to add them to the site.
- Click Reset to discard your edits and start the review again.
- Click Cancel to leave without saving.
Note: Each POI label must be unique per site. POI types are stored in your company-wide root settings, not per site.
See POI for more information on how points of interest are used.