Instantaneous Measurements
Dynamic Plume Method.
This feature is accessed via the survey map screen by pressing the button on the bottom of the screen.
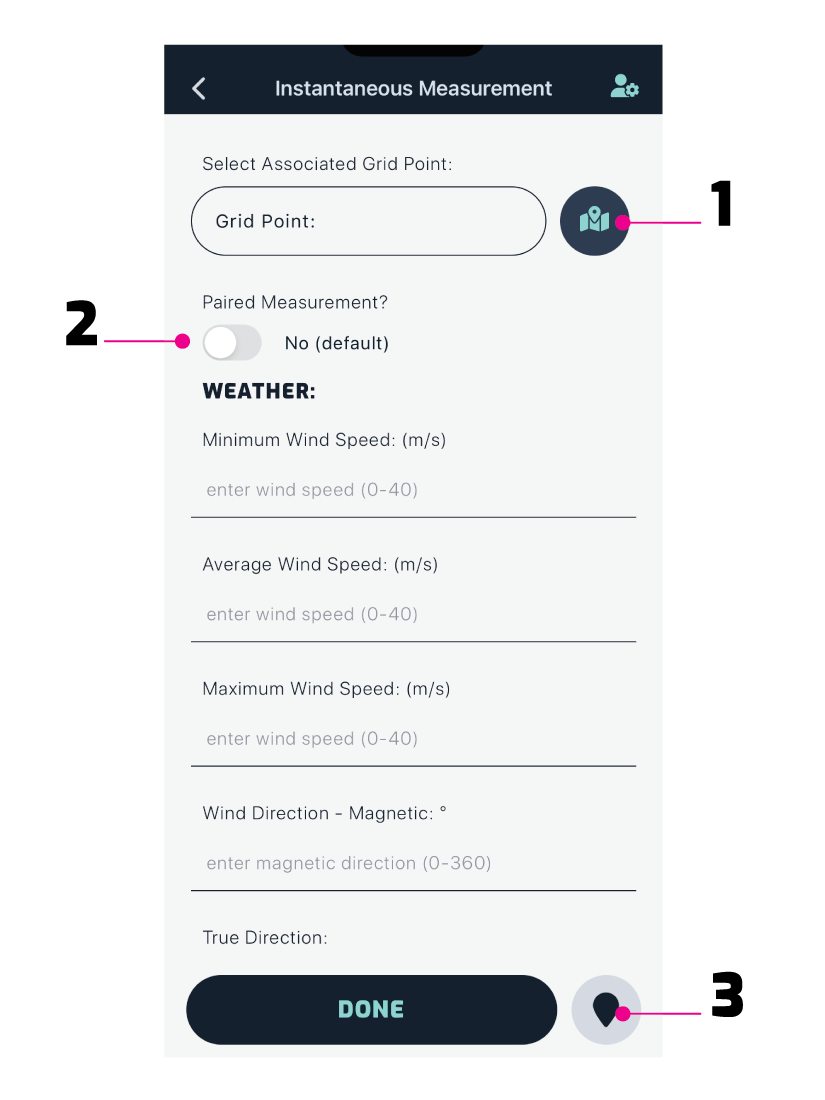
1. Associated Grid Point
This feature will only appear if the site has transect grids set up.
You can select the grid point ID from the dropdown menu or press the button to bring up a map with all grid points as shown below. Select the associated point by pressing it.
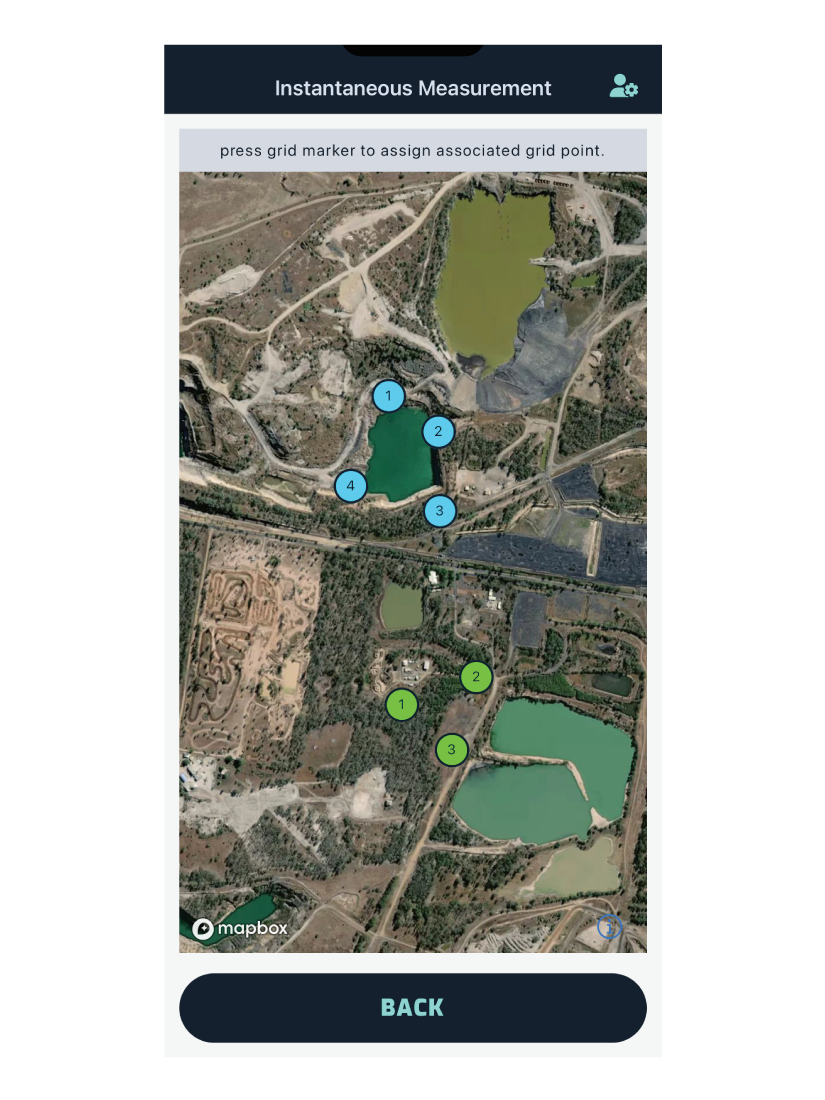
When using grids; this is how a user can identify a measurement that is associated to a specific grid point (location).
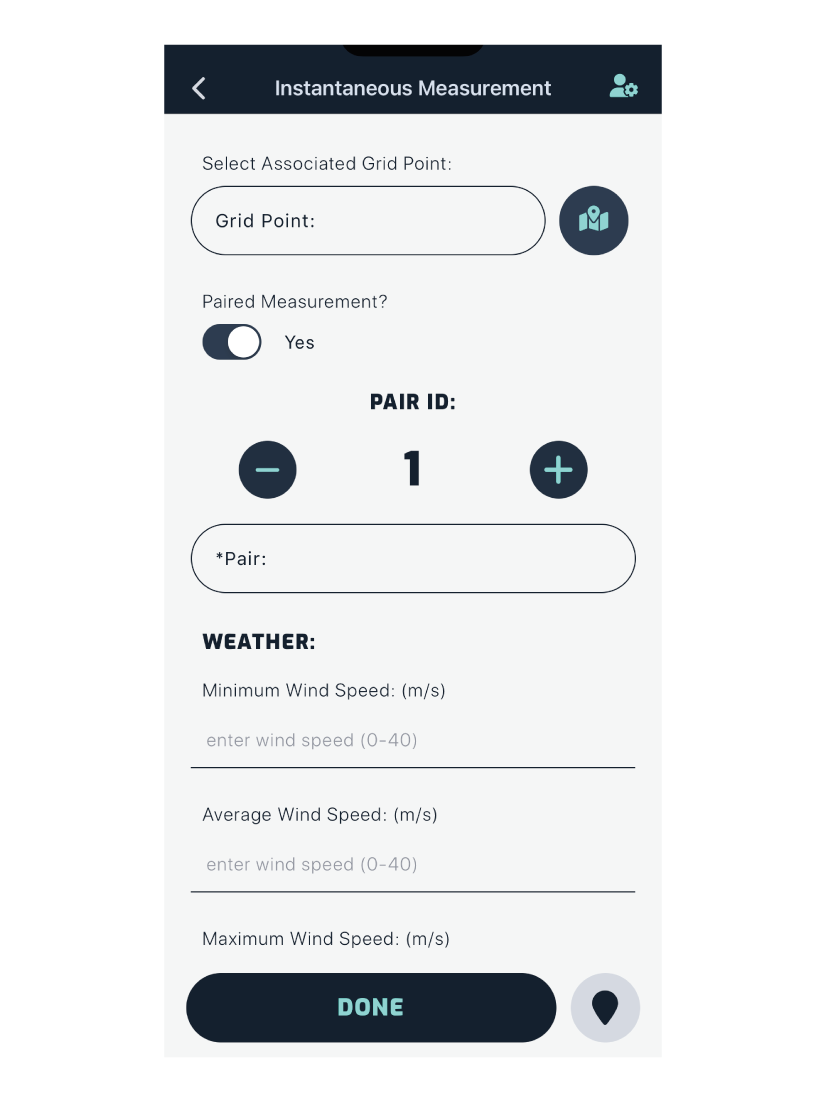
2. Paired Measurement
By default a measurement is unpaired, if you are collecting paired data, toggle the switch to yes. A dropdown will appear with a list of all the surveyors on the field, select the person you are working with and continue.
Note:
It is crucial that your partner has the same pair ID as you for each paired measurement.
You can manage this by (+) incrementing or (-) decrementing the ID
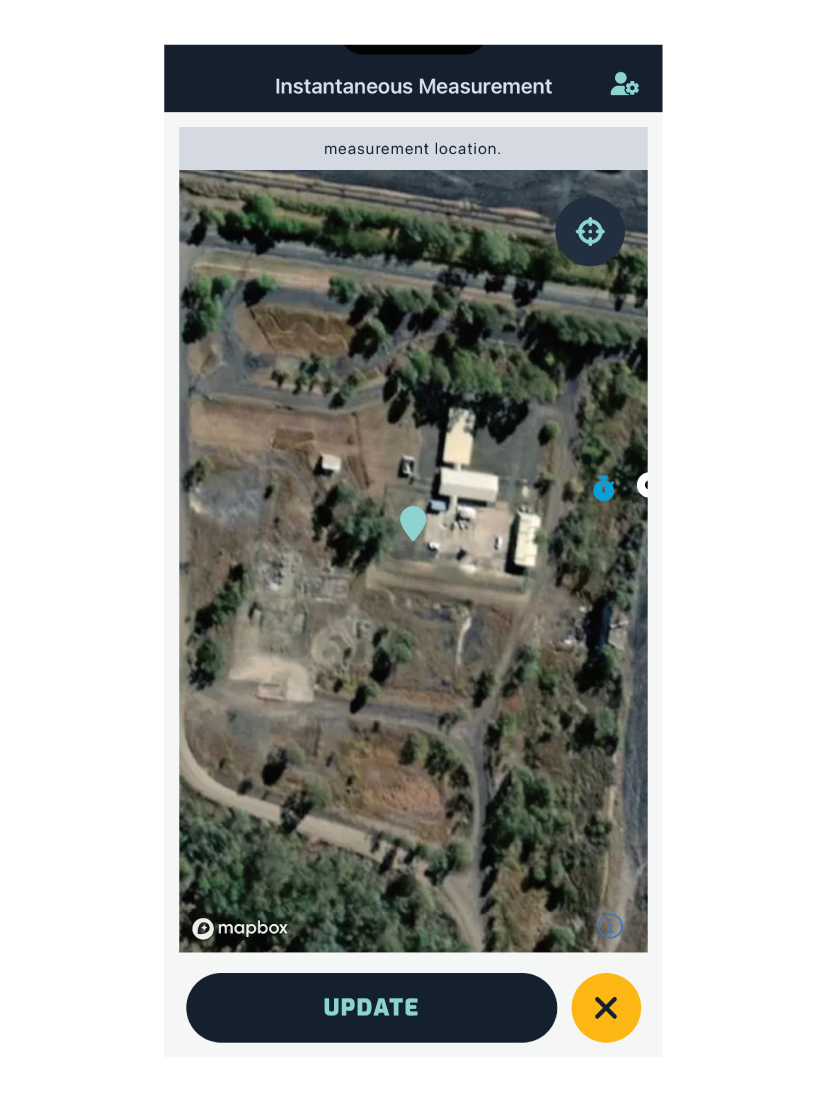
3. Measurement Location
When in GPS mode, the measurement location will be where your GPS location marker is on the survey map.
Due to inaccurate GPS, you can update the measurement location, by panning the map until the is correctly situated, then press update.
Note:
This map will automatically pop up if the location was not populated or if another measurement is within 0.5m of an existing measurement point.
Weather Data
In the weather section the user can enter weather conditions such as:
Wind Speed:
- Minimum
- Average
- Maximum
Wind Direction:
- Magnetic
- True; automated when magnetic direction is entered
Temperature:
- WetBulb
- DryBulb
Rain & Cloud:
- Precipitation
- Cloud Coverage
- Cloud Type
Other:
- Surface atmospheric pressure (hPa)
- Relative humidity
Odour Data
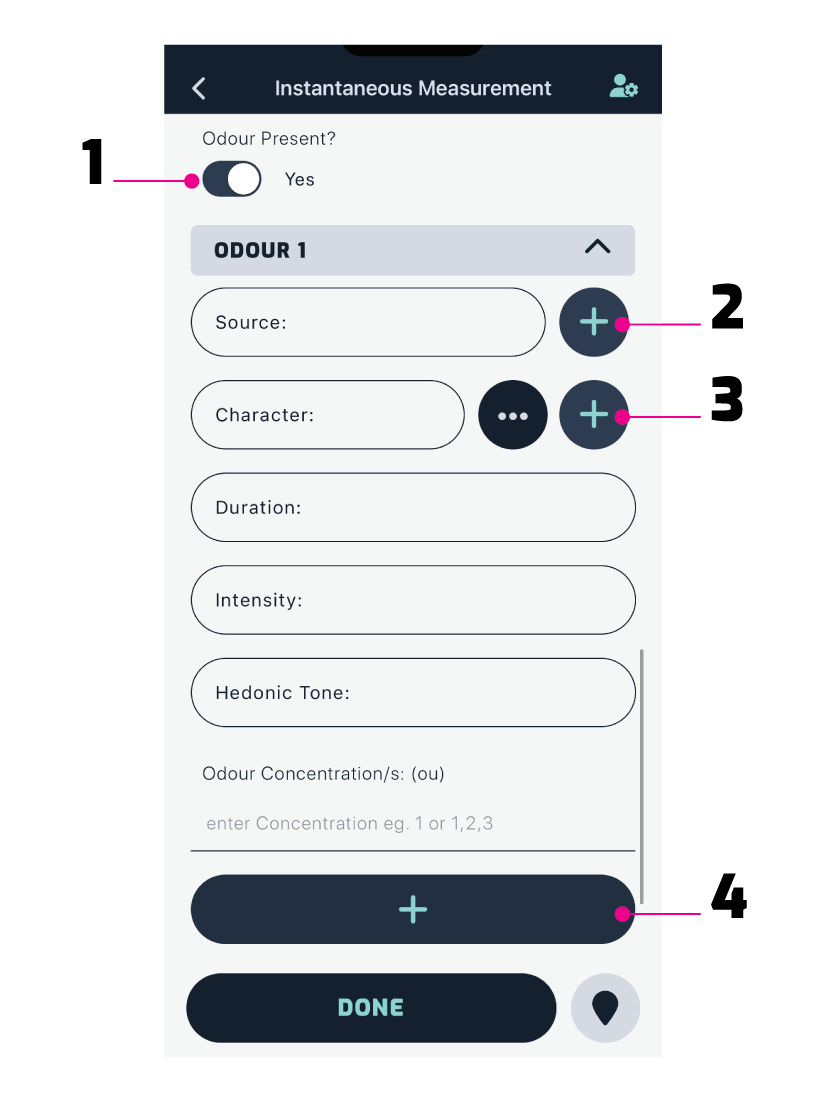
1. Is odour present?
By default the odour status is no odour, if there is odour present, toggle the switch to the yes position. This will reveal the odour form. As shown above.
2. Odour Source
Any existing odour sources on a site will populate in the dropdown. To add a new source, press the + button and you will be navigated to the add new odour screen.
3. Odour Character
Any existing odour characters will populate in the dropdown. To add a new character, press the + button and enter the name of the character.
To choose characters from the character wheel (below), press the button, then choose a category which will open up sub categories to choose from.
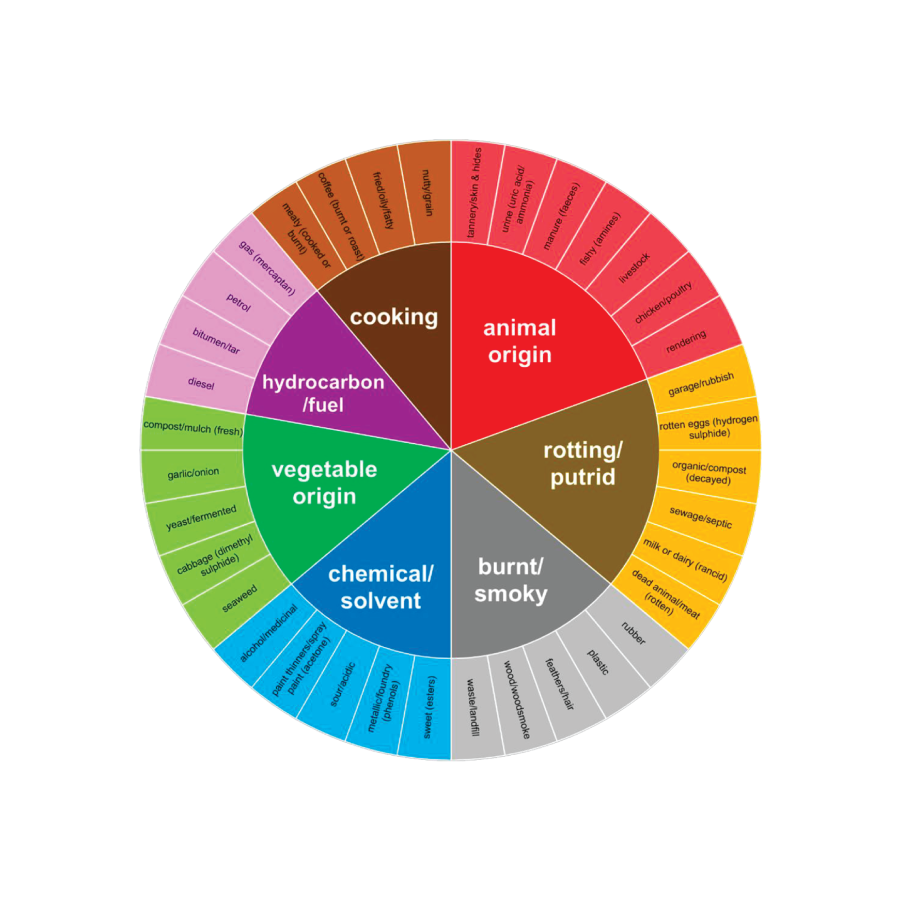
*Sourced from: VIC EPA - Guidance for field odour surveillance - 2021, Document.
Duration
German Standard:
- Not Present (0)
- Fleeting/Transient (1)
- Intermittent/Occasional (2)
- Mostly Present (3)
- Continuously Present (4)
- Other (5)
EPA Victoria:
- Transient (0)
- Frequent/Repetitive (1)
- Constant (2)
Intensity
VDI 3882 Part 1
- Not Detectable (0)
- Very Weak (1)
- Weak (2)
- Moderate (3)
- Strong (4)
- Very Strong (5)
- Extremely Strong (6)
EPA Victoria
- No Odour (0)
- Subtle (1)
- Obvious (2)
Hedonic Tone
VDI 3882 Part 2
- Extremely Unpleasant (-4)
- Very Unpleasant (-3)
- Moderately Unpleasant (-2)
- Slightly Unpleasant (-1)
- Neutral (0)
- Slightly Pleasant (1)
- Moderately Pleasant (2)
- Very Pleasant (3)
- Extremely Pleasant (4)
Odour Concentration
If available the user can record odour concentration/s. To add multiple entries, separate each number with a comma.
4. Recording Multiple Odours
If there are multiple odours detected, press the + button after each odour.
Each odour entry will populate a form (as seen in the above image), you can review and delete each odour entry.
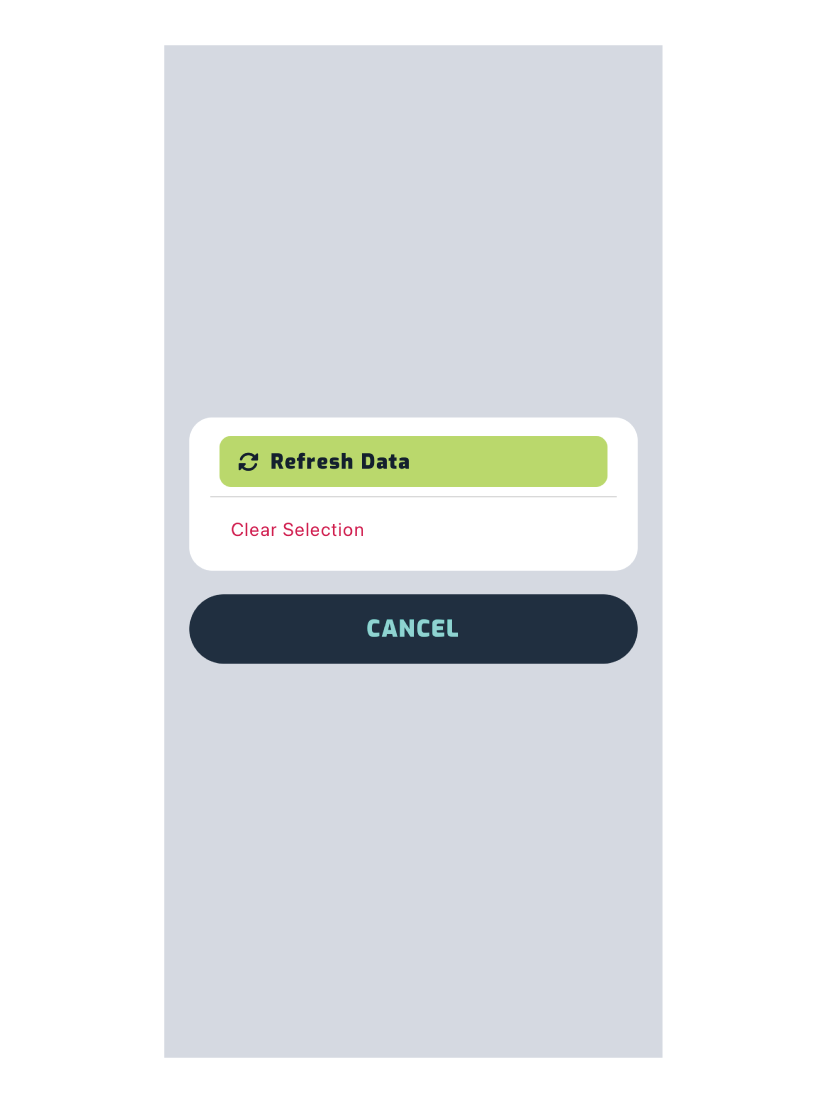
Syncing Site Data
When selecting the associated grid point, character or source from their respective dropdowns. There is a refresh data button, as shown below. If another assessor has added a new source, character or grid point and it does not populate in your dropdown, pressing this will update the content in the dropdown.
Note:
The button can only be pressed once every minute.
Press Done when complete and the measurement will be visible on the survey map screen.