Image Capture
Capture report ready images of the map.
Capturing an Image
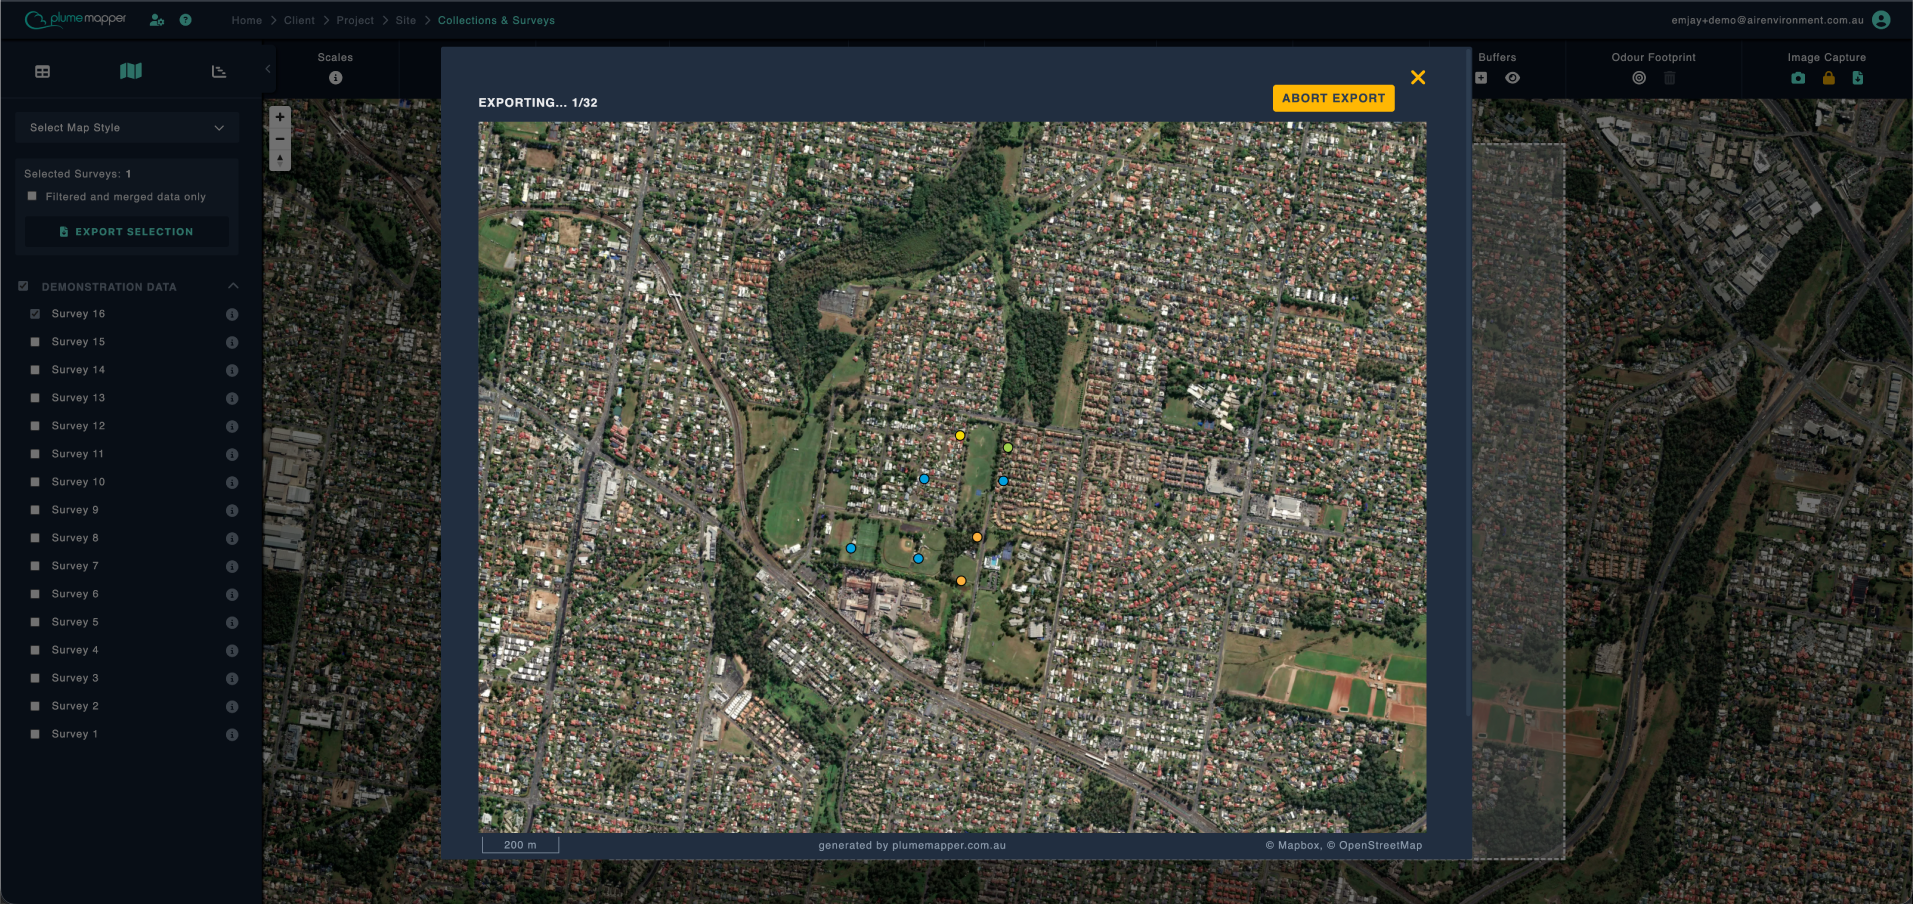
1. Click the icon under Image Capture on the map toolbar, to use the capture feature.
2. Choose the Image Ratio - Rectangle (4:3) or Square (1:1).
3. Zoom and pan the map until its contents are within the white dotted box. This is what will be captured in the final image.
4. Click Capture Image when you are happy with the selection.
Note: The more features within the selection, the longer it takes to capture the image. If the map is still redrawing, the button is replaced with “Map is updating…” - wait for it to finish.
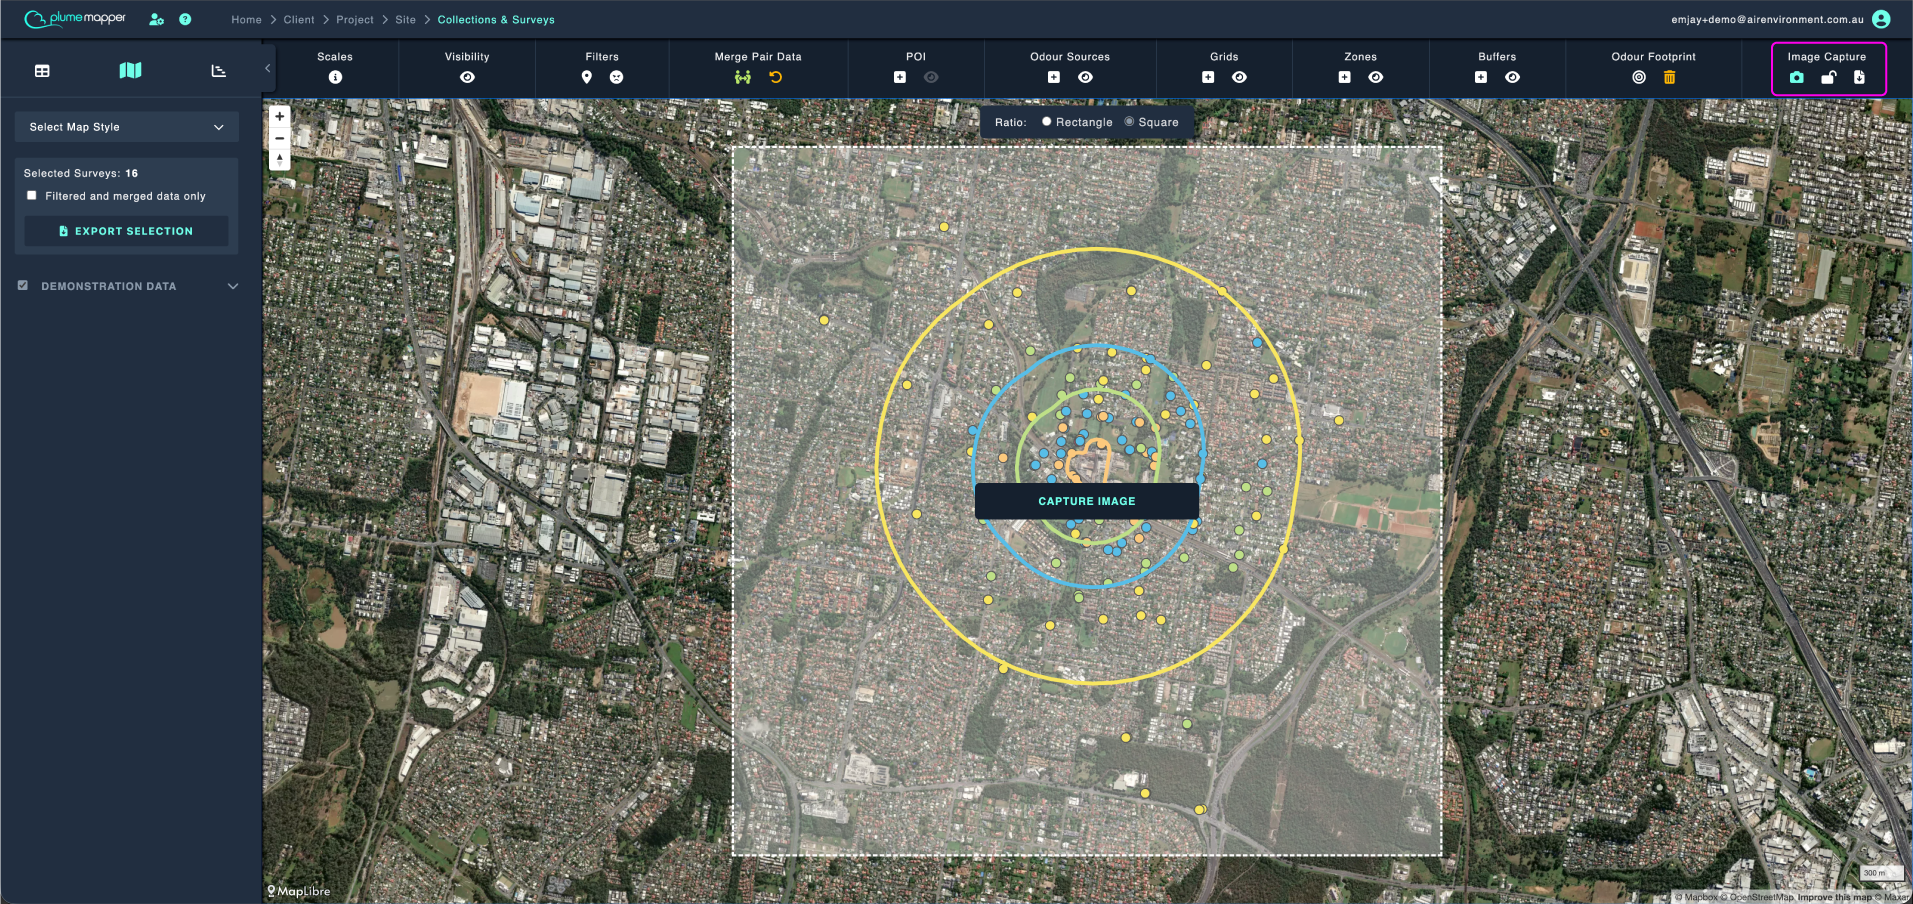
5. Enter a name for the image file.
6. Check any legends or data you want displayed along with the image, from the checkboxes above the download button:
- Compass
- Add Custom Legend
- Zones
- Wind Speed
- Intensity
- Hedonic Tone - replaced by your custom tone scale, if one is enabled for the site
- Filters - only available when filters are applied
- Risk Assessment - only available when a risk assessment is on the map
7. Click the Download button.
Custom Legends
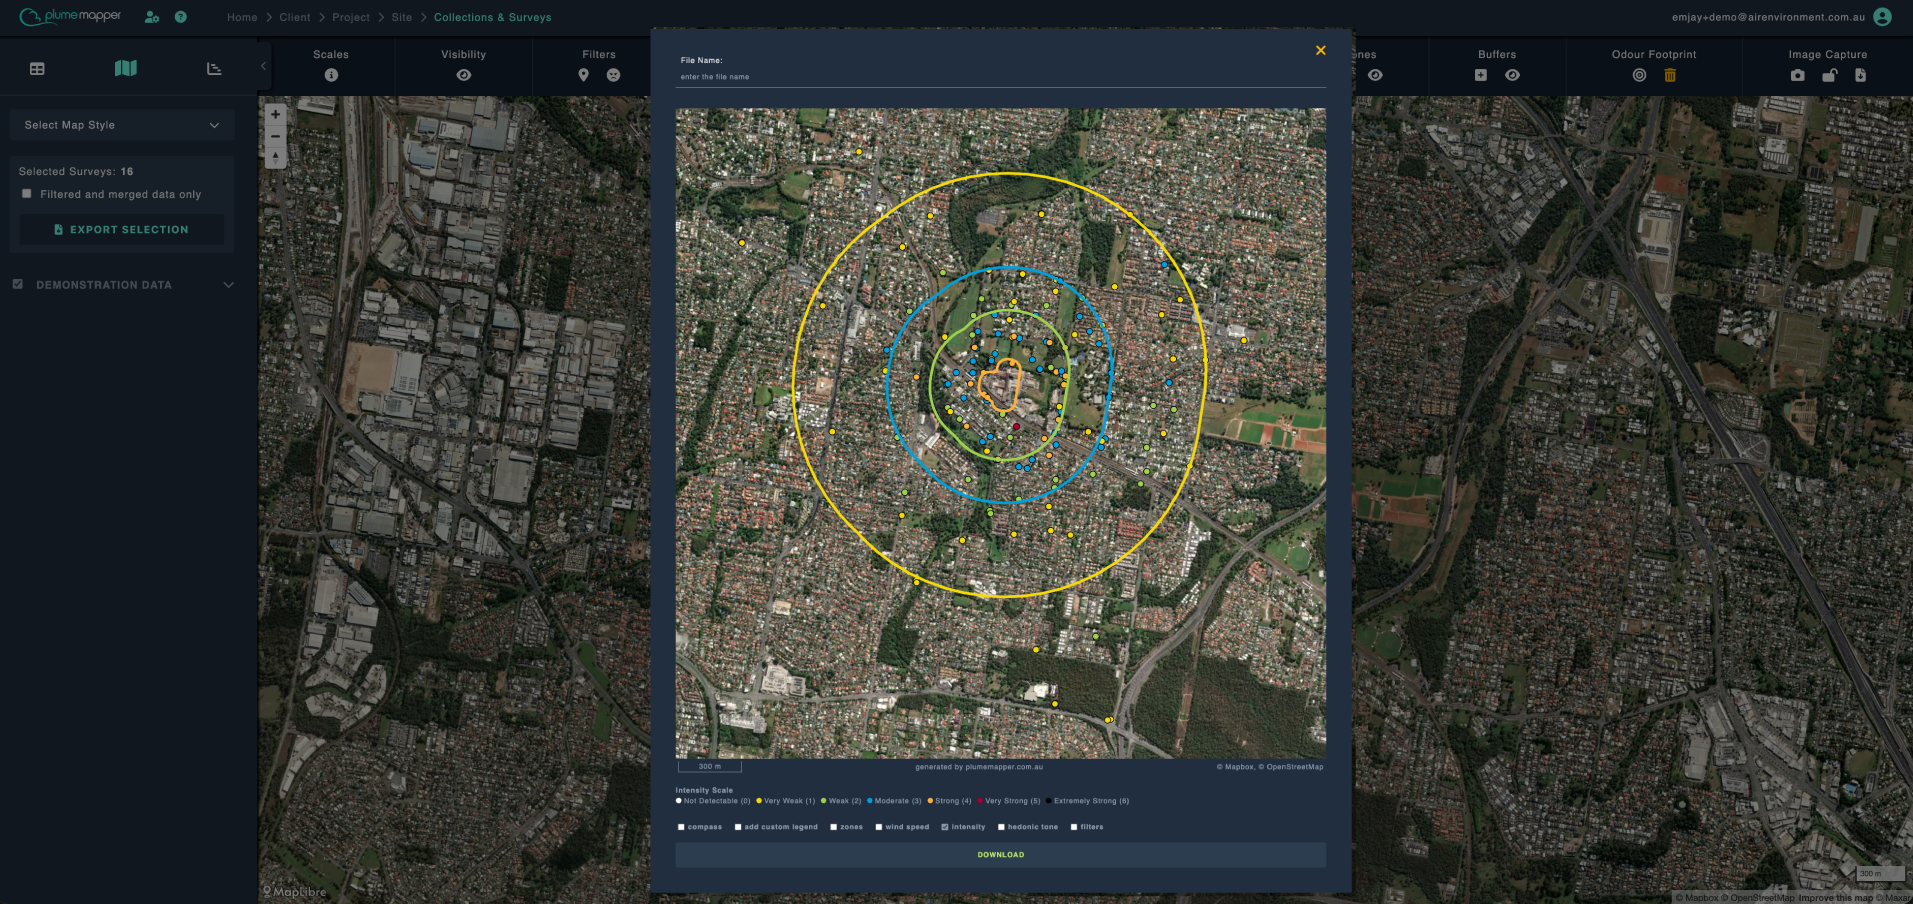
If you want to create custom legends, check the Add Custom Legend selection.
You can add as many labels as you wish:
- Select either fill or outline and the colour for the legend.
- Enter the label name.
- Click Add to legend for each label.
You can click the icon to remove the last added label.
Capture Lock
Click the icon under Image Capture on the map toolbar, to lock the framing.
- Position the map, then click the Lock Area button.
- While locked, the map cannot be panned or zoomed during capture, so every image uses exactly the same bounds.
- The icon turns orange and changes to while a lock is set. Click it again to release the lock.
Note: This is useful when you need a set of images that line up with each other in a report.
Bulk Export
Click the icon under Image Capture on the map toolbar, to access the Bulk Export Wizard.
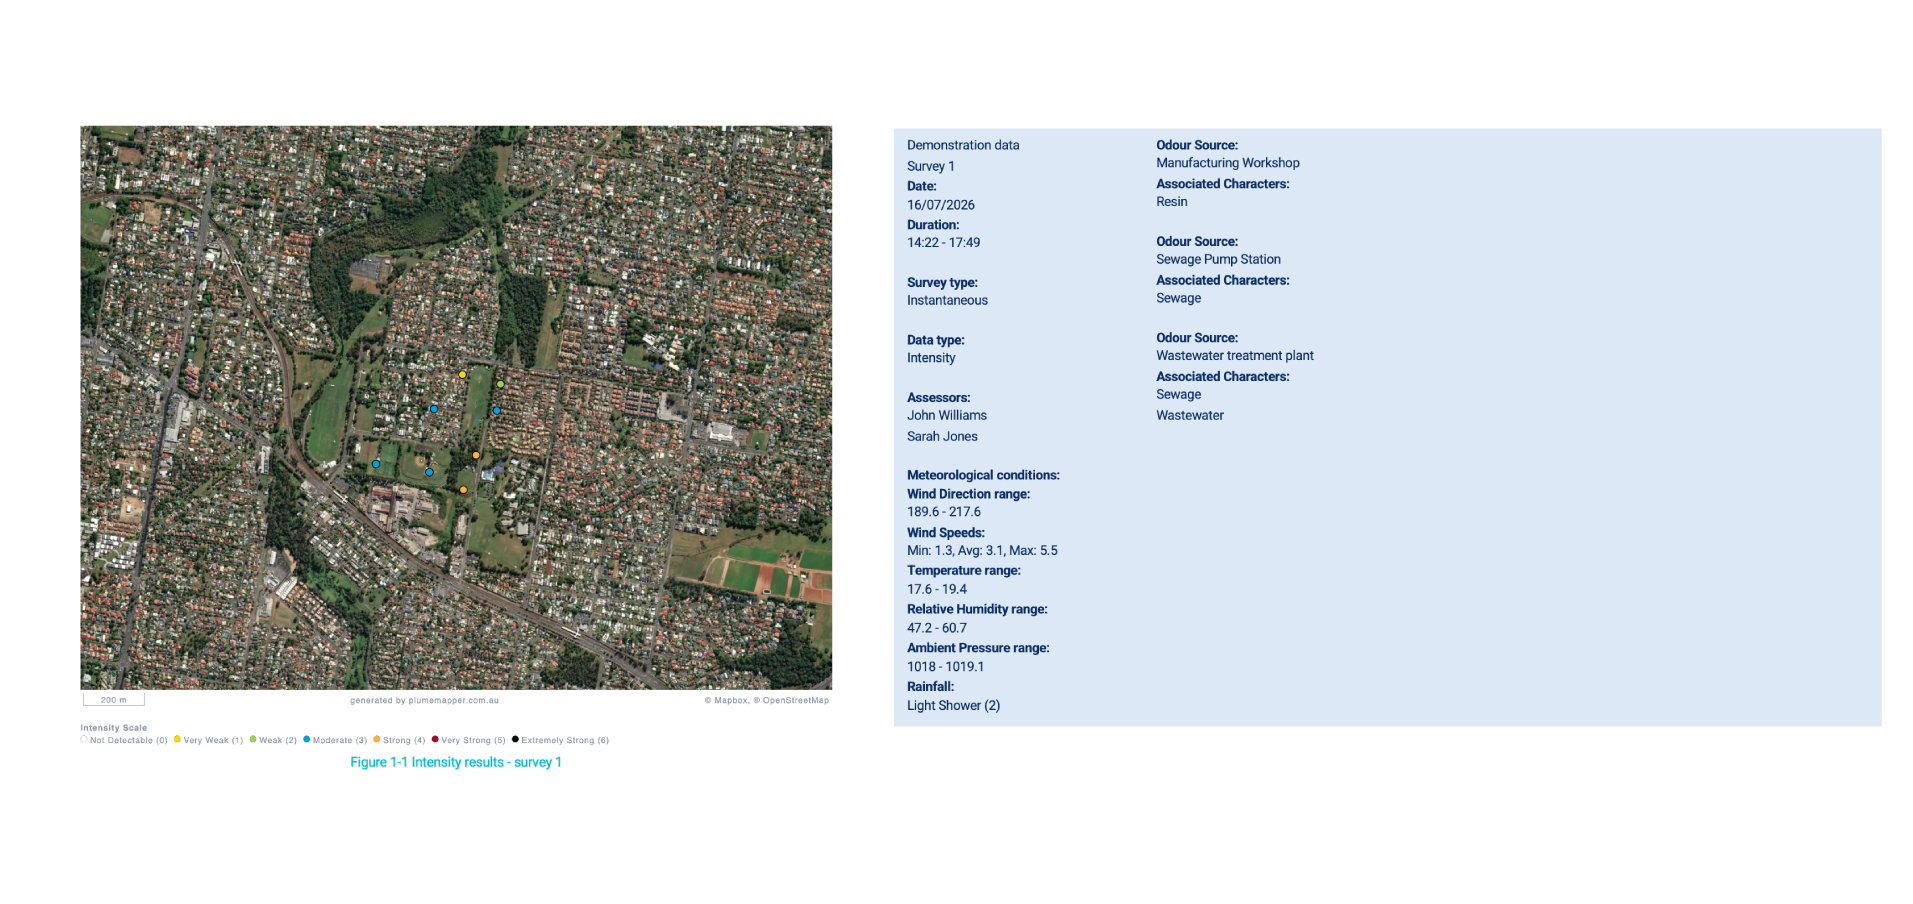
This produces an image per survey, along with a Word document.
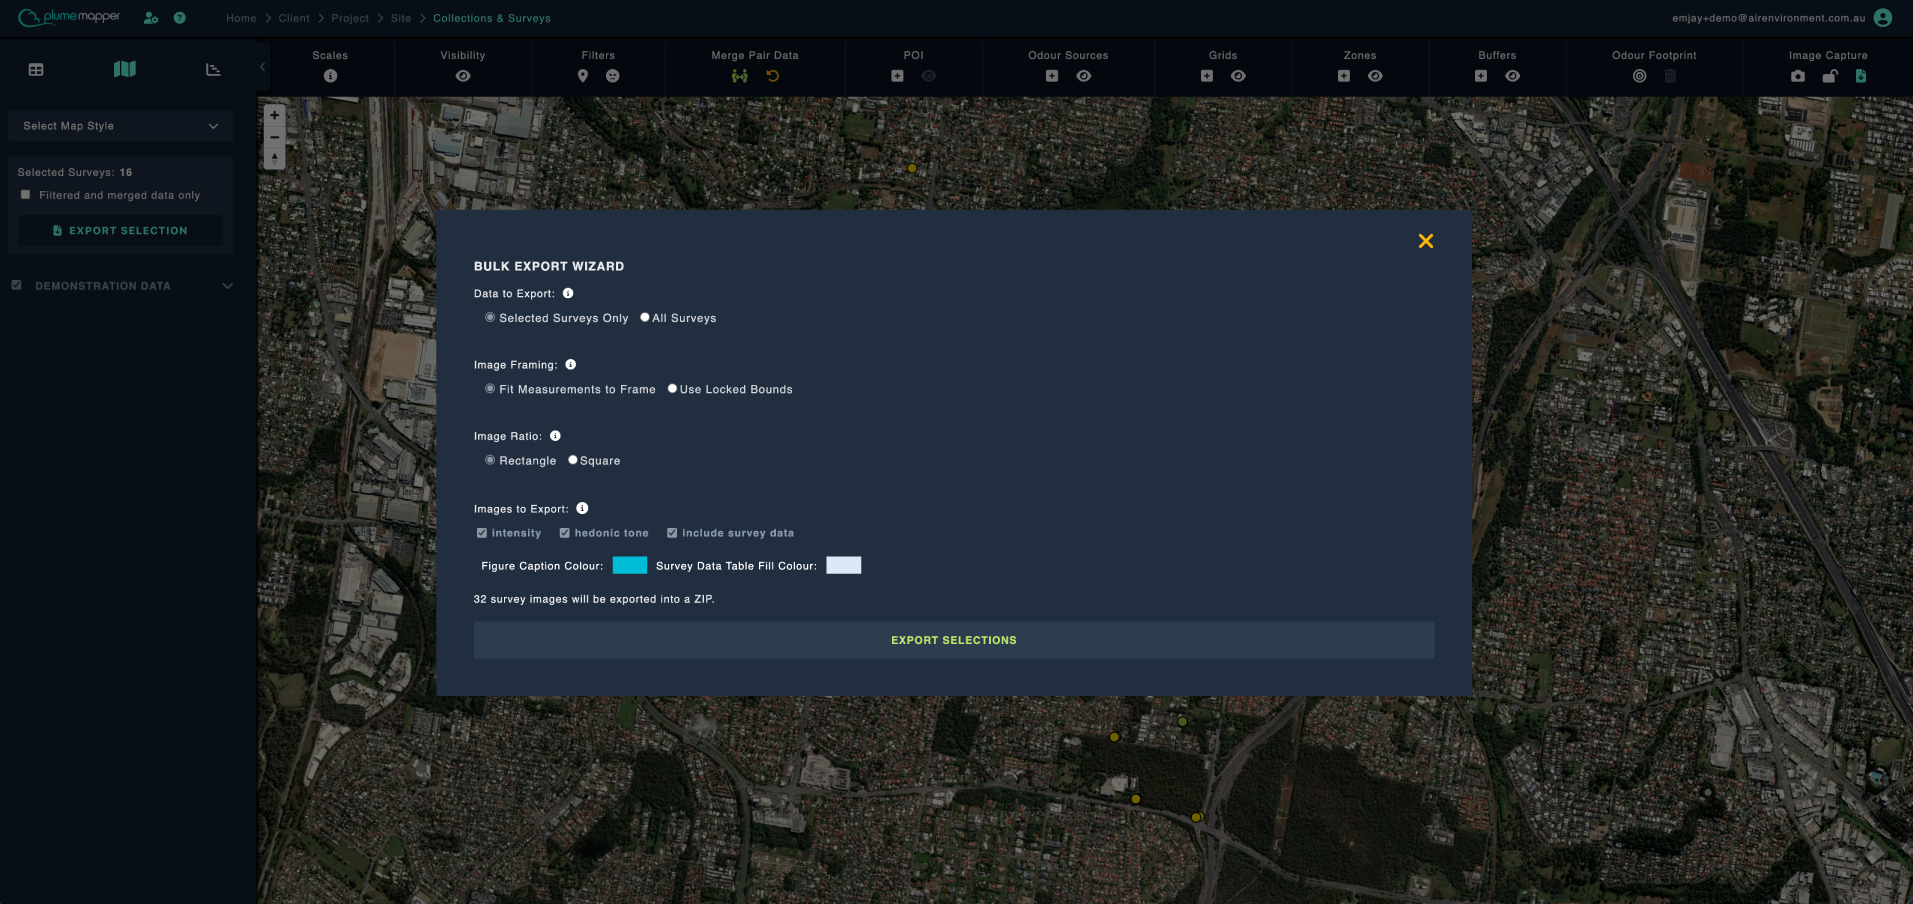
1. Data to Export:
- Selected Surveys Only - just the surveys you have checked in the sidebar.
- All Surveys - every survey across all collections.
2. Image Framing:
- Fit Measurements to Frame - each image is automatically framed to fit its own measurements.
- Use Locked Bounds - every image uses the same framing, based on the current lock area. If no lock is set, the wizard will send you to set one, then reappear once you have.
3. Image Ratio - Rectangle or Square.
Note: This setting is shared with single image capture and capture lock.
4. Images to Export:
- Intensity - measurements coloured by intensity.
- Hedonic Tone - measurements coloured by hedonic tone.
- Include Survey Data.
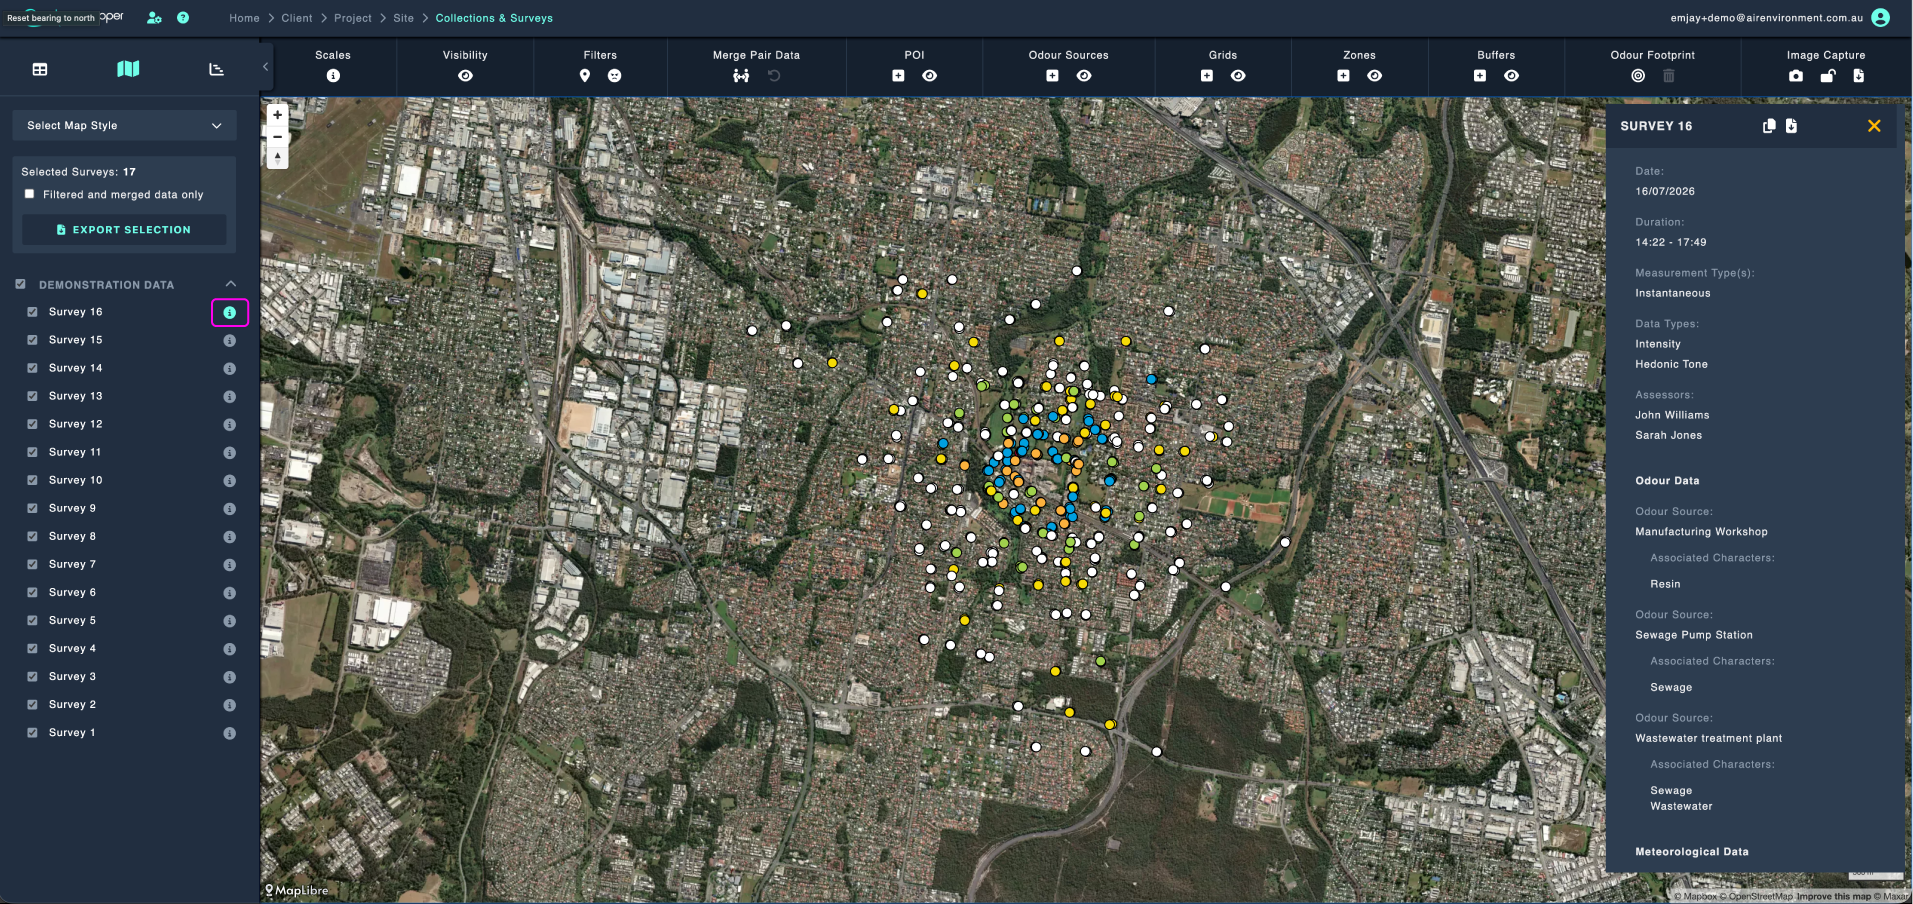
5. If Include Survey Data is checked, set the Figure Caption Colour and the Survey Data Table Fill Colour used in the Word document. The survey data refers to the data shown in the image below.
6. Click the Export Selections button.
- The wizard tells you how many images will be exported before you start.
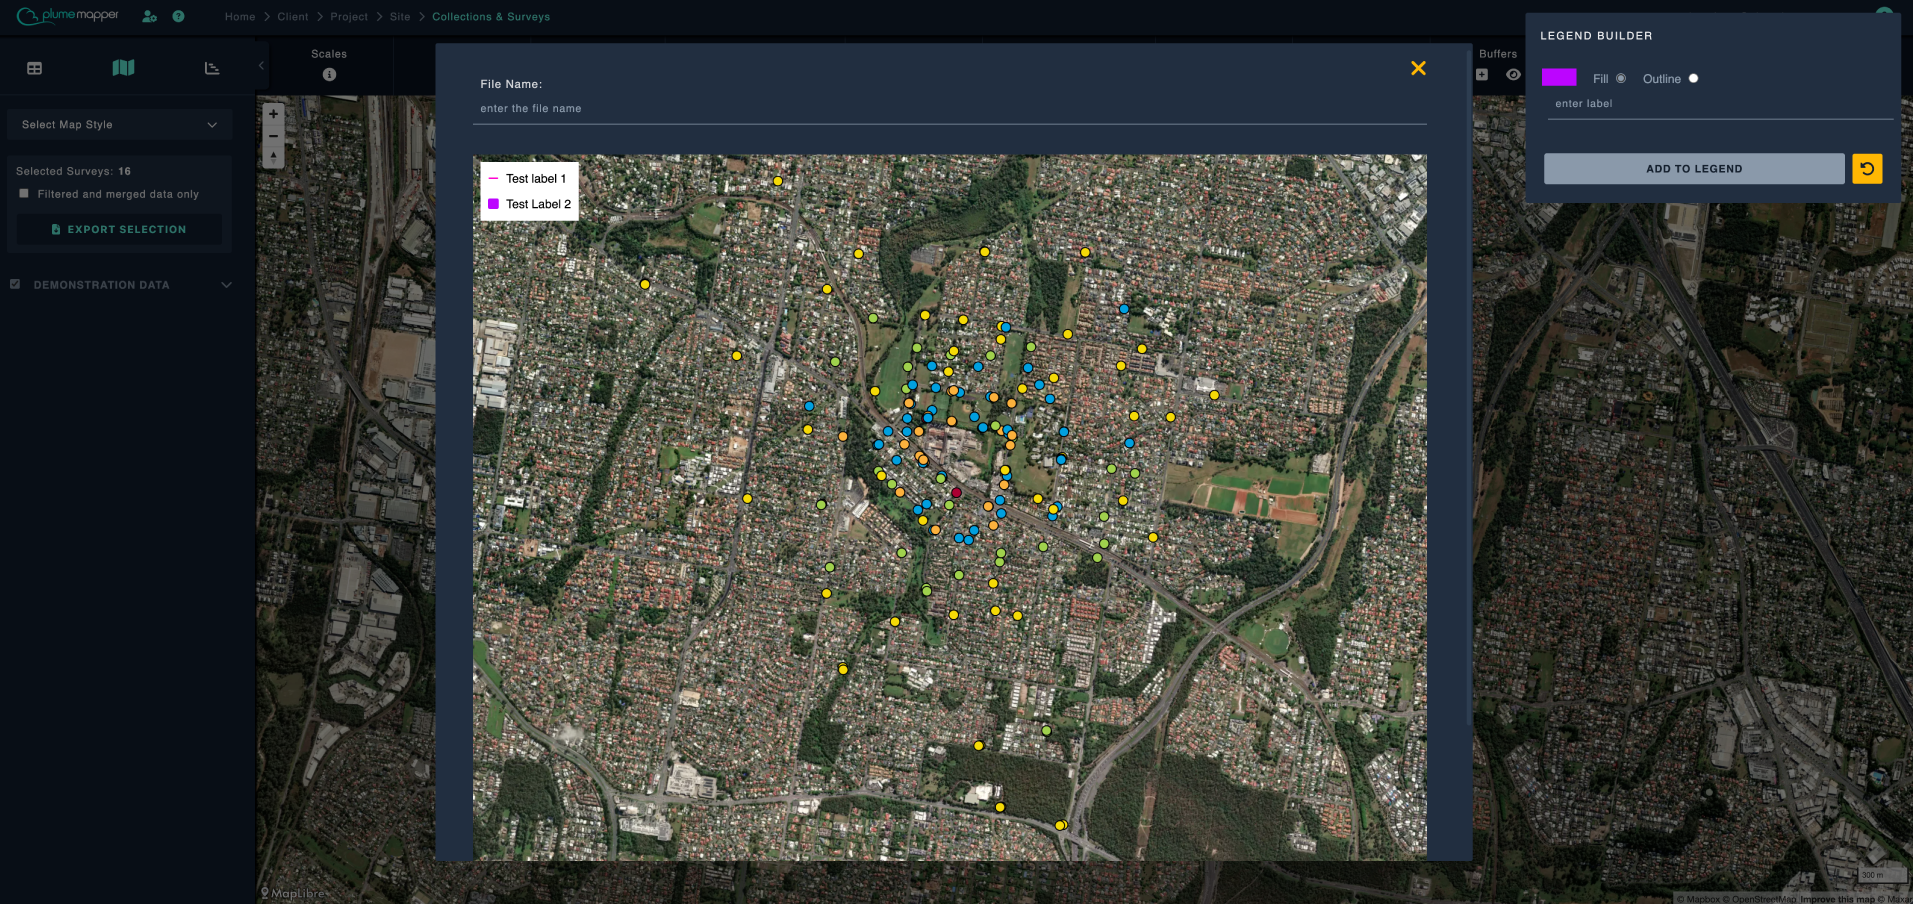
- Click Abort Export to stop part way through.
Note: Aborting means no export file is created. If any survey images fail to capture, they are skipped and you are told how many.