Buffers
Buffers are used to define separation zones that outline permitted land uses. For example, if property developers intend to expand residential areas beyond the designated boundaries, a buffer can be applied to represent the approved width, as well as an additional buffer to illustrate the proposed extension.
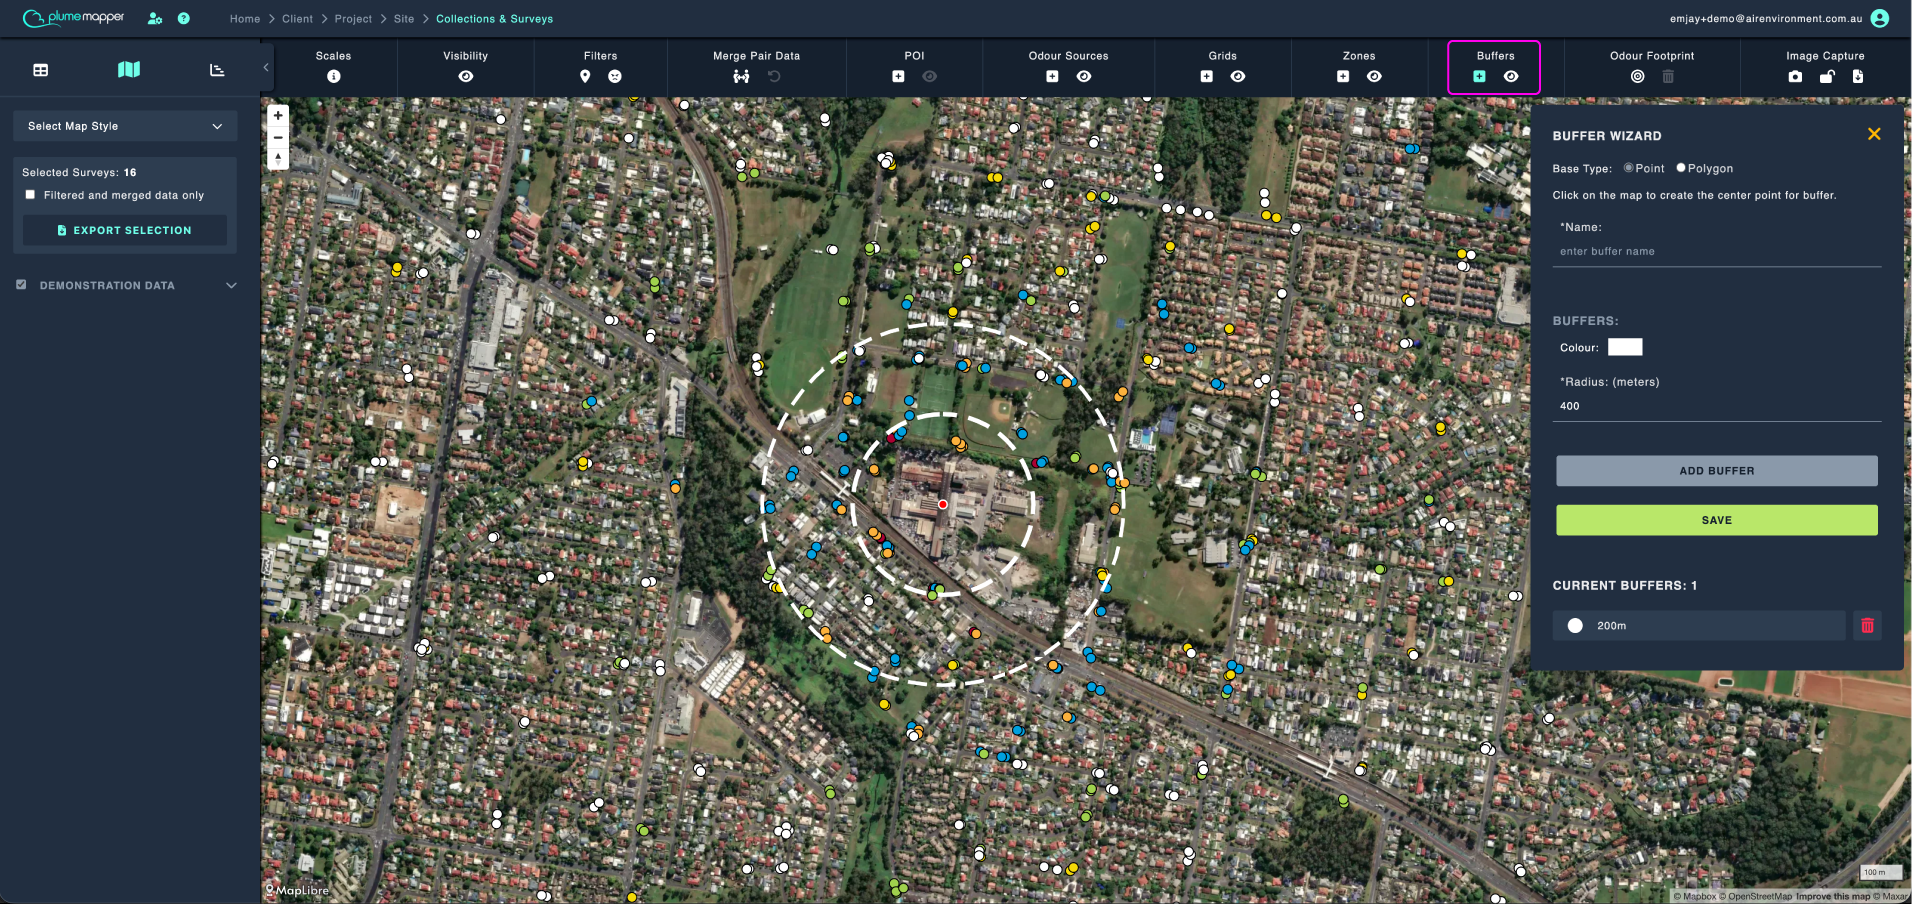
Adding a Point Buffer
1. Click the icon under Buffers on the map toolbar, to access the Buffer Wizard.
2. Enter a unique name for the buffer in the input field.
3. Click the map to get the center point where the buffer is located.
4. Add a buffer, by entering a radius (in meters) and a colour.
- Click Add Buffer for each buffer, you can add as many as you want.
- All buffers will appear in the current buffers list at the bottom of the wizard.
5. Click the Save button to add the new buffer.
Adding a Polygon Buffer
1. Enter a unique name for the buffer in the input field.
2. Draw the polygon base by clicking the map to add the points.
- A dotted line will appear as you draw.
3. Close the polygon:
- Align the first dot with the last dot.
- The polygon will change from a dotted line to a white block when closed.
4. After closing the polygon:
- Adjust the colour and fill type as desired.
- To modify the polygon shape, delete and redraw it.
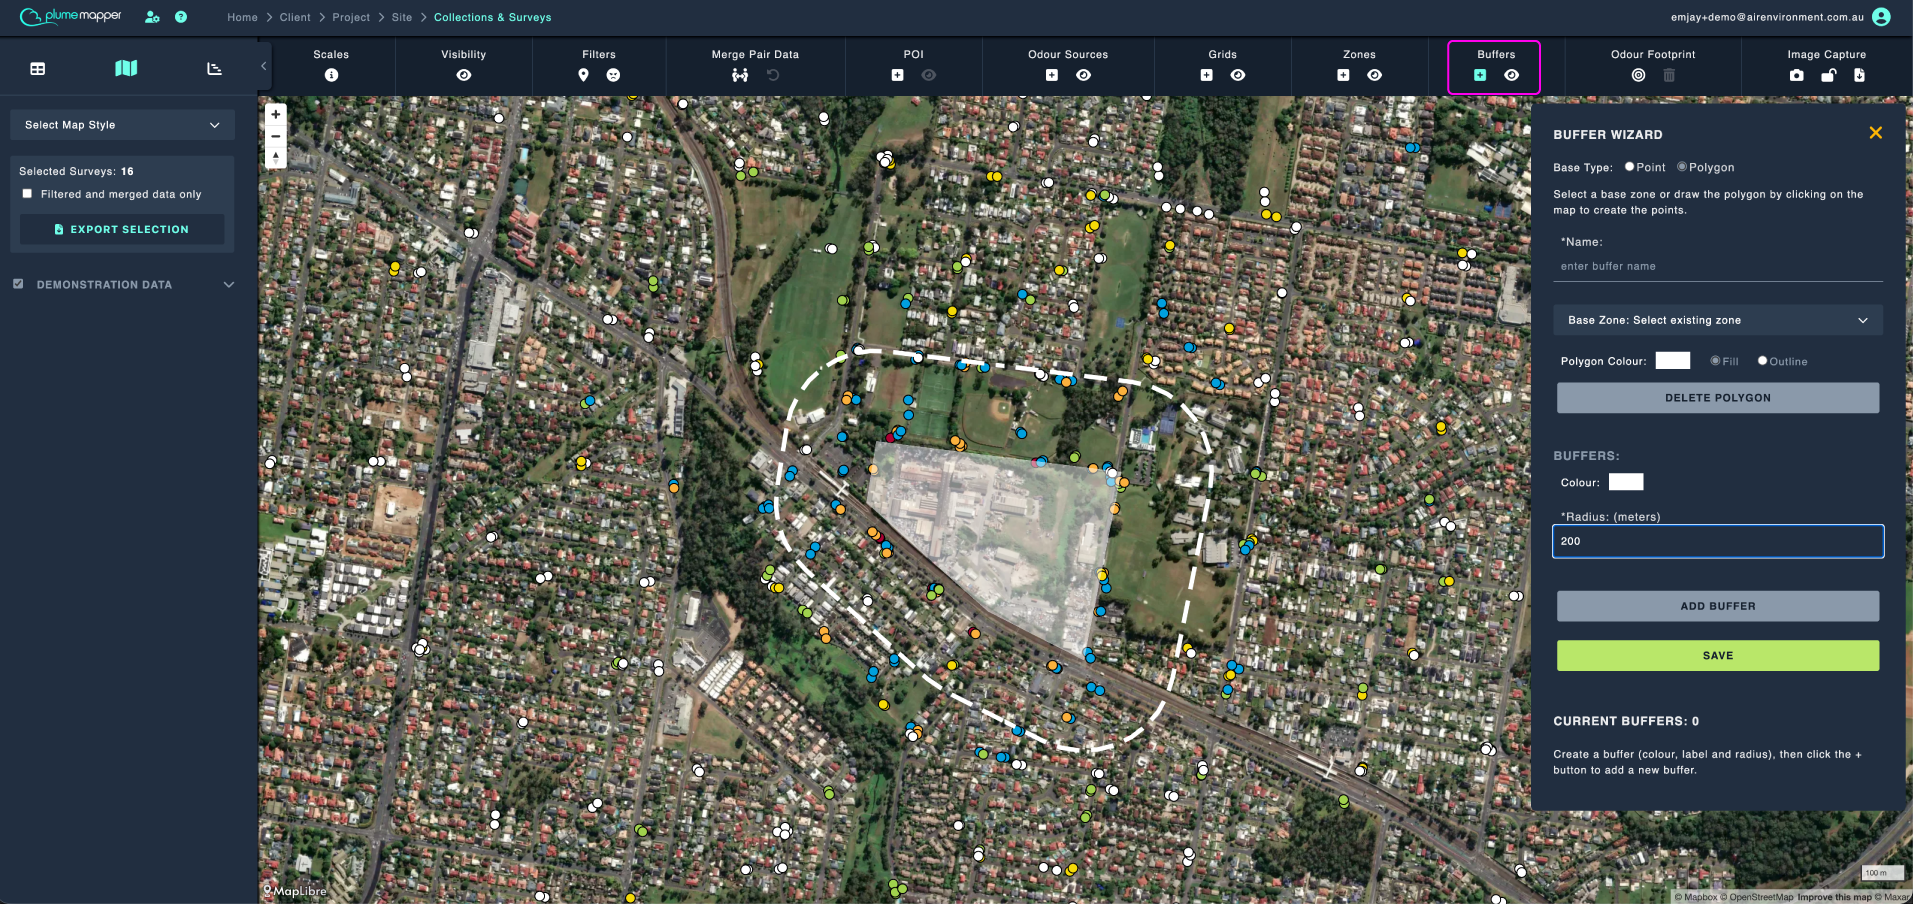
5. Add a buffer, by entering a radius (in meters) and a colour.
- Click Add Buffer for each buffer, you can add as many as you want.
- All buffers will appear in the current buffers list at the bottom of the wizard.
6. Click the Save button to add the new buffer.
Showing and Hiding Buffers
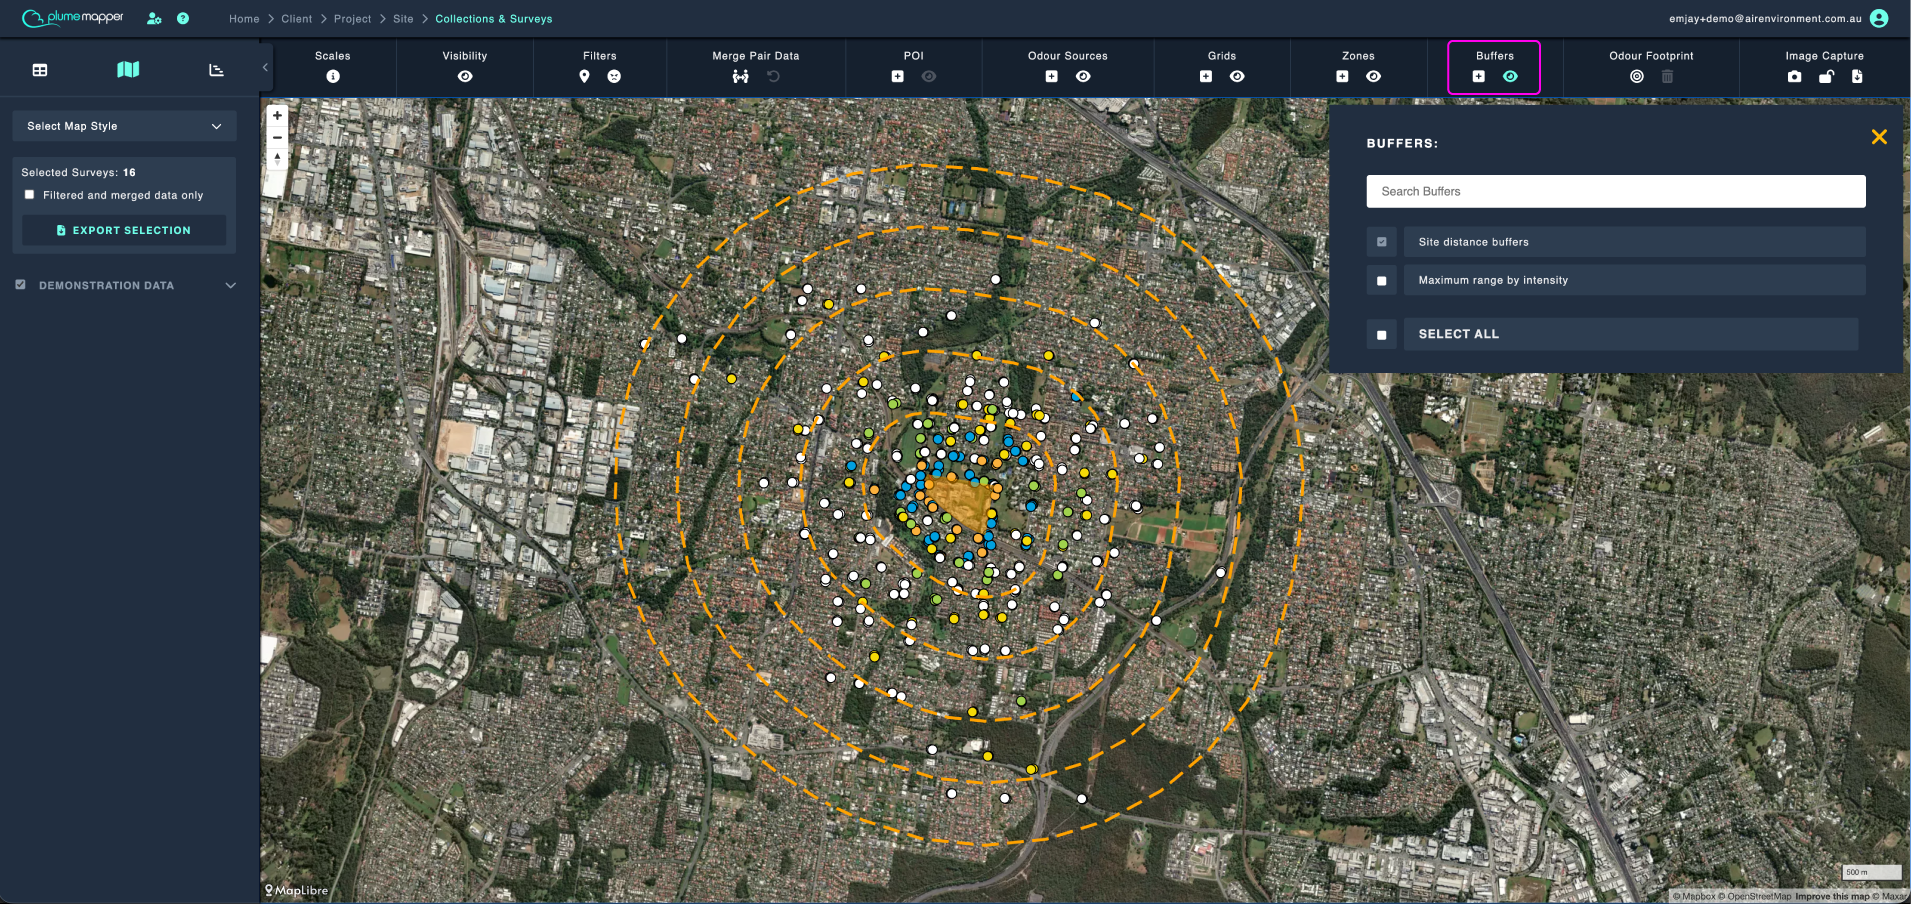
Click the icon under Buffers on the map toolbar, to open the buffer list.
- Search for a buffer by name, in the input field.
- Check or uncheck the items on the list you wish to be visible on the map.
- Use Select All at the bottom of the list to show or hide all of them at once.
Note: The icon is disabled (greyed out) when the site has no buffers.
Editing a Buffer
1. Click the buffer you want to edit.
- To edit a point buffer, click the center point.
- To edit a polygon buffer, click anywhere in the polygon shape.
2. Click the icon in the banner that appears at the top.
Editing a Point Buffer
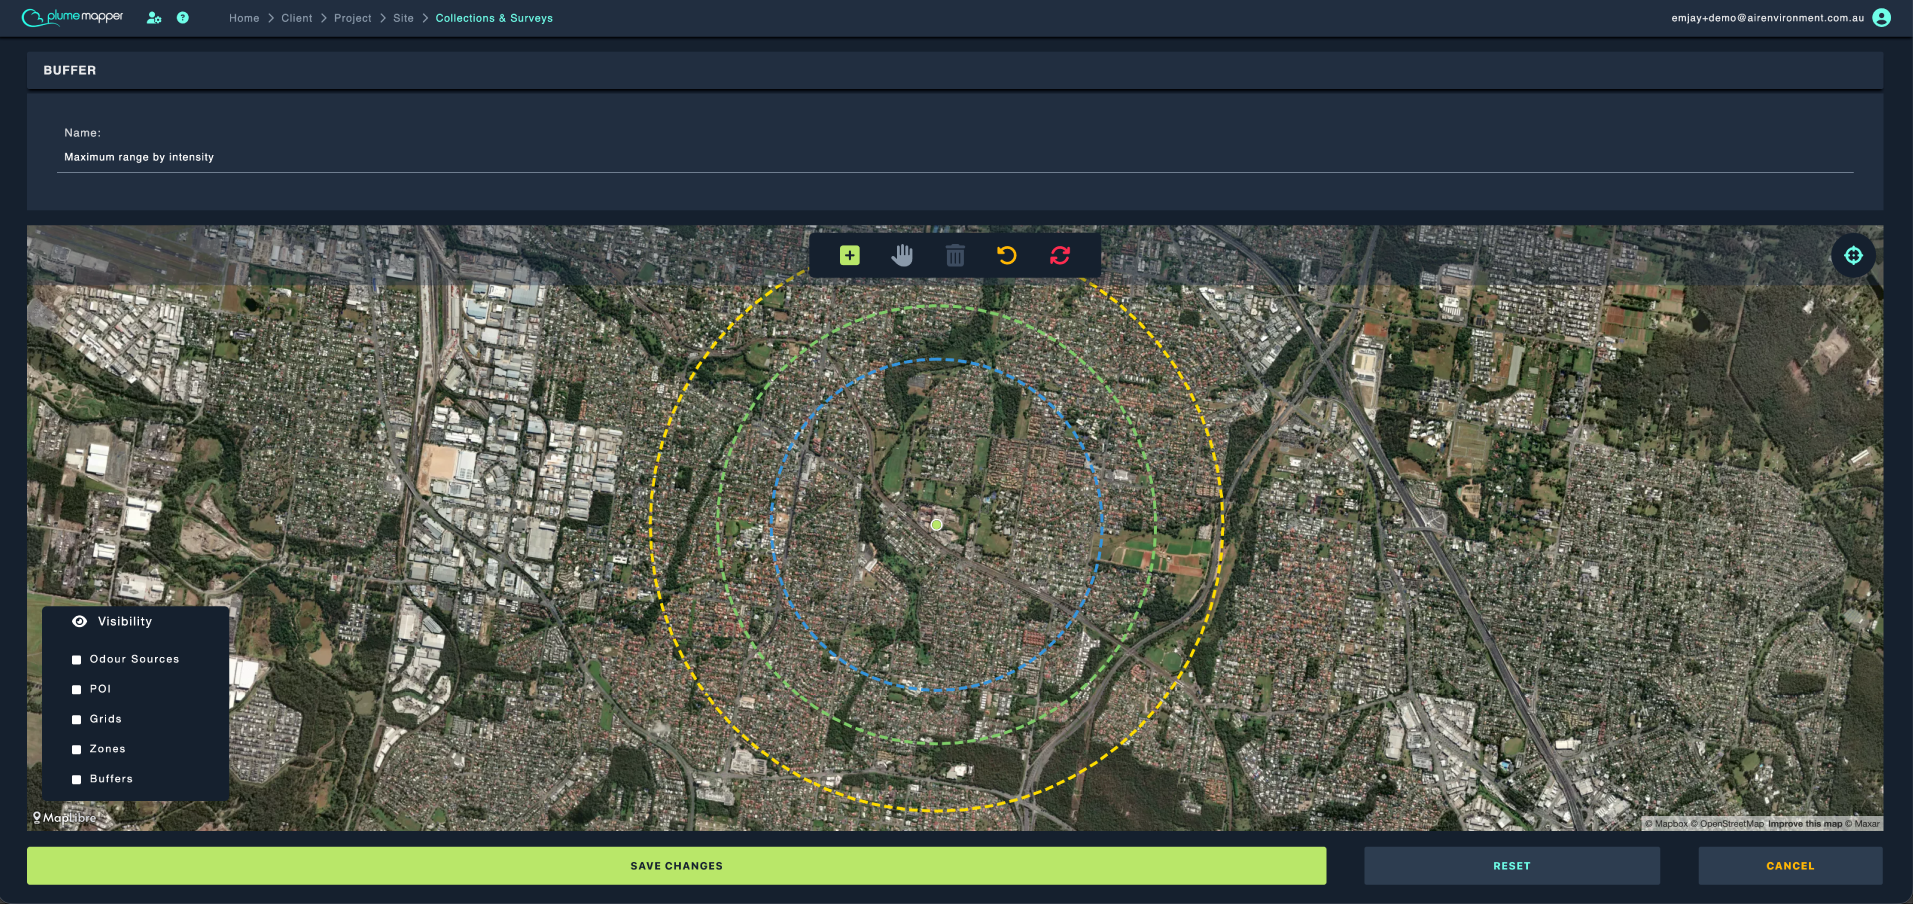
1. Updating location:
- Click the center point of the buffer; it changes from orange to green.
- Drag it to the new location.
- Click the icon, to deselect the center point.
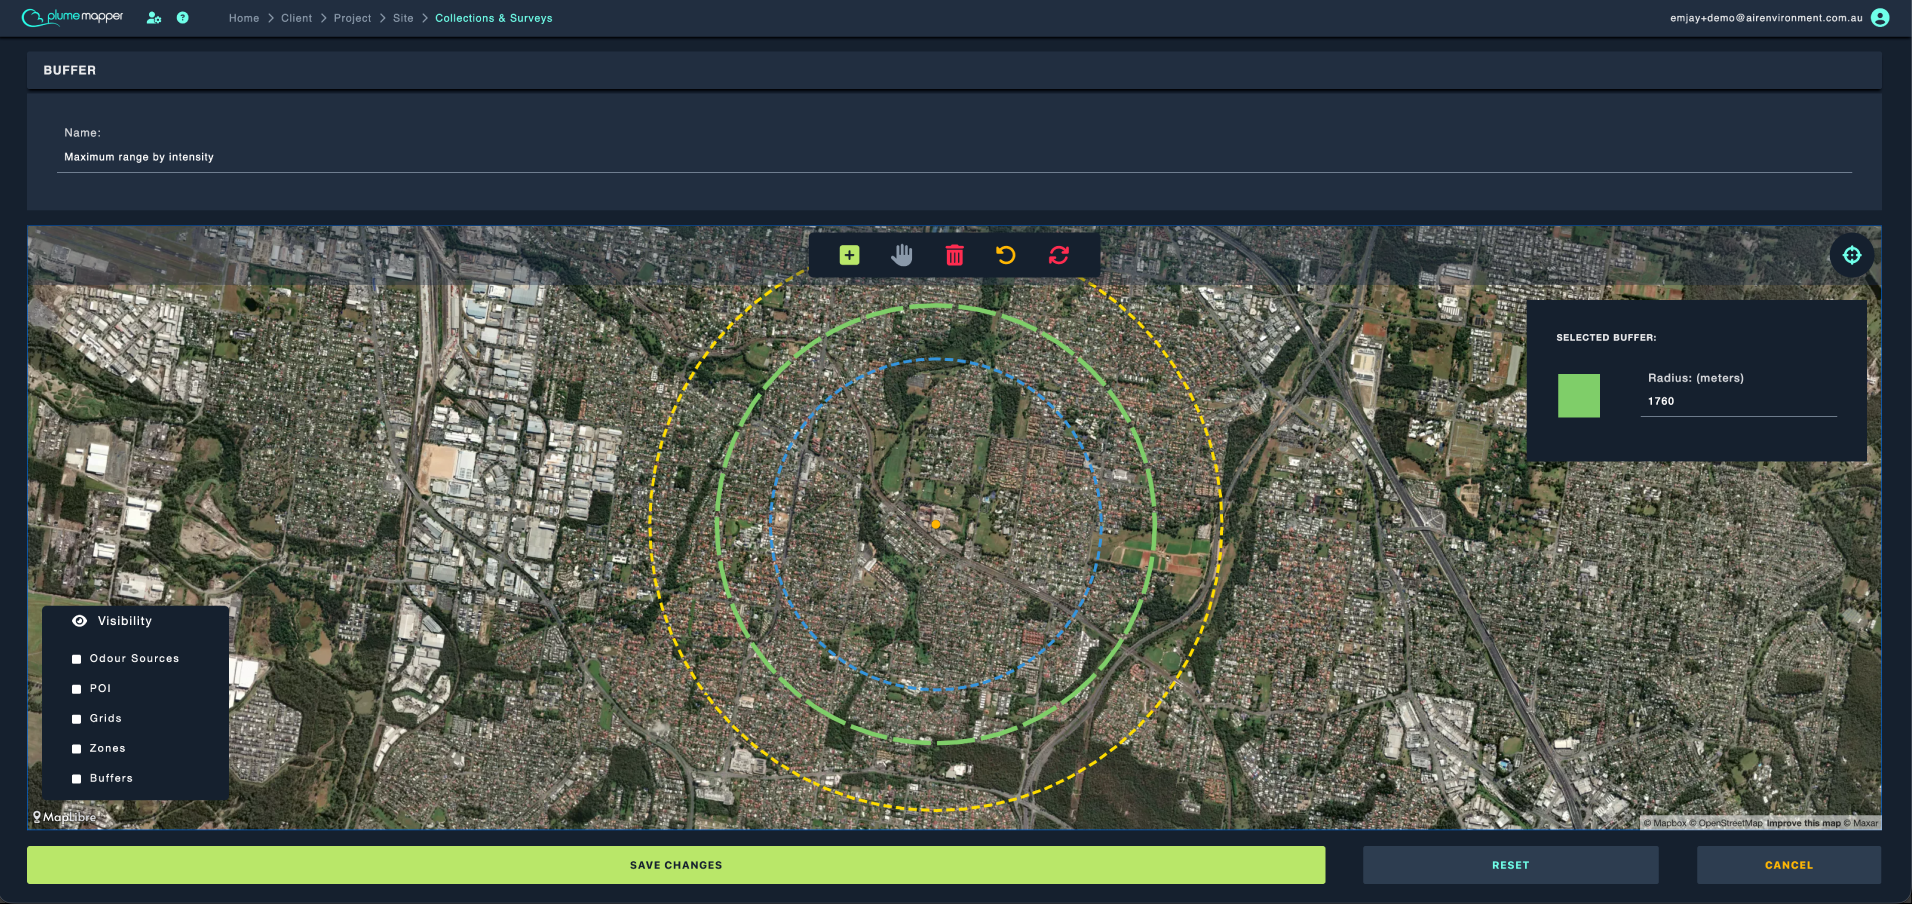
2. Editing a buffer (ring):
- Click the buffer you want to edit; a modal will appear on the right.
- Change the colour and/or radius (in meters) as desired.
- Click the icon, to deselect the buffer.
- Alternatively, you can delete the selected buffer by clicking the icon.
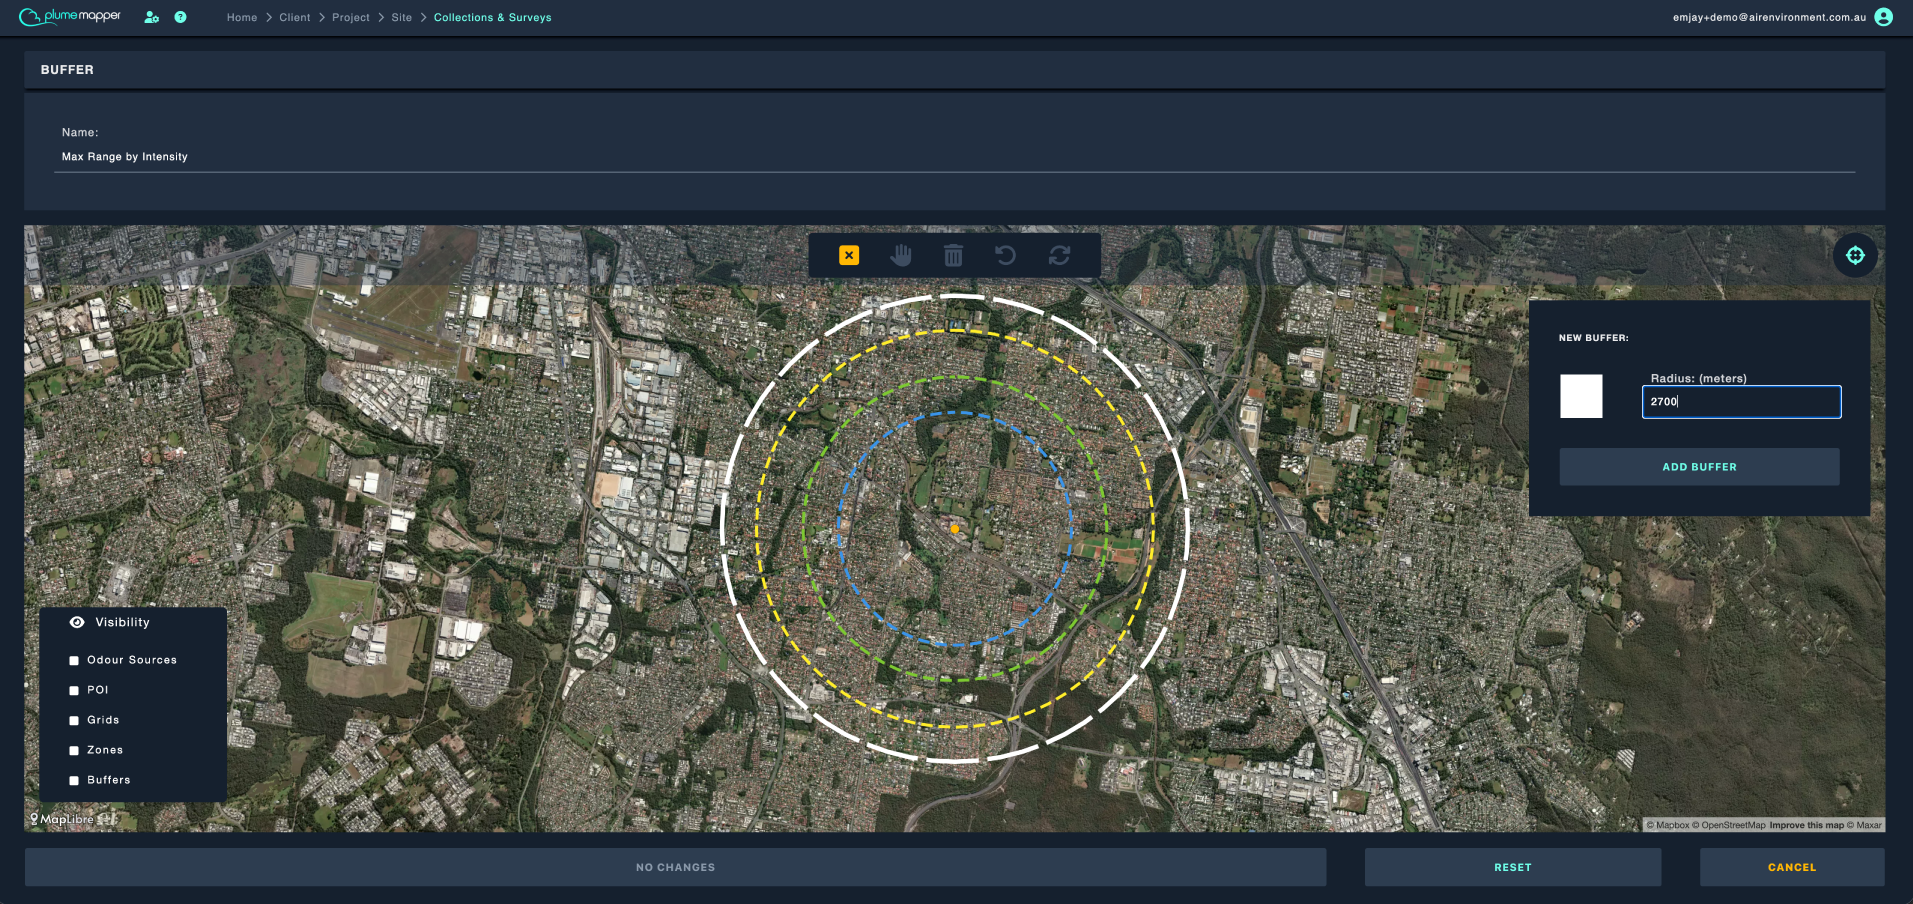
3. Adding a New Buffer:
- Click the icon; a modal will appear on the right.
- Choose the colour and enter the radius (in meters).
- Then click Add Buffer.
- Repeat these steps to add multiple new buffers.
Once all your edits have been made, click Save Changes to apply the changes.
Editing a Polygon Buffer
1. Edit the name, colour and fill type as desired.
- Under the Buffer section, the colour swatch represents the polygon colour.
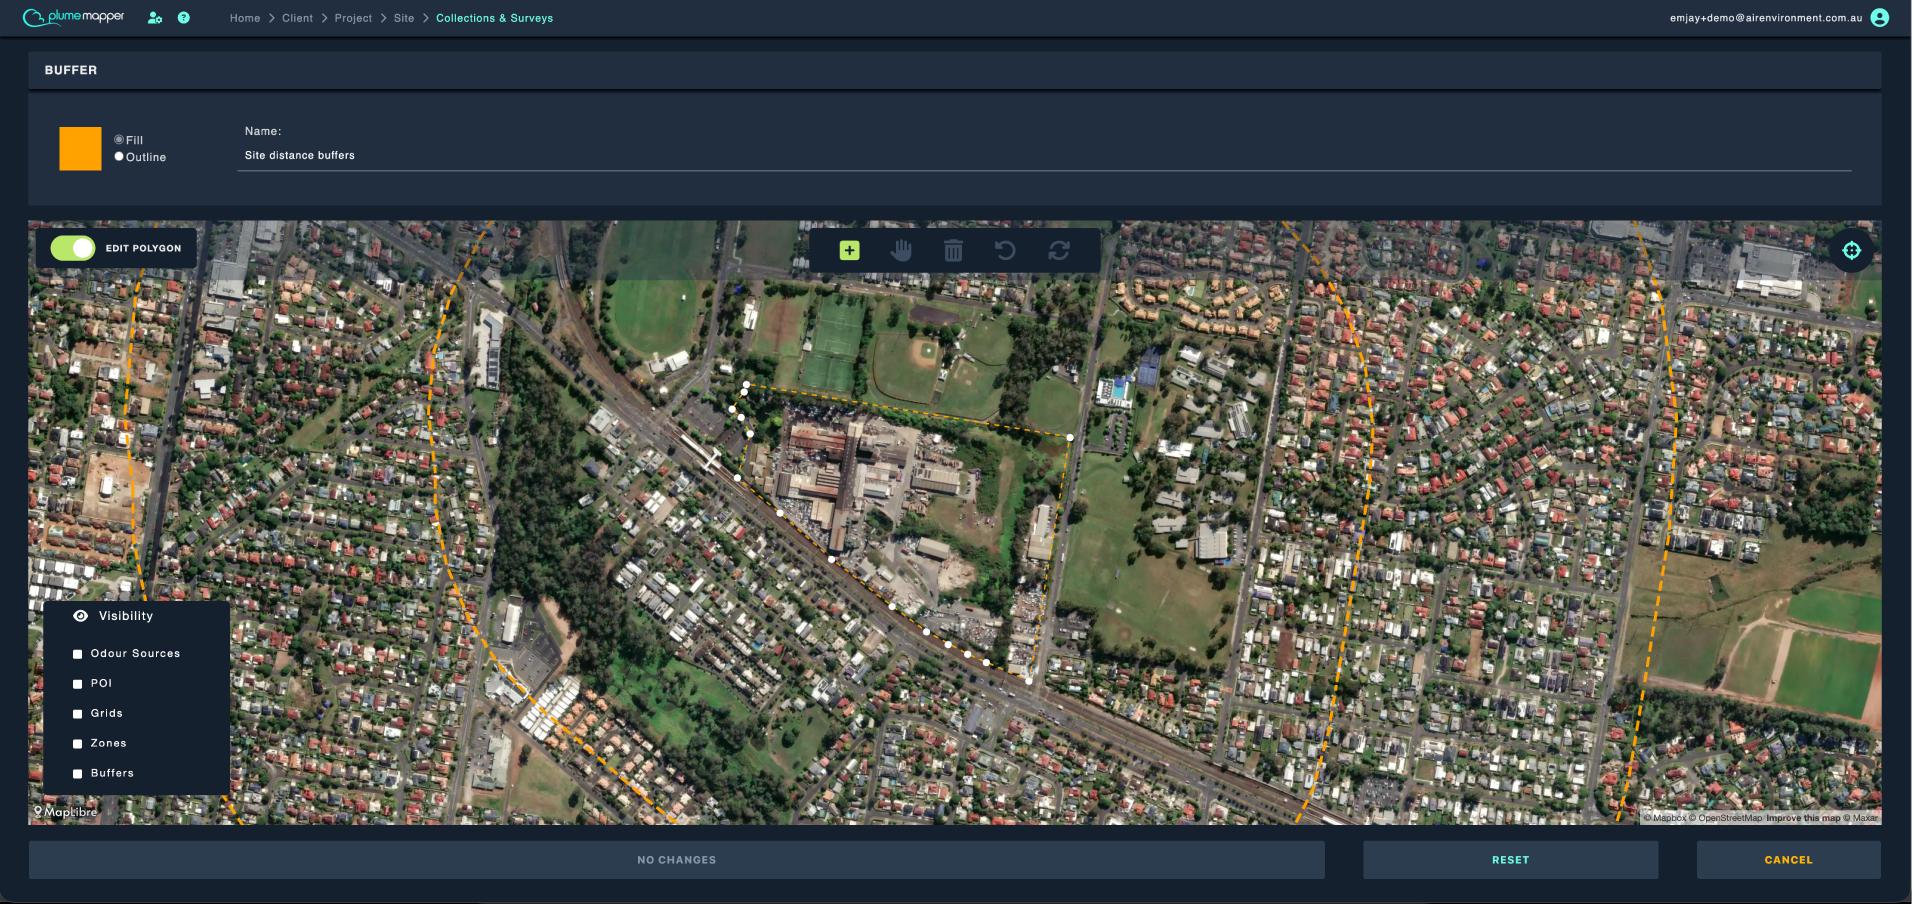
2. Edit polygon mode:
- Select the polygon by clicking it.
- Alternatively, toggle the Edit Polygon switch located at the top left of the map.
- When in edit mode, the polygon’s border changes to a dotted line.
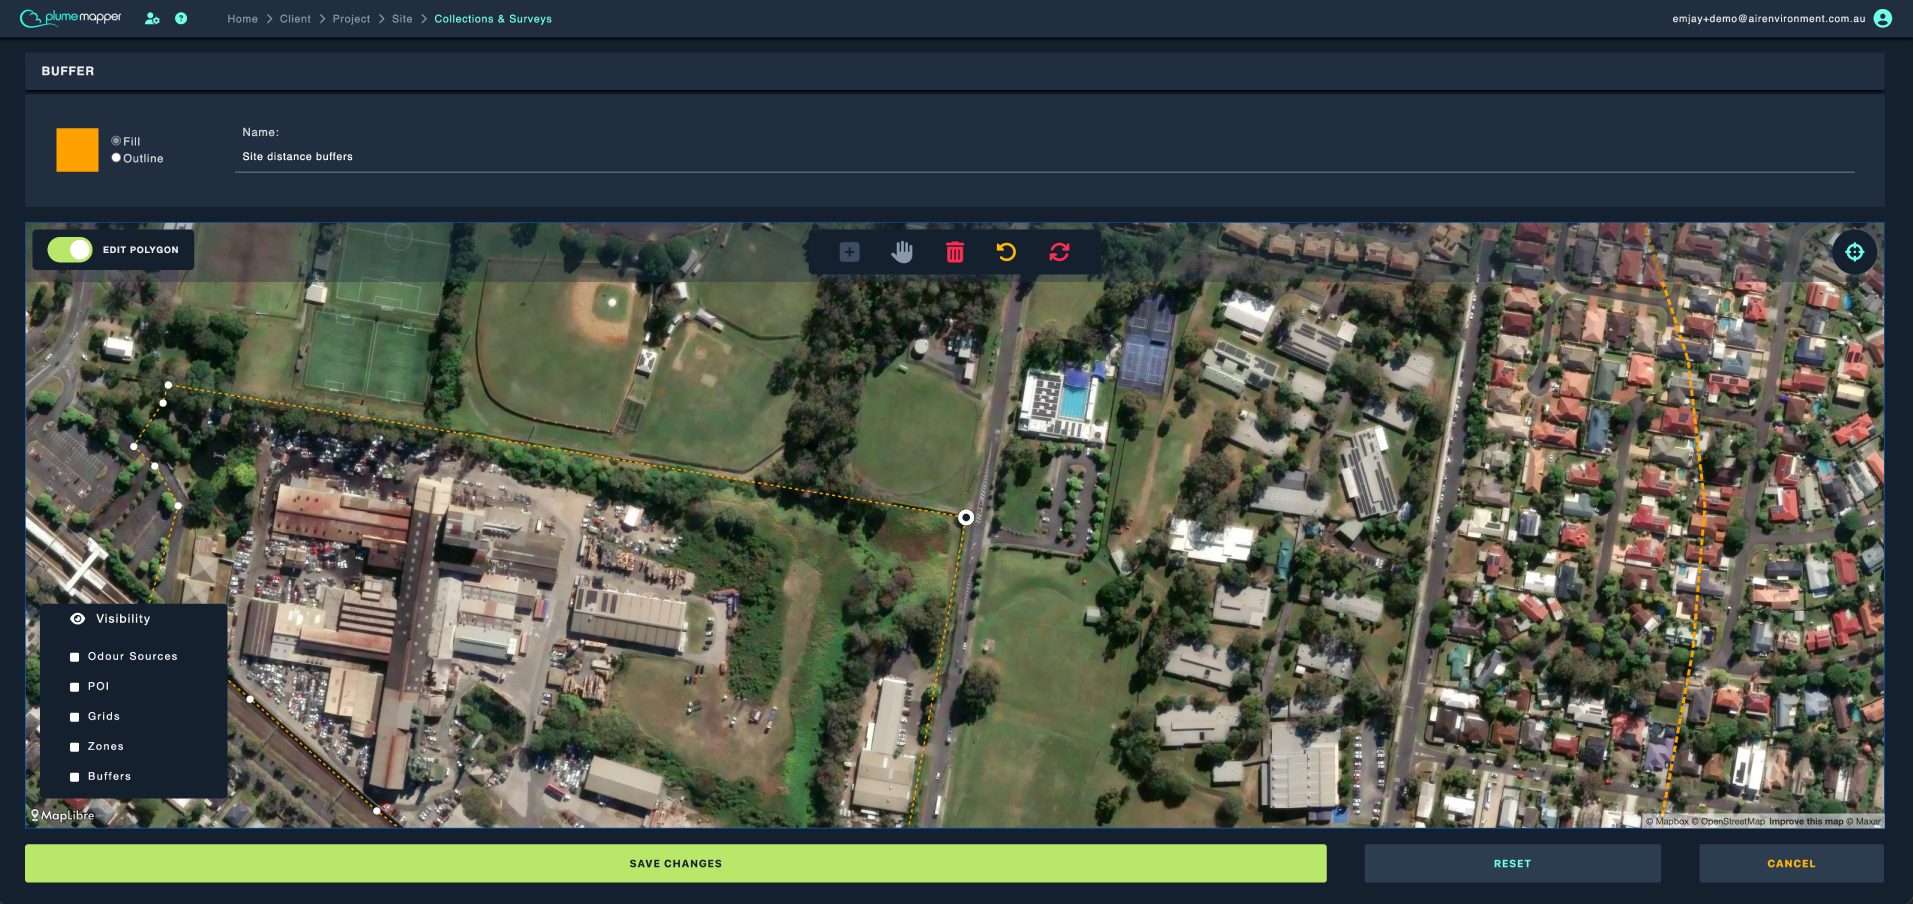
3. Editing existing points:
Note: Edit polygon mode must be enabled.
- Click the point you want to edit, the marker will change from a white circle to a bigger white circle with a small black circle in the middle.
- Drag it to a new location or delete it by clicking the icon.
- Deselect a point by clicking the icon.
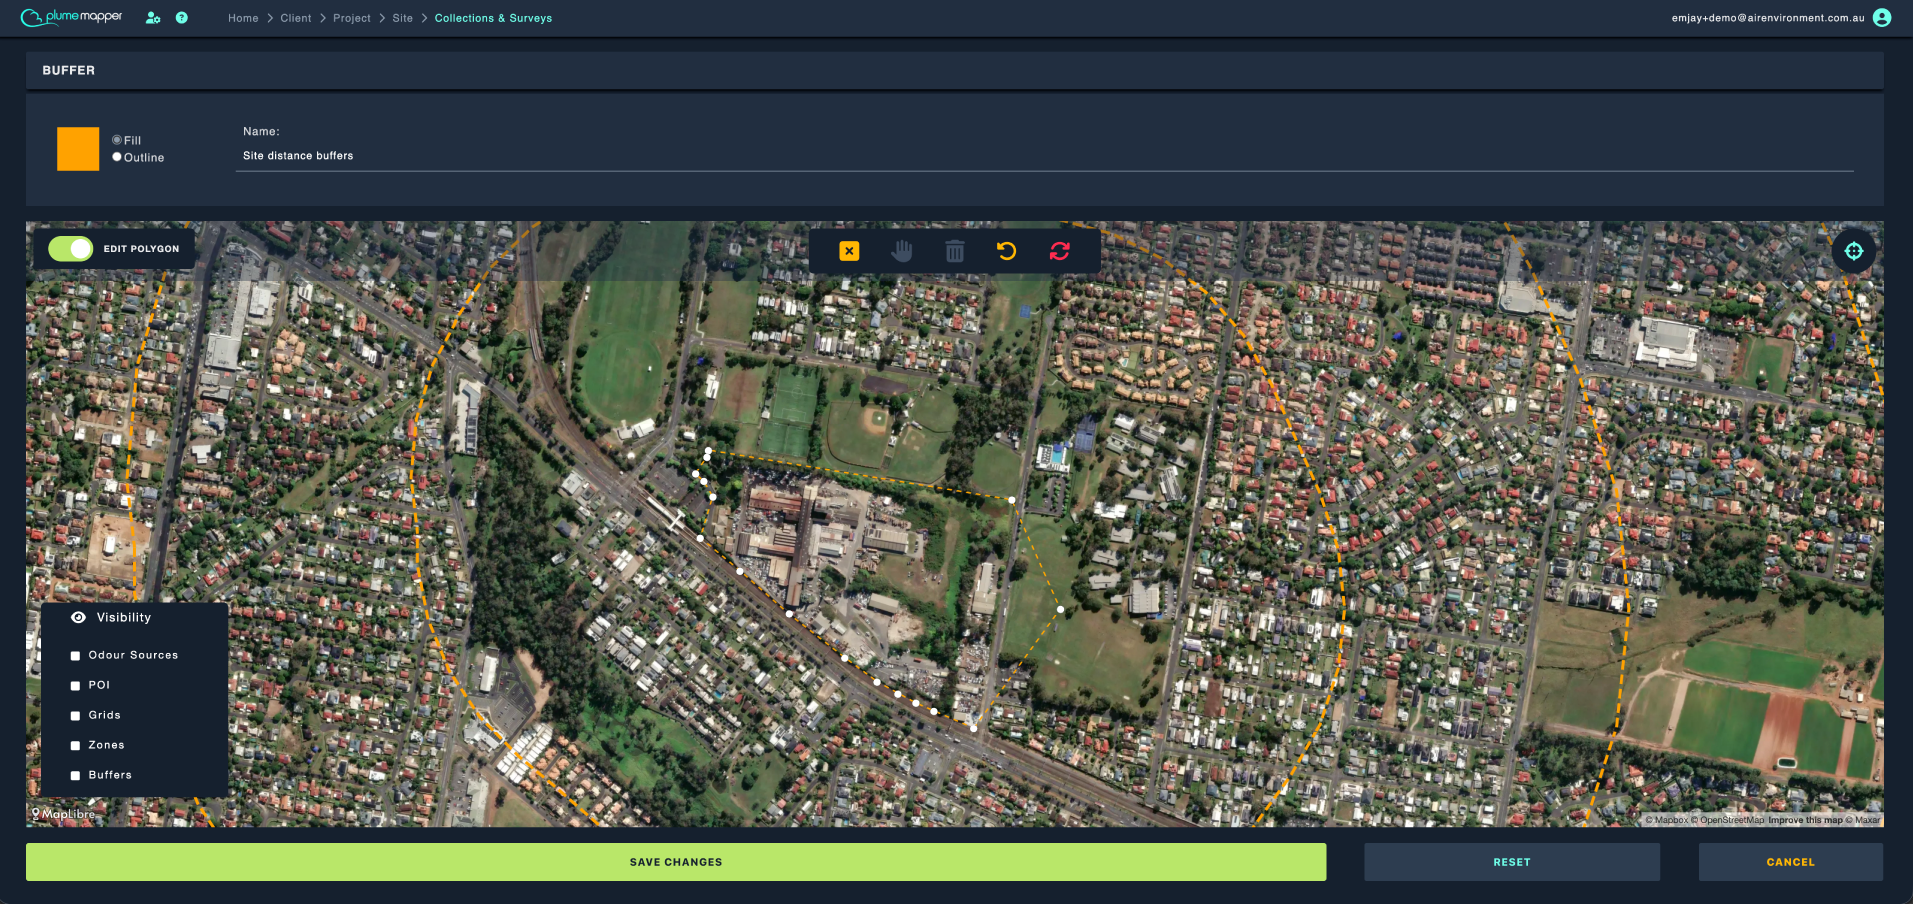
4. Adding new points:
Note: Edit polygon mode must be enabled.
- Click the icon, to enter add mode.
- Click the map at the location you want to place a new point.
- While in add mode, you can add as many points as needed.
- Exit add mode by clicking the icon.
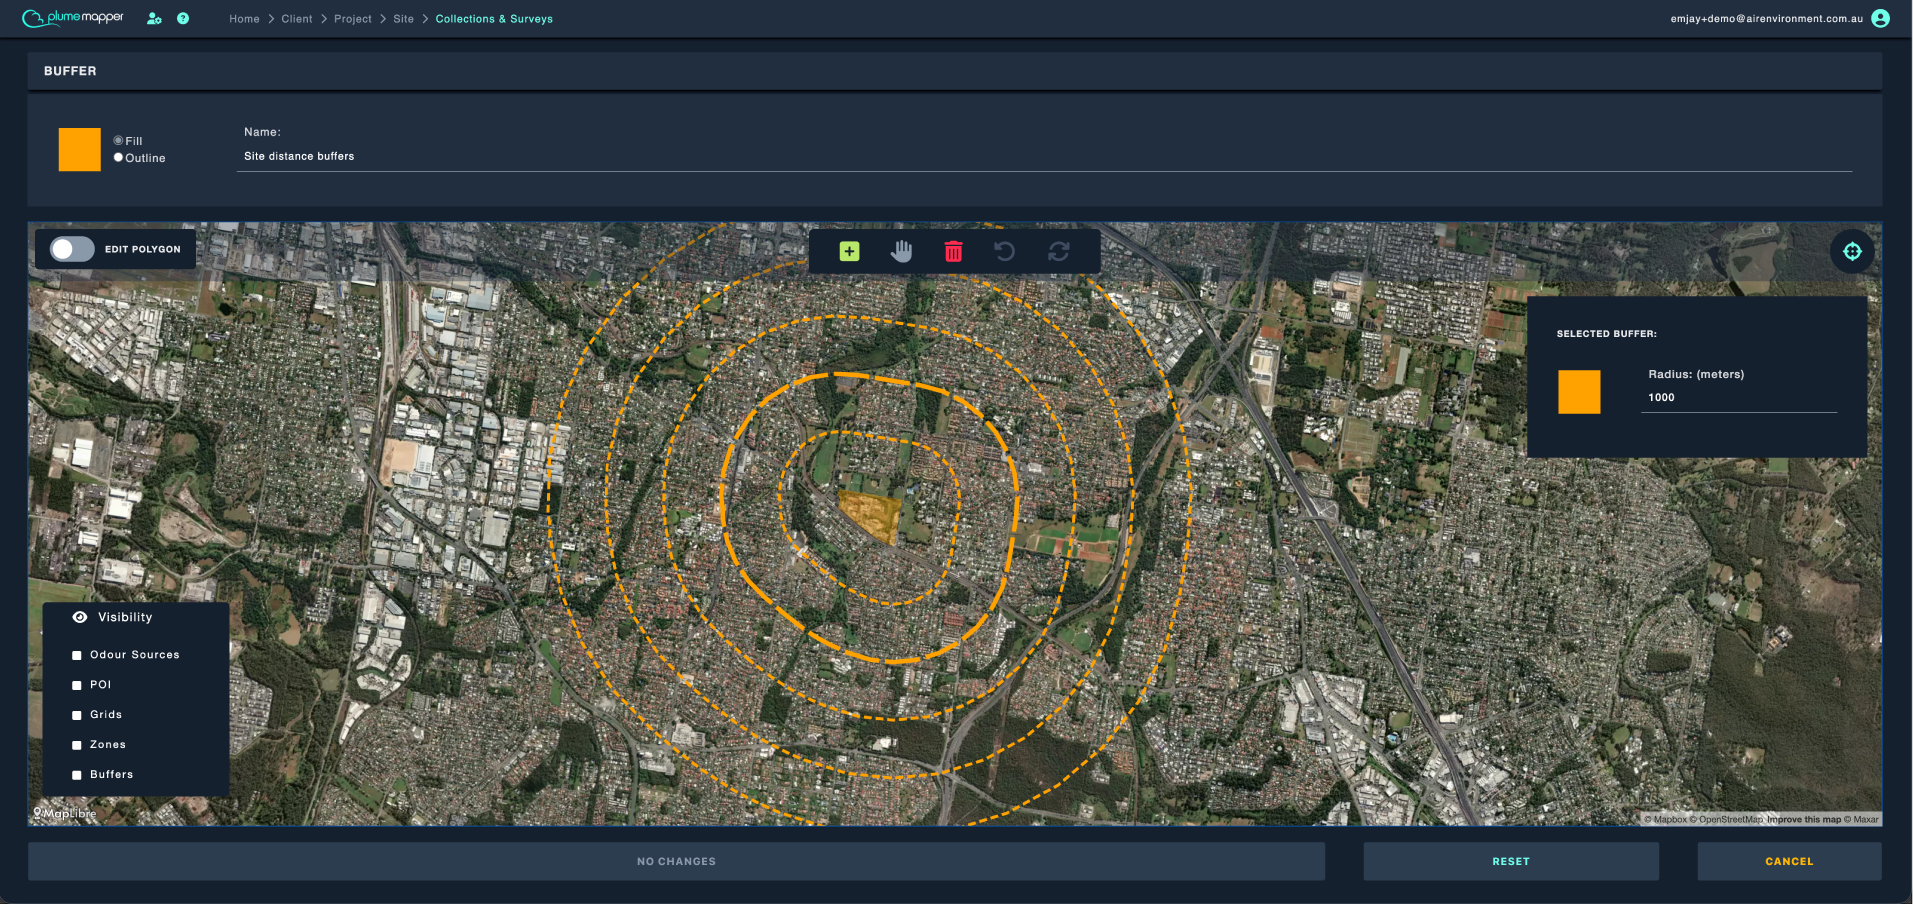
5. Editing existing buffers (rings):
Note: Edit polygon mode must be disabled.
- Click the buffer you want to edit; a modal will appear on the right.
- Change the colour and/or radius (in meters) as desired.
- Click the icon, to deselect the buffer.
- Alternatively, you can delete the selected buffer by clicking the icon.
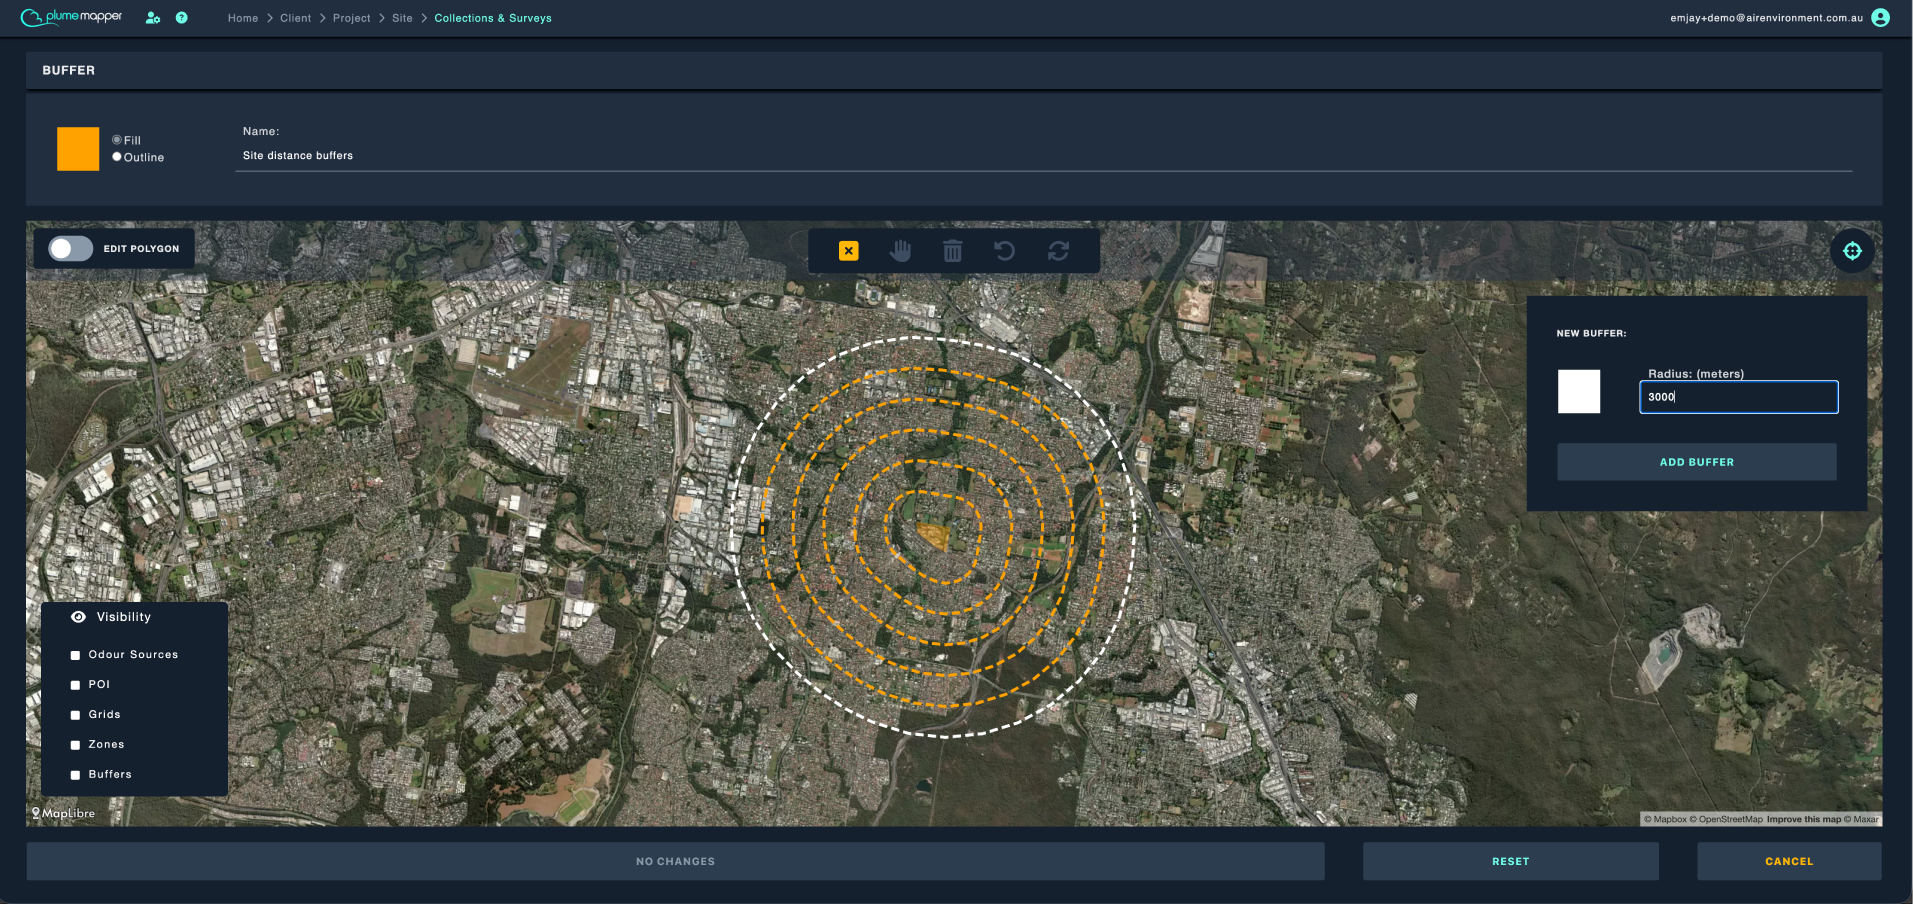
6. Adding new buffers:
Note: Edit polygon mode must be disabled.
- Click the icon; a modal will appear on the right.
- Choose the colour and enter the radius (in meters).
- Then click Add Buffer.
- Repeat these steps to add multiple new buffers.
Once all your edits have been made, click Save Changes to apply the changes.
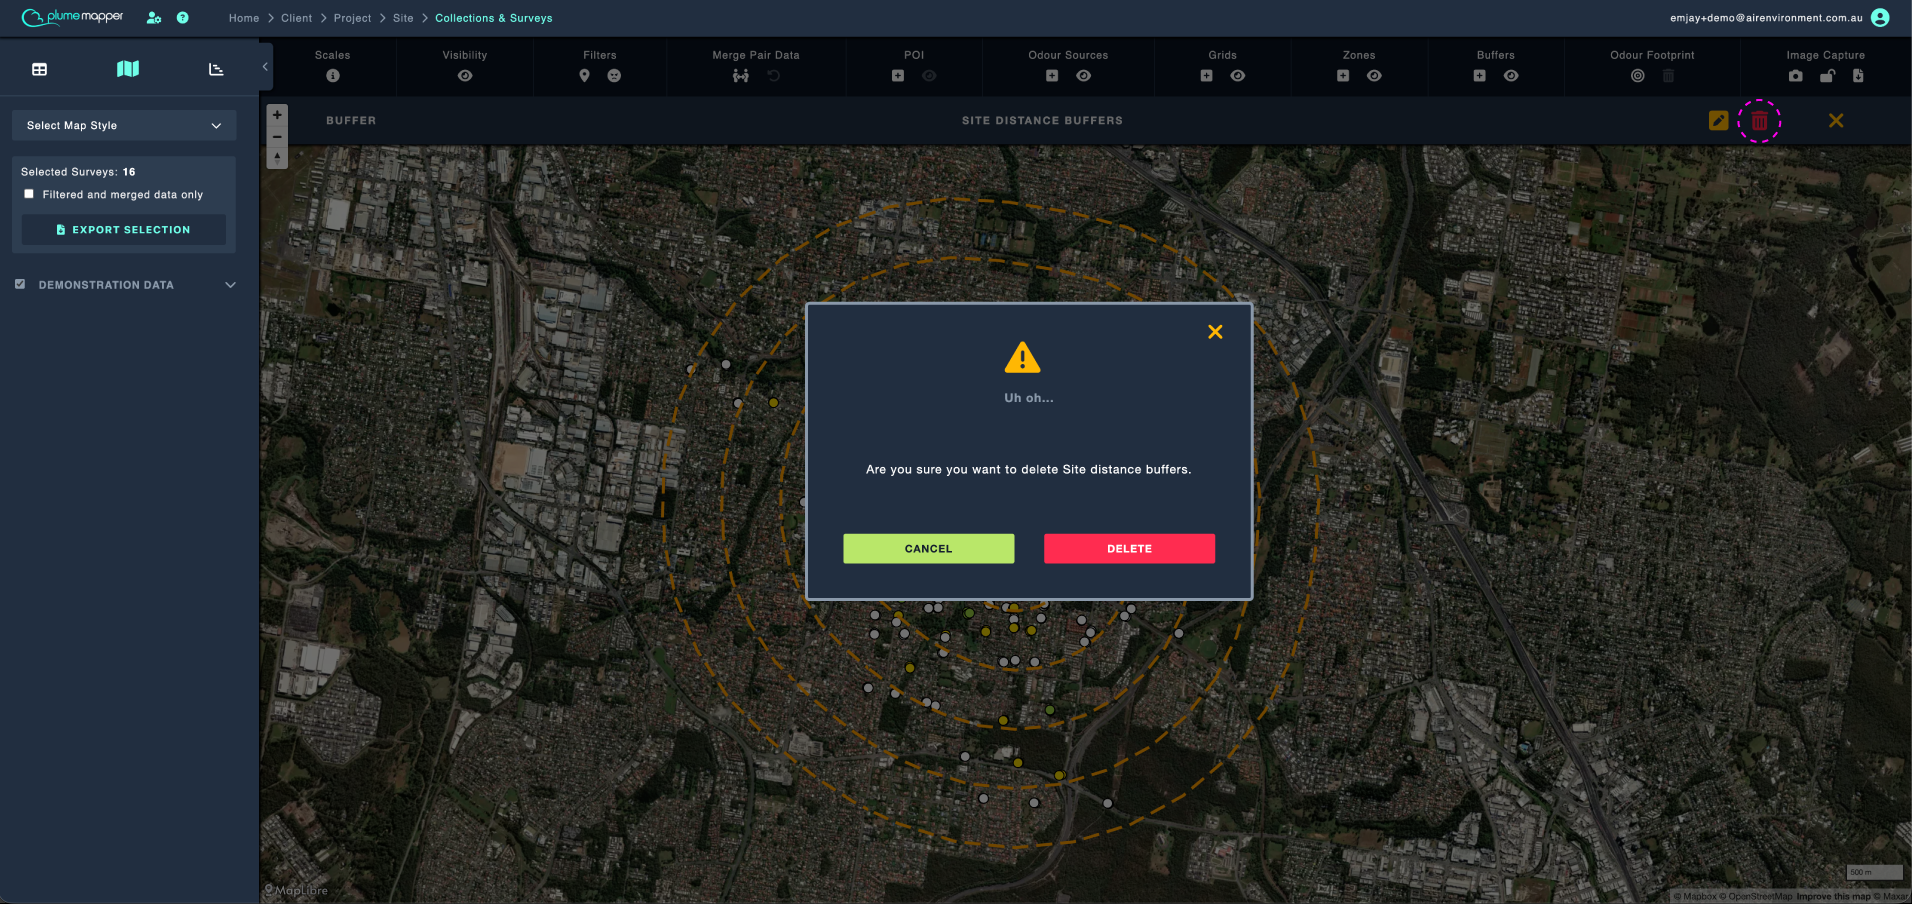
Deleting Buffers
1. Click the buffer you want to delete.
2. Click the icon in the banner that appears at the top.
3. Confirm deletion, by clicking Delete in the modal that pops up.
Important: Deleting a buffer is permanent and cannot be undone.