Survey Map View
This screen provides an overview of the measurement points collected in a survey.
As well as any odour sources, zones or transect grids added to a site.
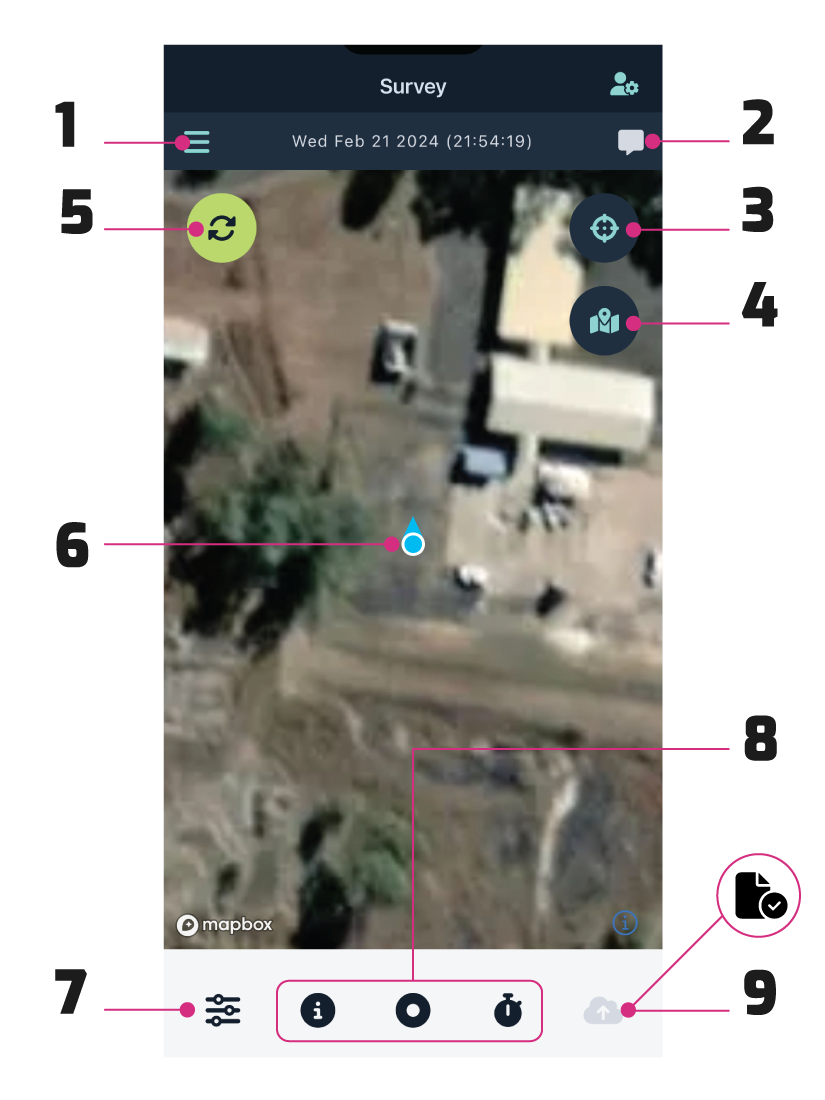
1. Sidebar navigation
- Navigate back to the setup screen.
- Add new odour sources.
- Download offline maps.
- Create and edit grids.

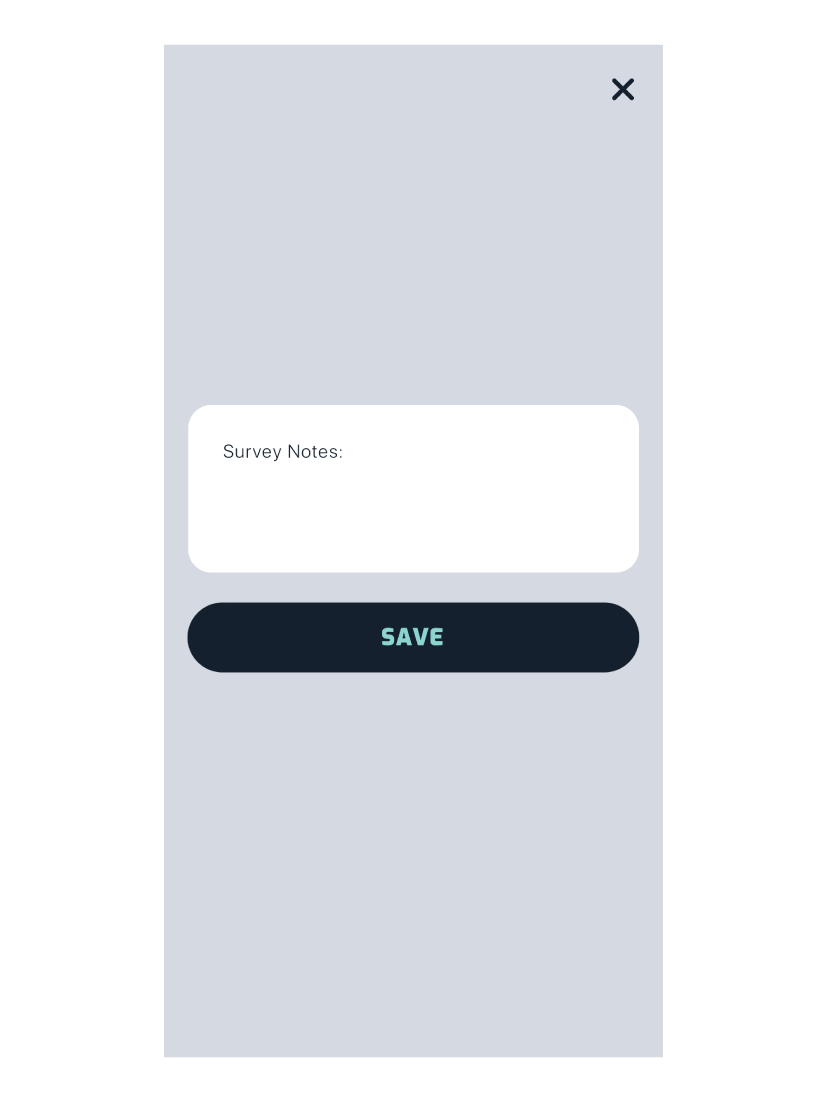
2. Survey Notes
Add new notes or view notes added when the survey was created.
When your device has no iternet connection this icon will be replaced with a no connection icon.
3. Center to GPS
Pressing the button will recenter the map to your current location.
4. Center to Site
Pressing the button will recenter the map to the recorded site location.
5. Refresh Site Data
Pressing the button will refresh any new site data.
Eg. when working in pairs and the other assessor adds or updates a grid point, pressing the refresh button will pull the changes and update the map on your device.
Note:
The button can only be pressed ONCE every minute - as to not make unnecessary calls to the server.
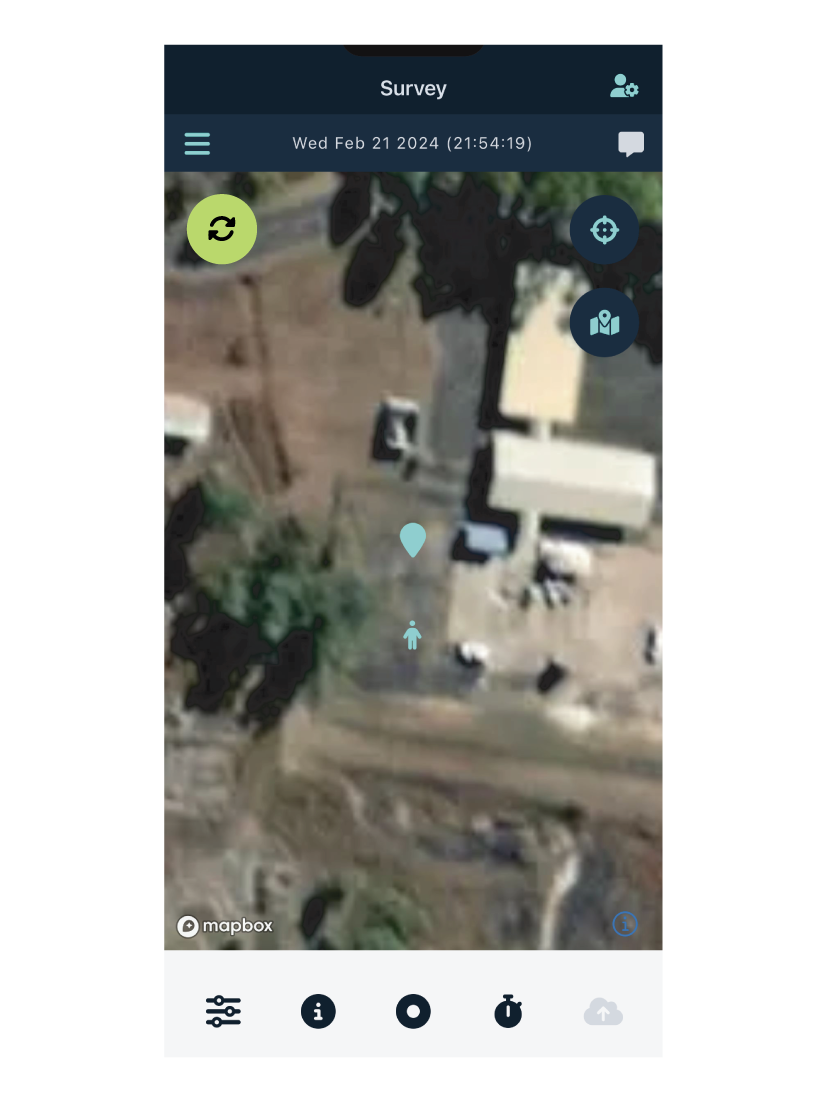
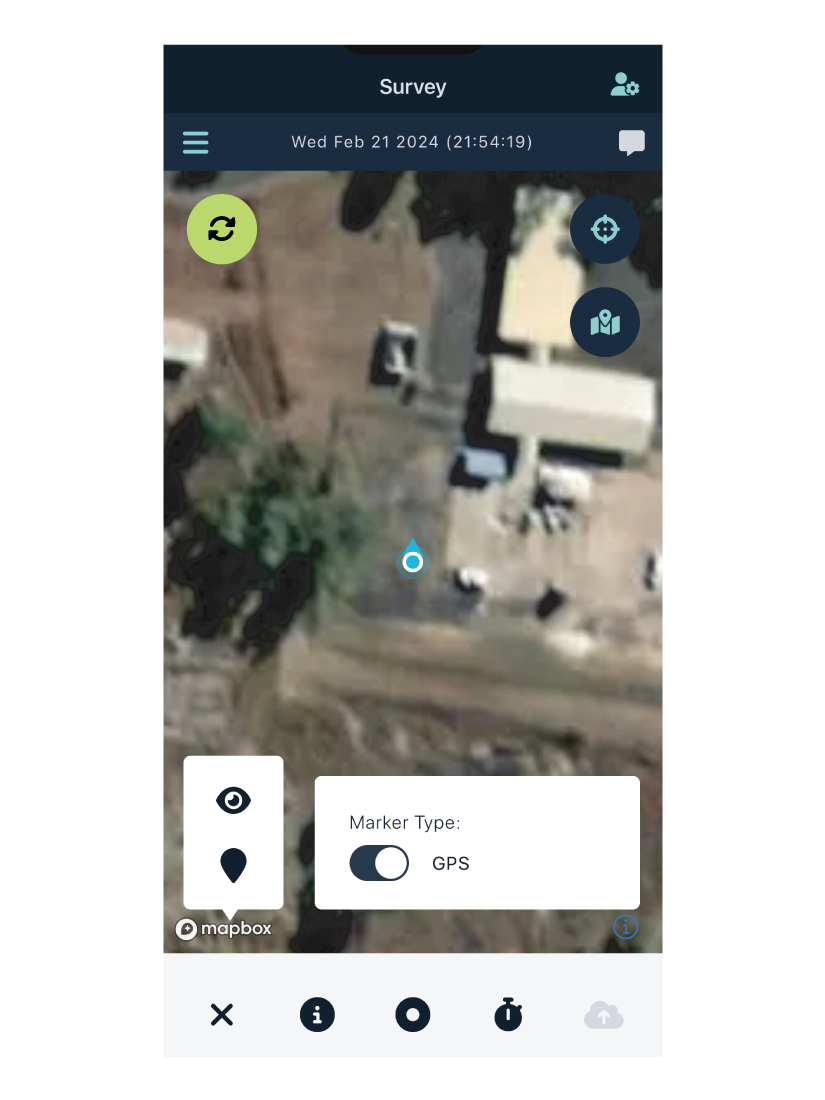
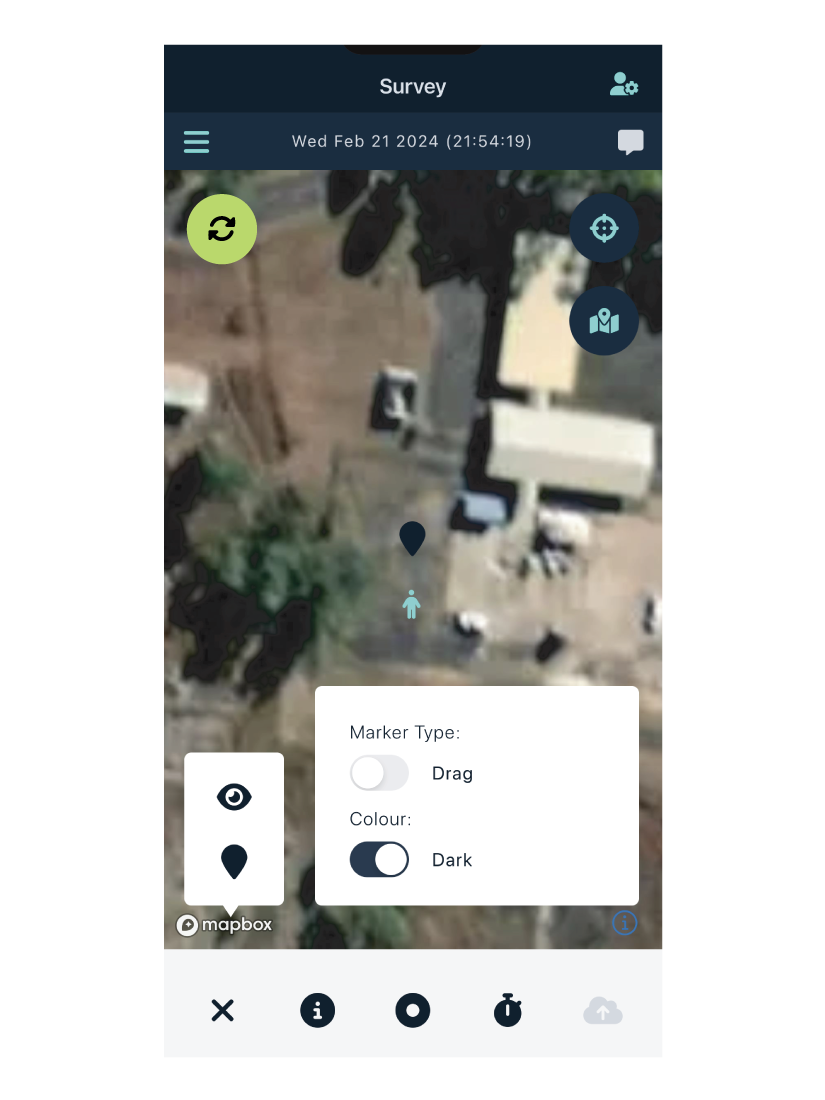
6. Location Marker
The app uses the user’s GPS location by default. The blue marker in the middle of the screen is your current location. It will follow you as you progress through the site collecting data.
When the marker mode is set to drag, the user location will be hidden and a will be displayed in the center of the map. The icon represents where your current location is.
See next section for details on how to set drag mode.
7. Map Settings Menu
Toggle map features
- Show or hide odour sources, zones and grids from being displayed on the map.
- Choose how the measurement markers are displayed.
- Measurement icon only: ,
- Wind vectors only:
- or both; stacked.
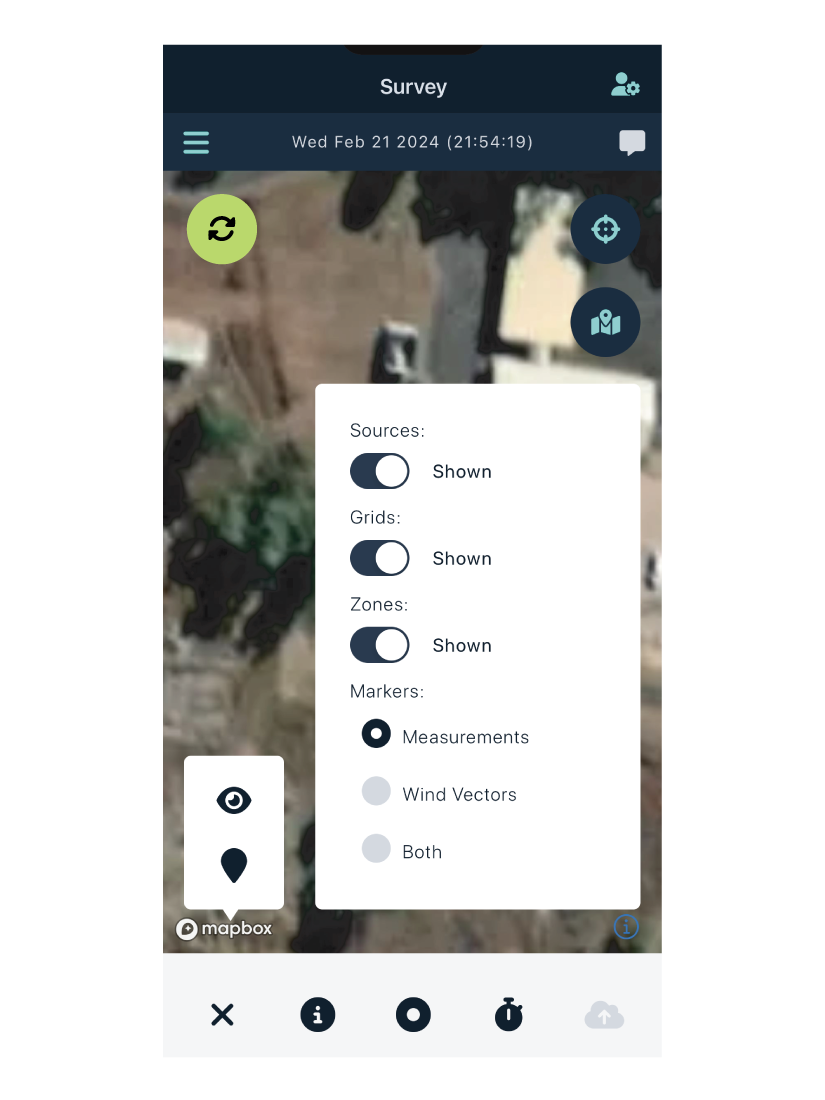
Toggle marker mode
- As mentioned in section 4., you can switch between drag and GPS mode.
- You can also toggle light and dark markers, depending on what is easier to see.
8. Measurement & Info Buttons
Info
- Information on map features
Dynamic Plume Method
- Add a new instantaneous measurement
Stationary Plume Method
- Add a new timed measurement
9. Unsaved Data or Ending Survey
When there is unsaved data on your device the button will active.
If there is is no unsaved data a button will be visible.
This allows you to add an end time to a survey.
If there is no unsaved data and an end time has already been added, it will show a light grey cloud, as shown in the image above.