
Import Complaints
You can import odour complaint records into a site from a CSV file.
Select Complaint Import from the Data Operations section of the sidebar.
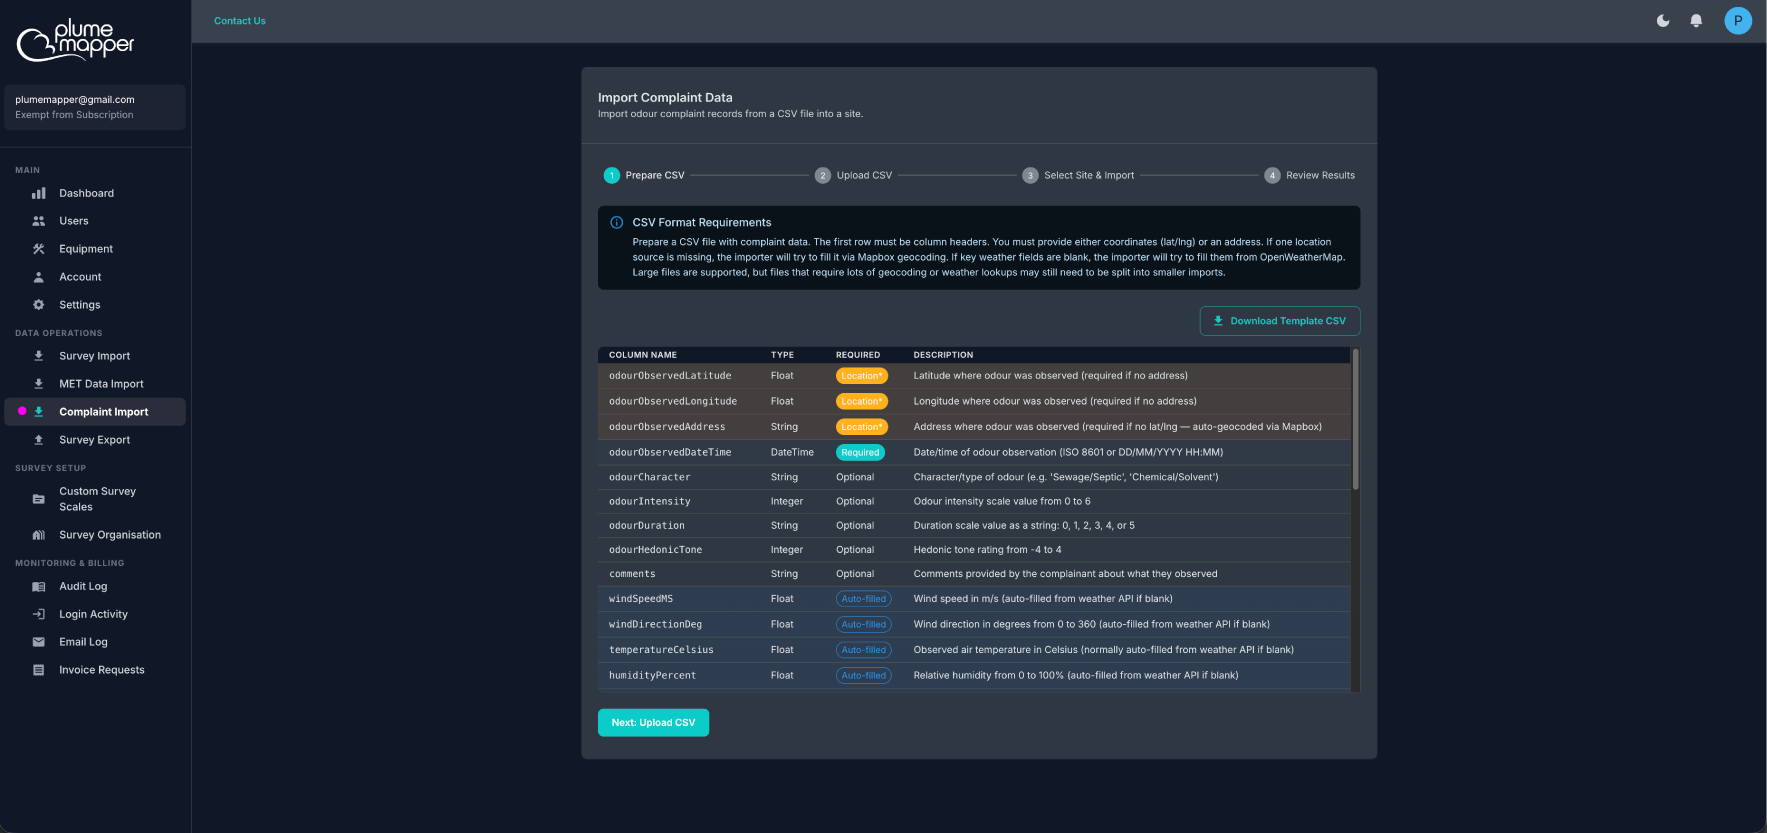
1. Prepare CSV
1. Click Download Template CSV for a correctly formatted file to fill in.
2. Fill in one complaint per row. The first row must be column headers.
Required Columns
- odourObservedDateTime - the date and time of the observation, as ISO 8601 (e.g.
2024-01-15T10:30:00.000Z) orDD/MM/YYYY HH:MM. - Location - either odourObservedLatitude and odourObservedLongitude, or odourObservedAddress.
If one of the location options is missing, the importer fills it in for you. An address is converted to coordinates, and coordinates are converted to an address.
Optional Columns
Odour details
- odourCharacter - e.g. Sewage/Septic.
- odourIntensity - a whole number from 0 to 6.
- odourDuration - 0, 1, 2, 3, 4 or 5.
- odourHedonicTone - a whole number from -4 to 4.
- comments - what the complainant observed.
Weather
- windSpeedMS (m/s), windDirectionDeg (0 to 360), temperatureCelsius, humidityPercent (0 to 100), weatherDescription, atmosphericPressureHPa, visibilityMeters and cloudCoverPercent.
- Leave these blank and the importer fills them in using weather data for the time and place of the complaint.
Complainant
- complainantGivenNames, complainantFamilyName, complainantEmail, complainantPhone, complainantStreetAddress, complainantSuburb, complainantState, complainantPostcode and complainantCountry.
- consentForContact -
trueorfalse. - Phone numbers must have 6 to 15 digits, and may include spaces, hyphens, parentheses, periods and a leading +. Postcodes can only contain letters, numbers, spaces and hyphens.
Investigation
- investigatedBy, dateOfInvestigation, suspectedOdourSource, complaintValidated (
trueorfalse) and notes.
Tip: Large files are supported, but files that need lots of address or weather lookups may need to be split into smaller imports.
3. Click Next: Upload CSV.
2. Upload CSV
1. Click Select CSV File and choose your file.
- The file must be a .csv, no larger than 10MB.
- Each file name must be unique. If a file with the same name has already been uploaded, delete it or rename yours.
- You can have up to 30 uploaded files at a time.
2. Click Upload File.
Uploaded files are listed under Uploaded Complaint CSVs. Click a file to select it, or click the icon to delete it.
3. Click Next: Select Site & Import.
3. Select Site & Import
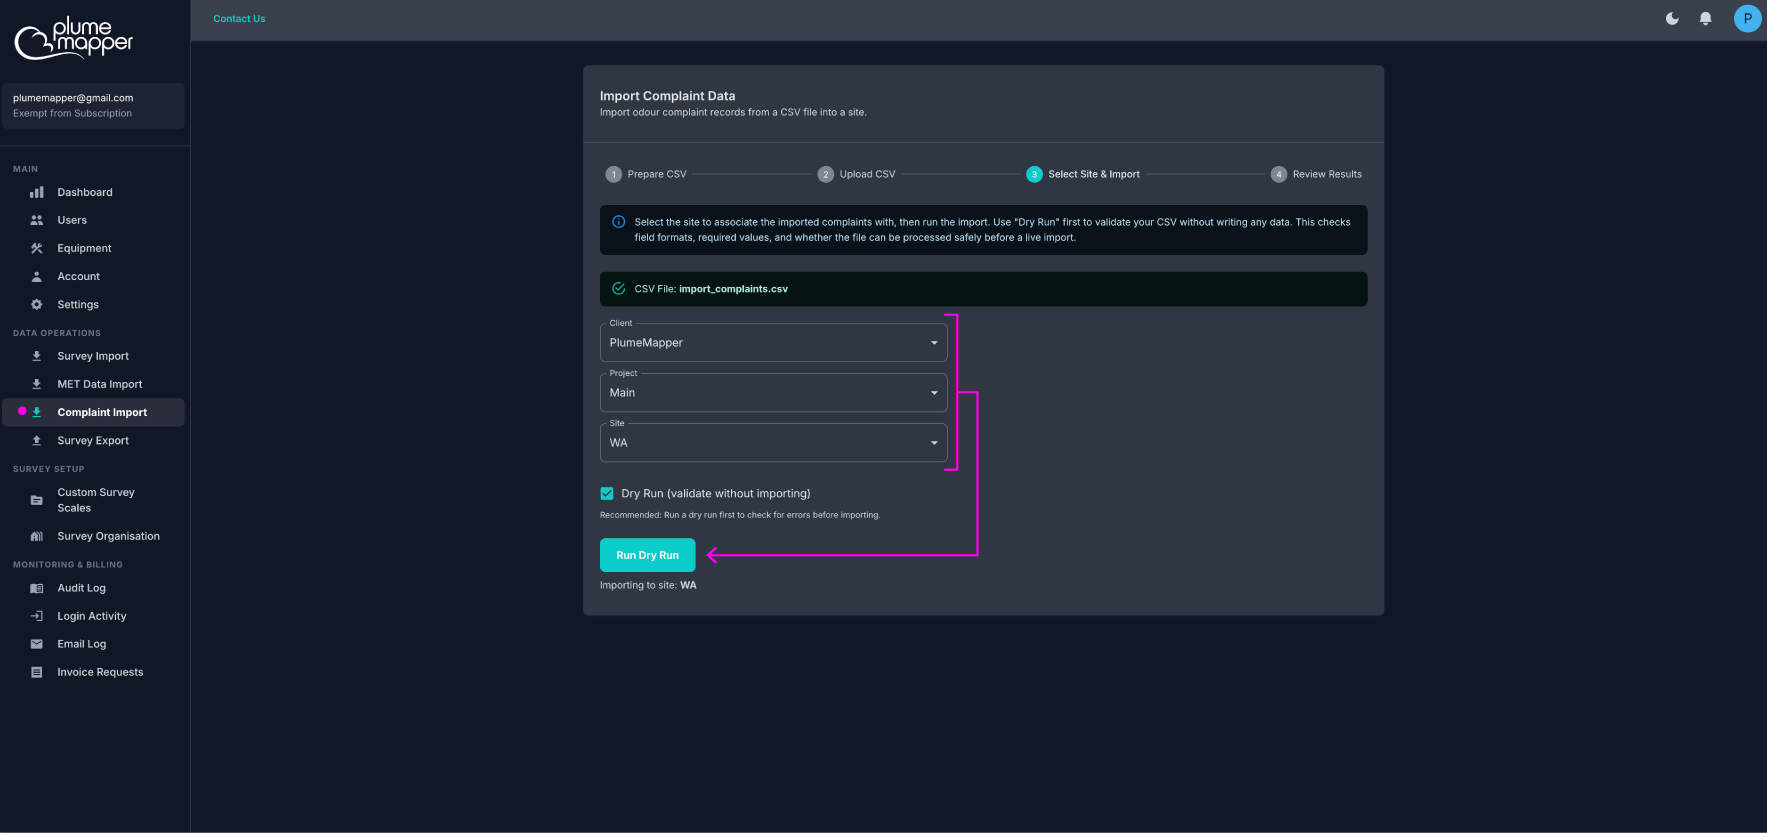
1. Choose the Client, Project and Site to import the complaints into.
2. Leave Dry Run (validate without importing) ticked, then click Run Dry Run.
A dry run checks field formats, required values and whether the file can be processed, without saving anything.
Tip: Always run a dry run first to check for errors.
4. Review Results
The results page shows:
- Total CSV Rows and Valid Rows
- Possible Duplicates - complaints that look like ones already at the site (dry run only)
- Validation Errors - with a table listing the row, field and error for each problem
- Unrecognised Columns (Ignored) - columns in your file that are not part of the template
- The number of records that had an address or coordinates filled in, and the number that had weather filled in. Any weather lookups that failed are also shown.
- Preview (First 5 Records) - a sample of what will be imported (dry run only)
Fix any errors in your CSV, upload it again and repeat the dry run.
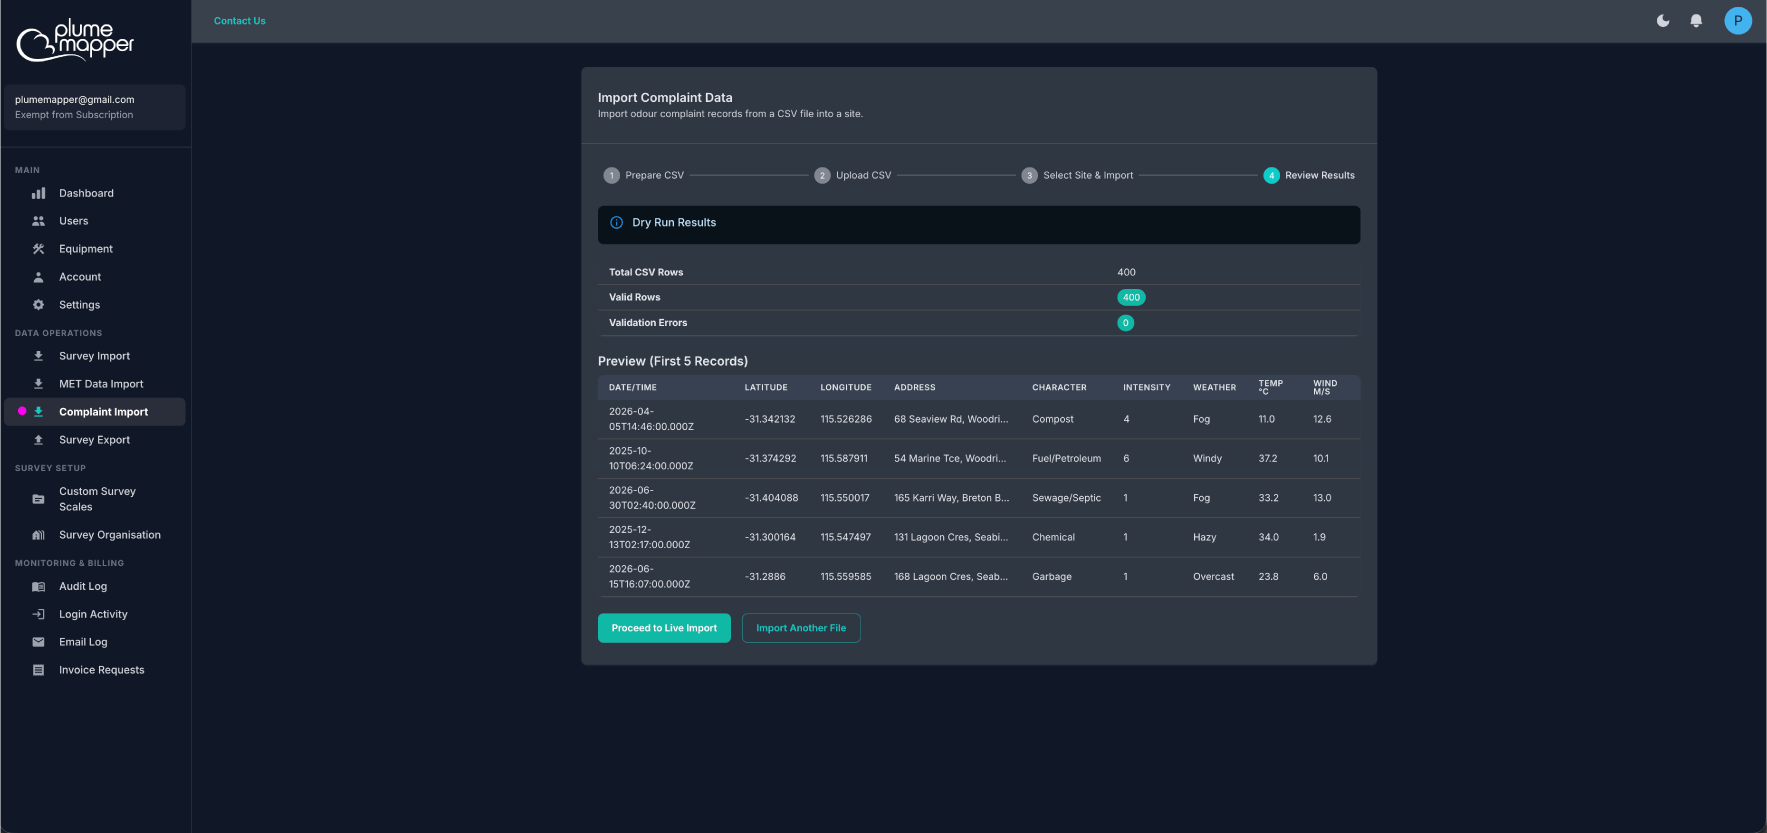
When the dry run looks right:
1. Click Proceed to Live Import.
2. Click Import Complaints.
The results page then shows how many complaints were Written to Database.
Click Import Another File to start again.
Important: Check the dry run results carefully, especially Possible Duplicates, before running the live import.