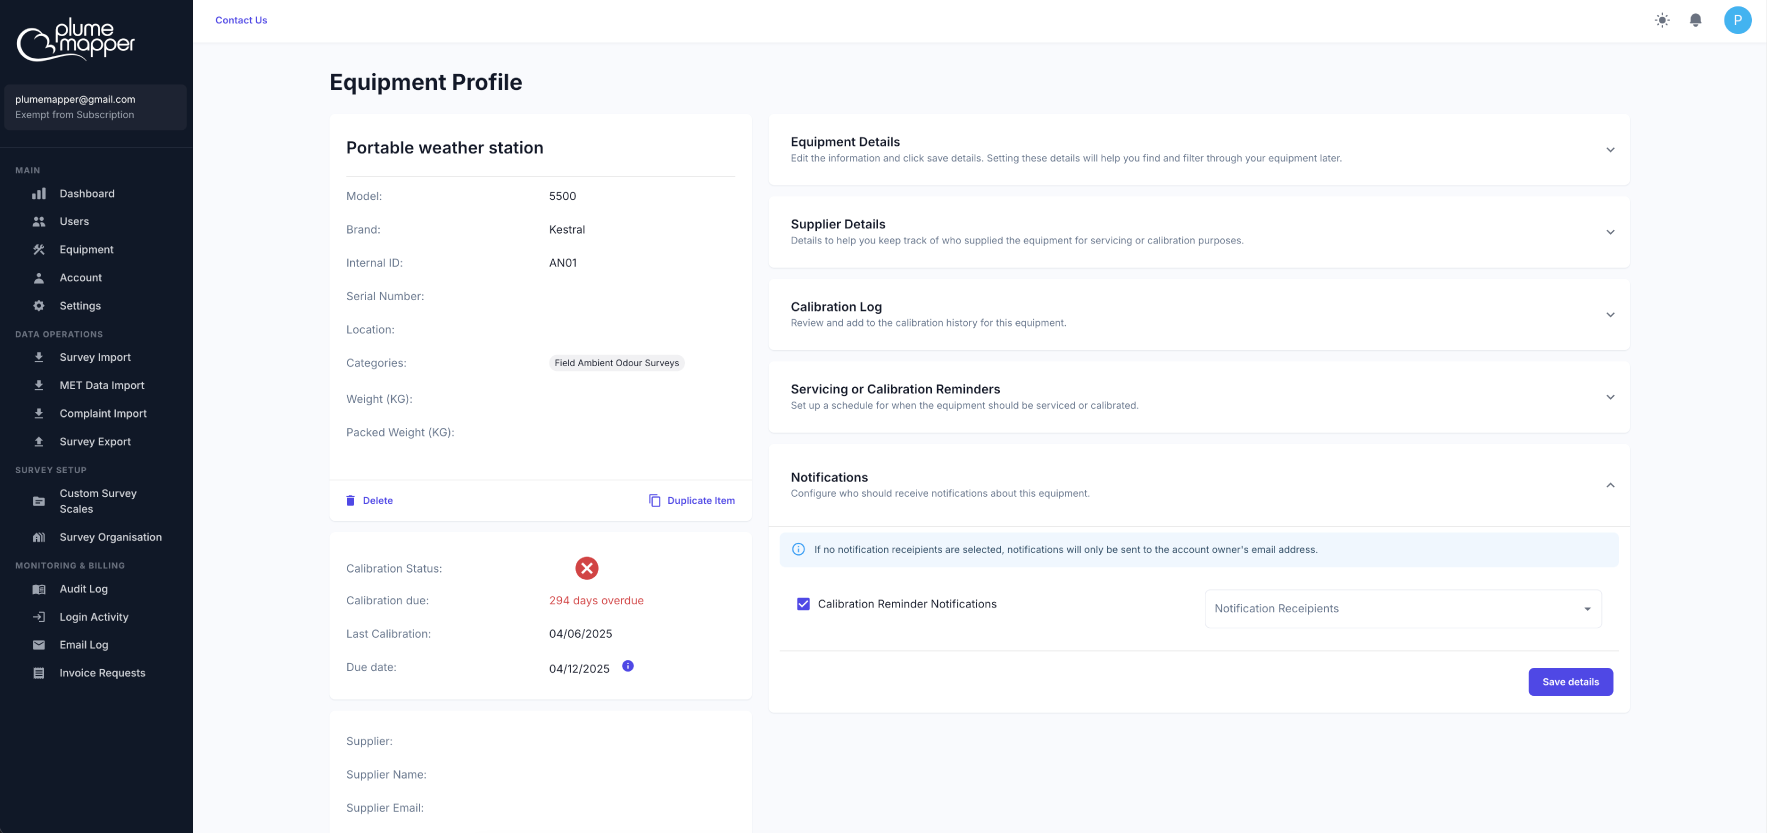
Equipment Management
Use Equipment Management to keep track of your equipment items, including when it was last calibrated or serviced and when it is next due.
Equipment added here can be assigned to surveys in the mobile app, helping you keep a record of who used each item in the field.
Select Equipment from the sidebar.
Categories and Locations
- Categories - describe what items are used for and help you group them, e.g. Field Ambient Odour Surveys, Odour Sampling or Odour Testing Laboratory. An item can belong to multiple categories.
- Locations - identify where an item is stored, e.g. Brisbane Office.
1. Click Manage Categories or Manage Locations.
2. Enter a name in the Add New Category / Add New Location field, then click .
To delete a category or location, click the icon next to it and confirm.
- Items assigned to it are removed from that category or location.
- The items themselves are not deleted.
Note: You can also create new categories and locations while editing an item.
Creating Equipment
1. Click Create Equipment.
2. Enter an Equipment Name (required). You can also enter the Model and Brand.
3. Click Create Equipment. You will be taken to the new item’s profile, where you can add further details.
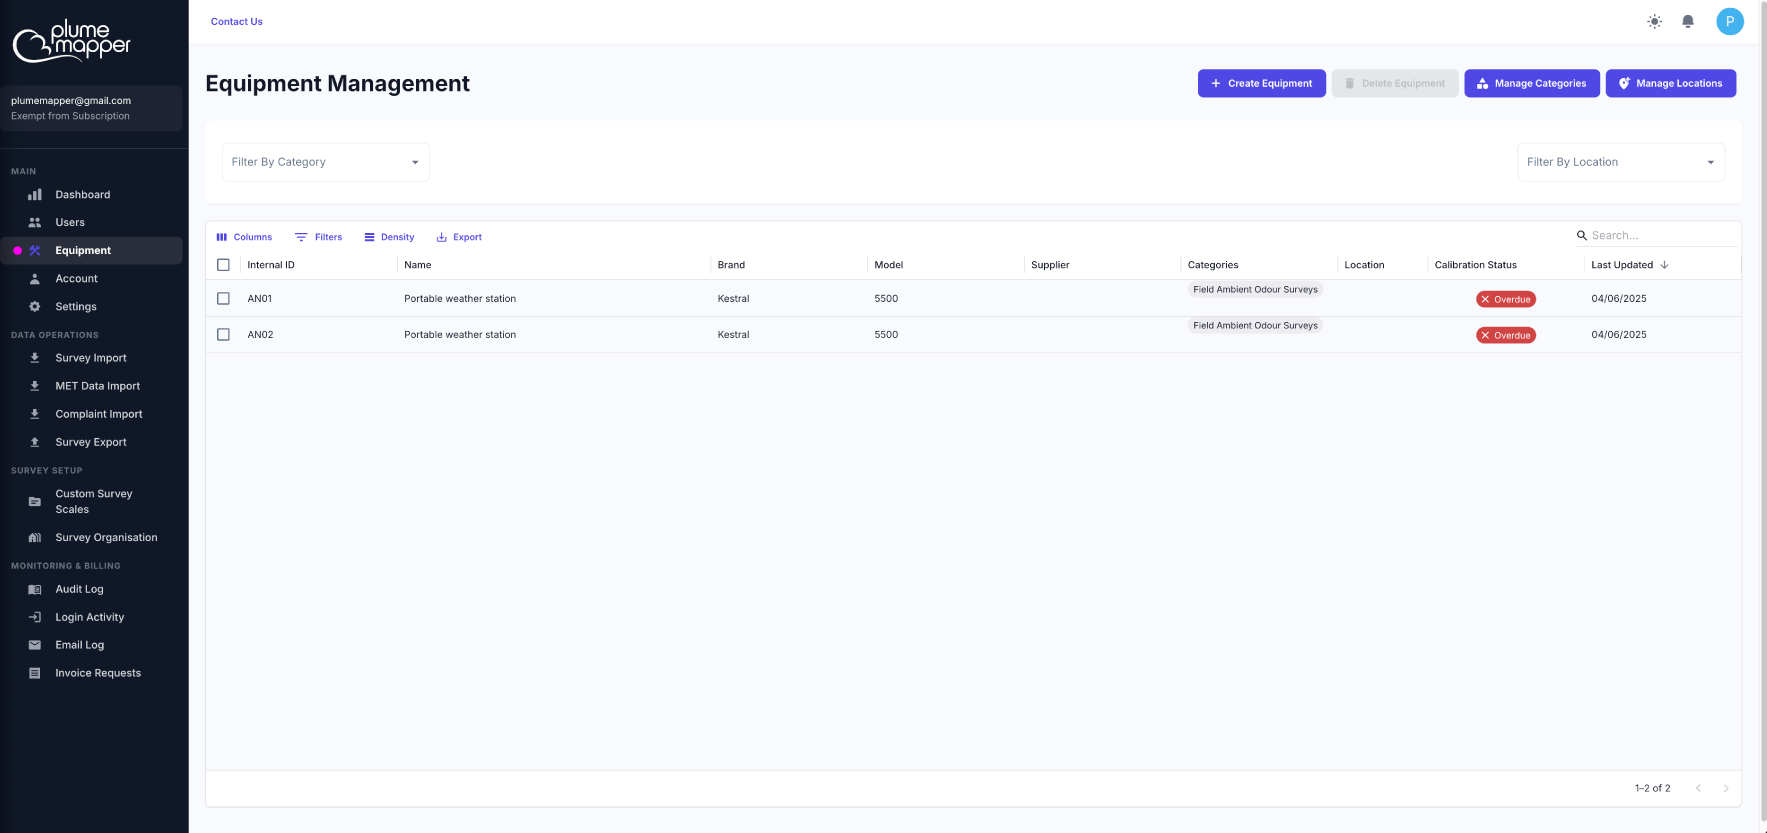
Equipment Profile
Click an item on the Equipment Management page shown above to open its profile.
The left side of the profile shows the item’s details, calibration status and supplier information. The right side contains panels where you can update each section.
- Delete - permanently deletes the item.
- Duplicate Item - creates a copy of the item with (Copy) added to its name. Categories, location, supplier and notification settings are copied. The serial number and calibration history are not copied.
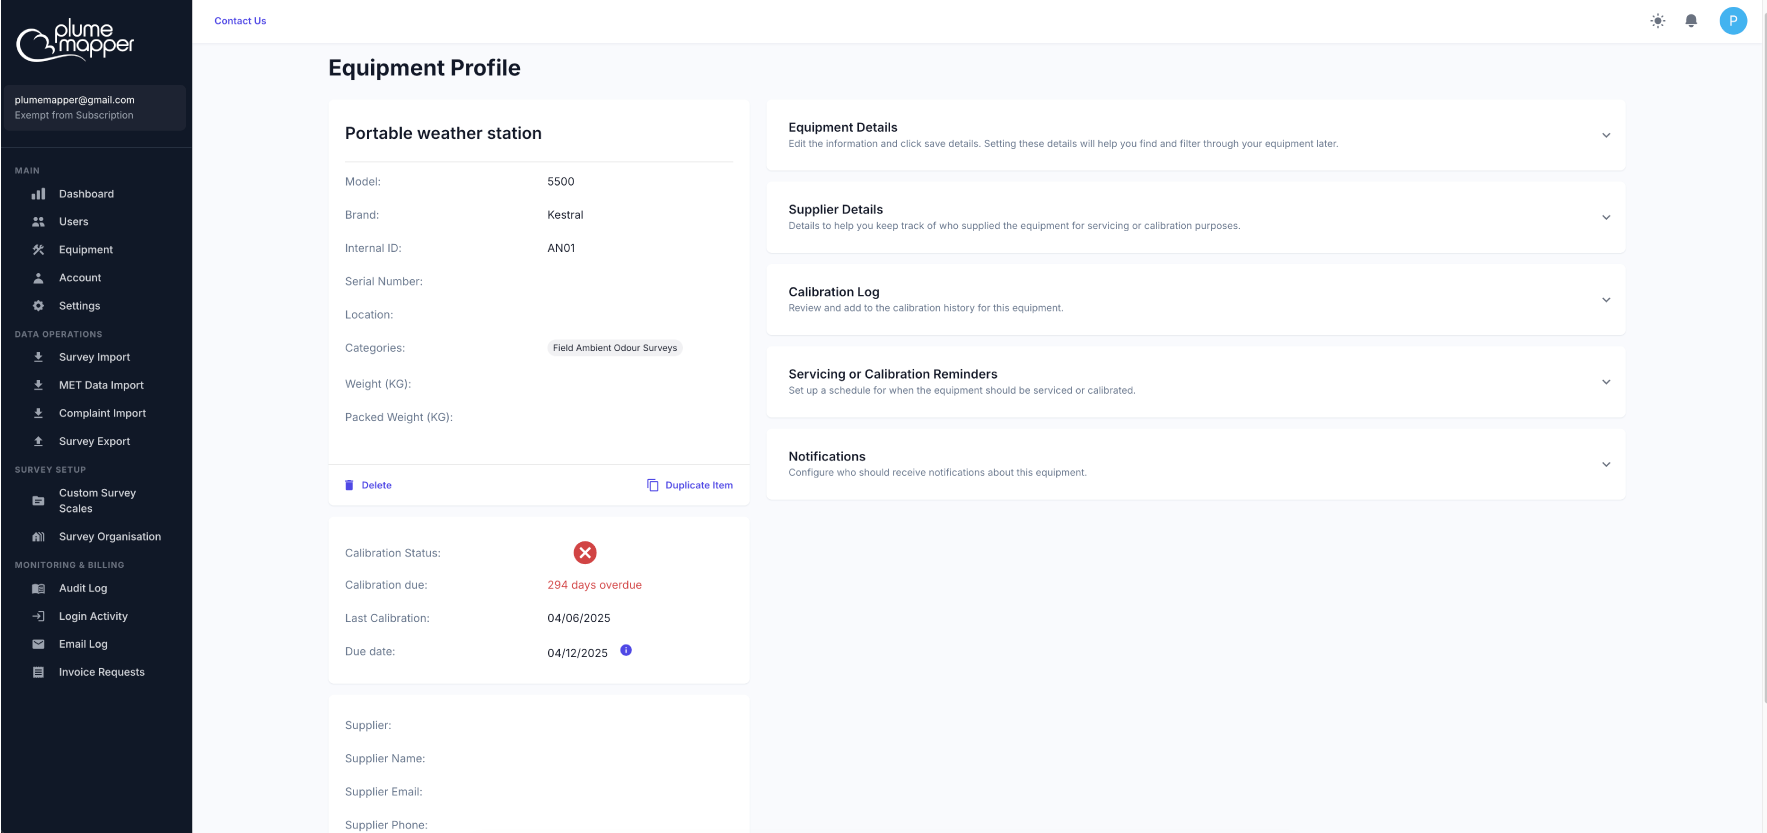
Equipment Details
- Item name (required), Model, Brand
- Internal ID - an existing ID your organisation uses for the item
- Serial Number
- Weight (KG) and Packed Weight (KG)
- Categories and Location
- Use Case, Description and Maintenance notes
Supplier Details
Record supplier information for servicing or calibration purposes:
- Supplier Business Name
- Supplier Contact Name
- Supplier Email
- Supplier Phone
- Supplier Website
- Date Purchased
- Supplier Notes
Calibration Log
Use the calibration log to keep a history of every calibration or service.
1. Click Add New Calibration/Servicing Event.
2. Enter the event details:
- Calibration Date (required) - only one event can be recorded for each date.
- Calibrated Until Date (optional) - must be at least 14 days after the calibration date.
- Calibrated By (optional)
- Notes (optional)
3. Click Create New Calibration Event.
The item’s last calibration date updates automatically. To remove an event, click the icon next to it.
Servicing or Calibration Reminders
Set when the item is next due for servicing or calibration.
- Set up calibration schedule - creates a repeating schedule calculated from the last calibration date, e.g. every 12 months.
- Set up calibration date - sets a single future due date.
Click Set Servicing Schedule to save. You must add at least one calibration event before setting a servicing schedule.
Click Remove Servicing Schedule / Servicing Date to clear the schedule or date.
The due date is calculated in this order:
1. The fixed servicing date, if one is set.
2. Otherwise, the last calibration date plus the servicing schedule.
3. Otherwise, the Calibrated Until date from the most recent calibration event.
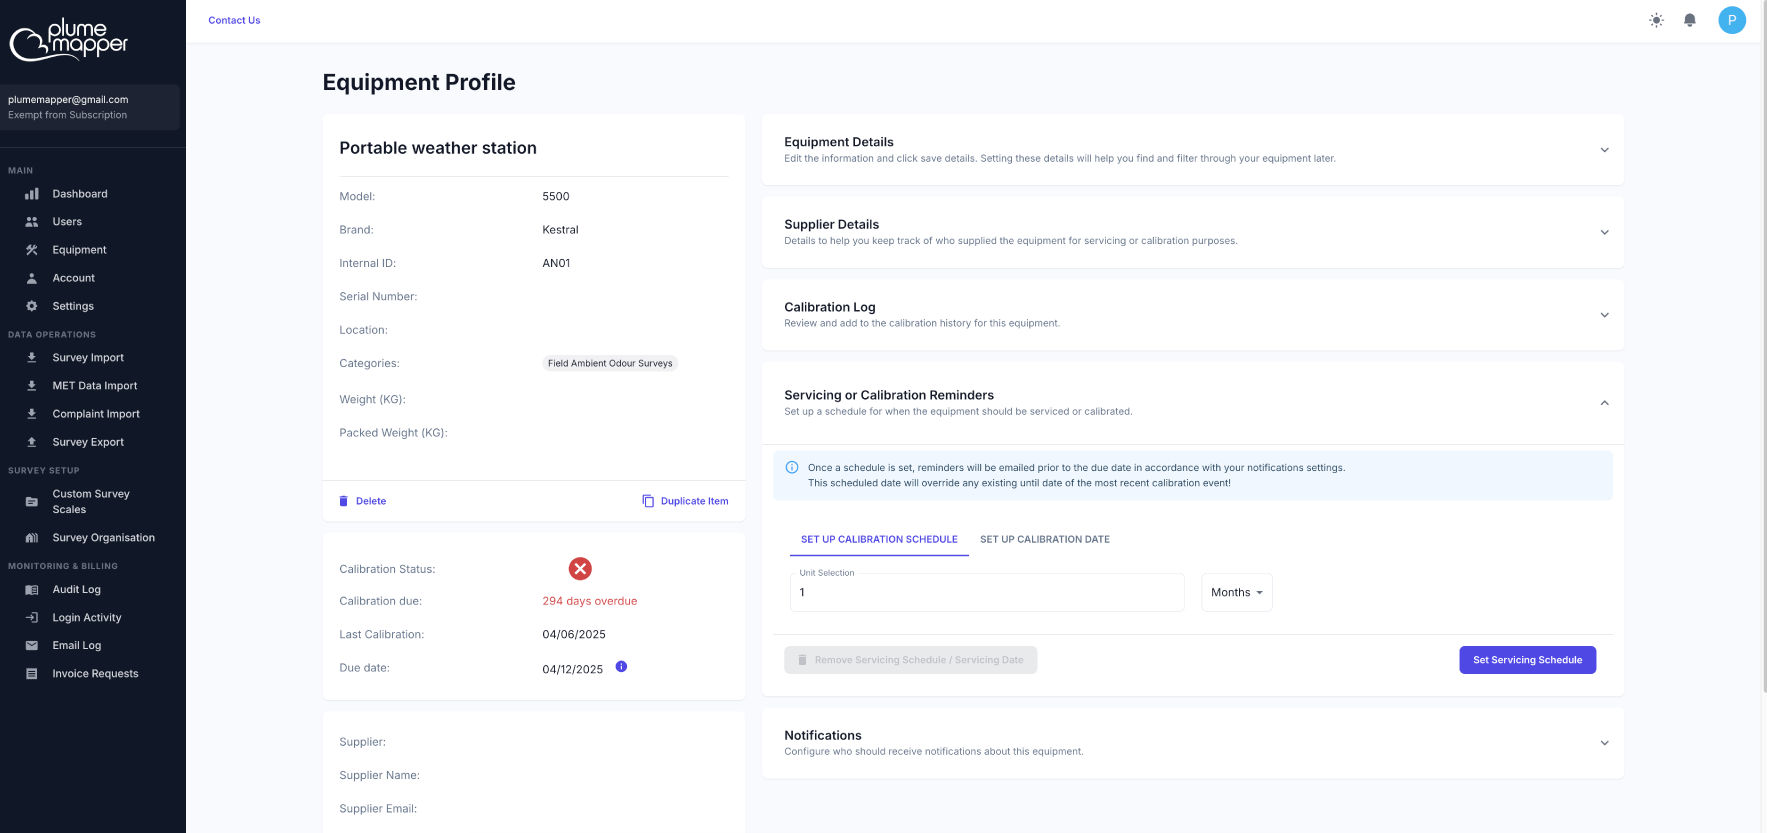
Notifications
Choose who receives email reminders before the item’s calibration is due.
1. Tick Calibration Reminder Notifications.
2. Select the users to notify under Notification Recipients.
3. Click Save details.
Note: If no recipients are selected, reminders are sent only to the administrator account’s email address.